

Solar for Tiny Houses: The Complete Sizing Guide
A properly sized 1–3 kW solar array paired with a 5–10 kWh battery bank will reliably power most tiny houses, according to Off Grid Authority’s tiny-home solar guide. That covers a refrigerator, LED lighting, a water pump, phone charging, and a small laptop without drama. Scale up to 2–4 kW if you run a mini-split or induction cooktop regularly.
Here is the fast version of who needs what:
- Minimal mobile use (weekend trips, phone/laptop/lights only): a 400–1,000 W portable or roof-mounted kit is enough.
- Typical off-grid tiny house (fridge, lighting, fans, small appliances): 1–3 kW array with a 5–10 kWh LiFePO4 battery bank.
- Comfort or all-electric (mini-split, induction, washer): 3–6 kW array with 10–20 kWh storage.
Roof-only kits work well for stationary tiny homes with adequate south-facing roof space. If your roof is small or shaded, a ground or pole mount solves the problem cleanly. Hire a licensed electrician for grid-tied interconnection or any system above 3 kW; DIY is reasonable for off-grid setups under that threshold when you follow NEC guidelines.
Key Takeaways
A 1–3 kW solar array paired with a 5–10 kWh LiFePO4 battery covers most tiny-house loads, and starting with a matched kit reduces both installation risk and permit complexity.
| Point | Details |
|---|---|
| Right system size | Most tiny houses need a 1–3 kW array and a 5–10 kWh battery for reliable off-grid power. |
| Battery chemistry | LiFePO4 is the preferred choice for tiny houses: longer cycle life, safer, and compact. |
| Size for winter | Use your location’s December peak sun hours as the baseline for off-grid system sizing. |
| Permit basics | Off-grid THOWs rarely need permits; fixed grid-tied installs require an electrician and utility approval. |
| Gridwiseliving kits | Matched kits from Gridwiseliving cover every tier, from the 100-Watt Briefcase Kit to the Powerhouse Gen 2. |
Table of Contents
- How much solar does a tiny house actually need?
- What components does a tiny-house solar system need?
- Grid-tied vs off-grid vs hybrid: which setup fits your tiny house?
- What are your best mounting options for a tiny house?
- What does a tiny-house solar system cost?
- How to size a solar system for your tiny house
- Which Gridwiseliving kit fits your tiny-house setup?
- Maintenance, safety, and permits: what you need to know
- Why kit-first solar makes sense for tiny houses
- Ready to power your tiny house with solar?
- Sources
How much solar does a tiny house actually need?
Most tiny homes use between 3 and 5 kWh per day, which puts them in a comfortable range for a modest solar system. That figure shifts depending on whether you cook with propane, run a mini-split, or rely on electric heating.
The table below maps system sizes to realistic appliance mixes:
| System size | Typical appliances covered | Approx. daily kWh |
|---|---|---|
| 1 kW array | LED lights, phone/laptop, 12V fridge, water pump | 1.5–2.5 kWh |
| 2 kW array | Above + full-size fridge, fans, TV, small appliances | 3–5 kWh |
| 3 kW array | Above + mini-split (moderate use), induction cooktop | 5–8 kWh |
| 4–7 kW array | All-electric comfort: mini-split, washer, induction | 5–10 kWh |
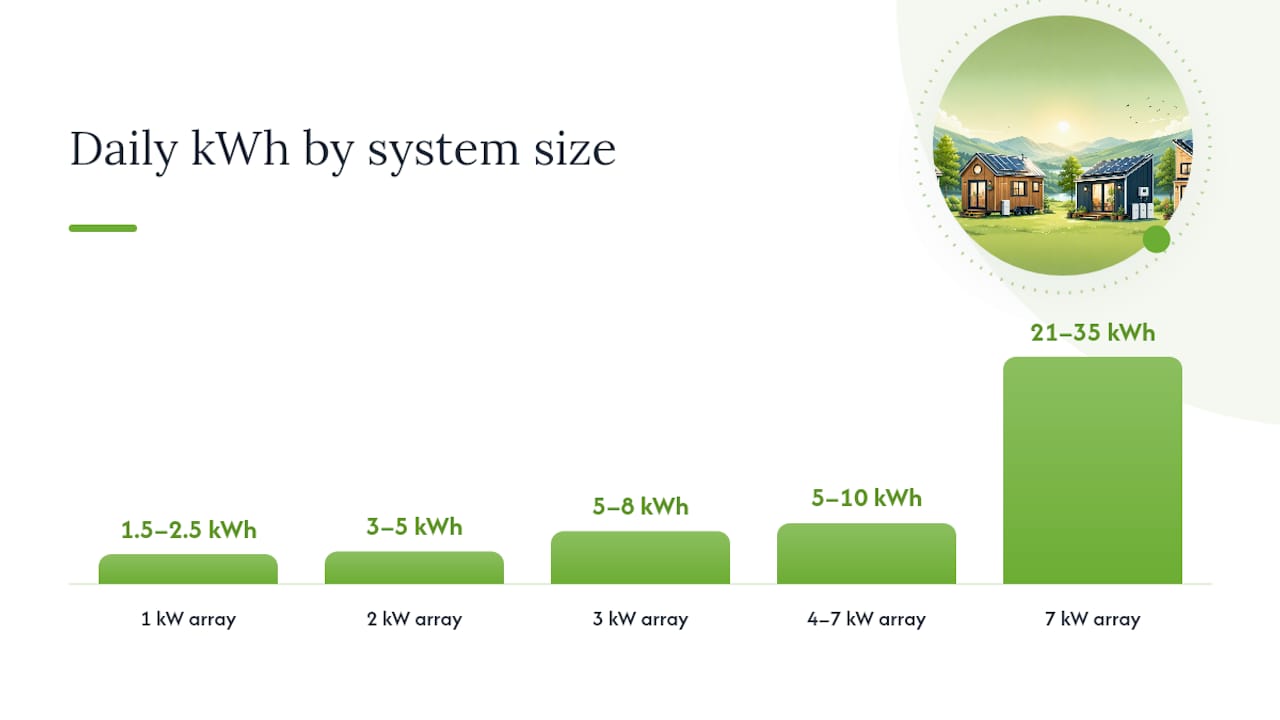
A 7 kW array can produce roughly 21–35 kWh per day depending on peak sun hours and system derate, which is more than most tiny houses ever need. Most owners land in the 2–3 kW sweet spot.
Peak and surge loads matter more than averages. A mini-split compressor can pull 1,500–2,000 W at startup, even if its running draw is 600 W. Your inverter needs to handle that surge without tripping. Size your inverter’s surge rating, not just its continuous rating, against the largest motor or compressor in the house.
Pro Tip: Size your off-grid system for your worst winter month, not your average summer output. A 2 kW array in Arizona in July produces very differently than the same array in Vermont in December. Use your location’s December peak sun hours as the baseline.
Green Energy Calculators’ sizing guide confirms that most tiny homes need between 4 and 10 panels (roughly 1–3 kW) depending on load, which aligns with these bands.
What components does a tiny-house solar system need?
Every off-grid or hybrid tiny-house system needs five core components. Skipping or undersizing any one of them is where most DIY installs go wrong.
Solar panels
For a tiny house, watts per square foot is the metric that matters. On a 150-square-foot roof with a south-facing pitch, you can realistically fit 4–6 panels before you hit structural or aesthetic limits. Off Grid Authority recommends choosing the highest-efficiency panels your budget allows to overcome roof area constraints.
Battery bank
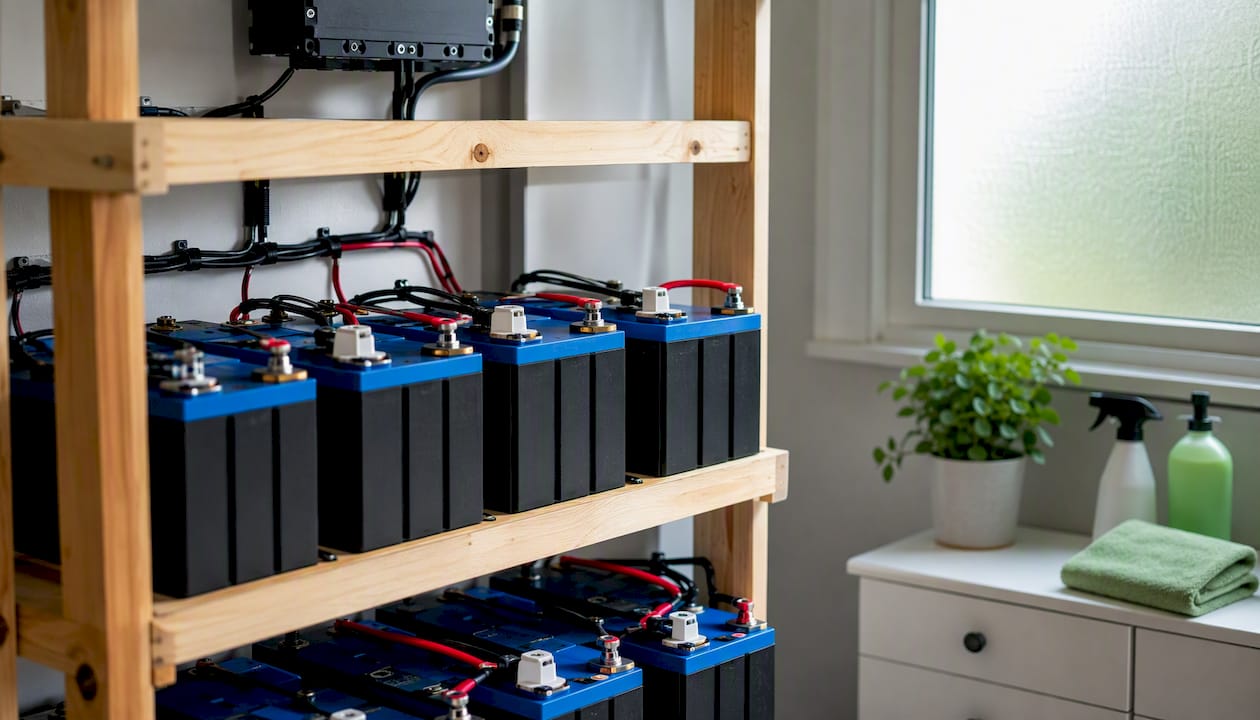
LiFePO4 (lithium iron phosphate) is the right call for tiny houses in 2026. It offers a longer cycle life, better safety, and a more compact energy density than lead-acid, and it tolerates partial states of charge without the sulfation damage that kills lead-acid banks. The Off-Grid and Mobile Sizing calculator recommends LiFePO4 for small mobile builds specifically. A 5–10 kWh usable capacity covers 1–3 days of autonomy for a typical tiny home.
Inverter/charger
A hybrid inverter/charger combines the inverter, battery charger, transfer switch, and MPPT charge controller into one box. For a tiny house where every cubic foot counts, that consolidation is a real advantage. Off Grid Authority’s guide specifically flags hybrid units as the preferred choice for small-space builds. String inverters cost less but require separate components and more wiring runs. SolarReviews notes that microinverters simplify installation on small roofs and avoid centralized inverter-placement headaches, though they carry a higher upfront cost.
Charge controller
If your inverter/charger does not include an integrated MPPT controller, you need a standalone unit. Size it by dividing your array’s short-circuit current by 0.8 and rounding up to the next standard amperage (20 A, 40 A, 60 A). A 2 kW array at 24 V typically needs a 40–60 A MPPT controller.
Mounting hardware
Roof mounts for traveling tiny homes on wheels (THOWs) need vibration-resistant hardware, stainless fasteners, and low-profile brackets that keep panels close to the roof surface to reduce wind load. Foundation-based tiny homes have more flexibility for tilt-adjustable racking.
Component checklist for any kit:
- Panels sized appropriately for your load
- Inverter/charger (continuous and surge rating)
- Battery bank (usable kWh, not just nominal)
- MPPT charge controller (if not integrated)
- Mounting hardware (roof or ground, appropriate for structure)
- Wiring, fuses, and disconnect switches
Grid-tied vs off-grid vs hybrid: which setup fits your tiny house?
The right system architecture depends on three things: whether you have grid access, whether your tiny house moves, and how much backup capacity you want.
Grid-tied is the cheapest option when you have utility service at your lot. You export excess power and draw from the grid at night. No battery required, which cuts system cost significantly. The downside: no power during grid outages unless you add a battery, and interconnection requires utility approval and a licensed electrician.
Off-grid makes sense when there is no grid hookup, when you park on rural land, or when full energy independence is the goal. You carry all your storage with you, which means battery sizing is critical. Off-grid systems are also simpler to permit for THOWs because they are not interconnected.
Hybrid is the practical middle path for most tiny-house owners with grid access. You get the bill savings of solar plus battery backup for outages, and you can size the battery for 1–2 days of autonomy rather than the 5–7 days an off-grid system might need.
Decision guide:
- THOW (moves regularly): Off-grid with a compact battery bank. No interconnection paperwork at every new location.
- Stationary with grid access: Grid-tied or hybrid. Hybrid if outage protection matters.
- Remote land, no utility: Off-grid, sized for worst-case winter production.
- Budget-first, stationary: Grid-tied with no battery to minimize upfront cost.
| Architecture | Upfront cost | Outage protection | Permit complexity | Mobility |
|---|---|---|---|---|
| Grid-tied | Lowest | None | Moderate | Fixed only |
| Off-grid | Moderate–high | Full | Low (no interconnect) | High |
| Hybrid | Highest | Partial–full | Moderate–high | Fixed only |
What are your best mounting options for a tiny house?
Roof mounting
Roof mounting keeps panels out of the way and works well for both stationary and mobile tiny homes. For THOWs, the priority is low-profile brackets, minimal roof penetrations, and panels rated for wind uplift. Tilt adjustment is usually fixed on a THOW because adjustable mounts add height and wind resistance. On a foundation home, tilt-adjustable racking lets you optimize for seasonal sun angles.
Weight is a real constraint. A Keystonesandrivets analysis notes that panels and racking add several hundred pounds, so a structural inspection of the roof framing is worth doing before you commit. See realistic tiny-home footprints for a sense of how much usable roof area different layouts actually provide.
Ground and pole mounts
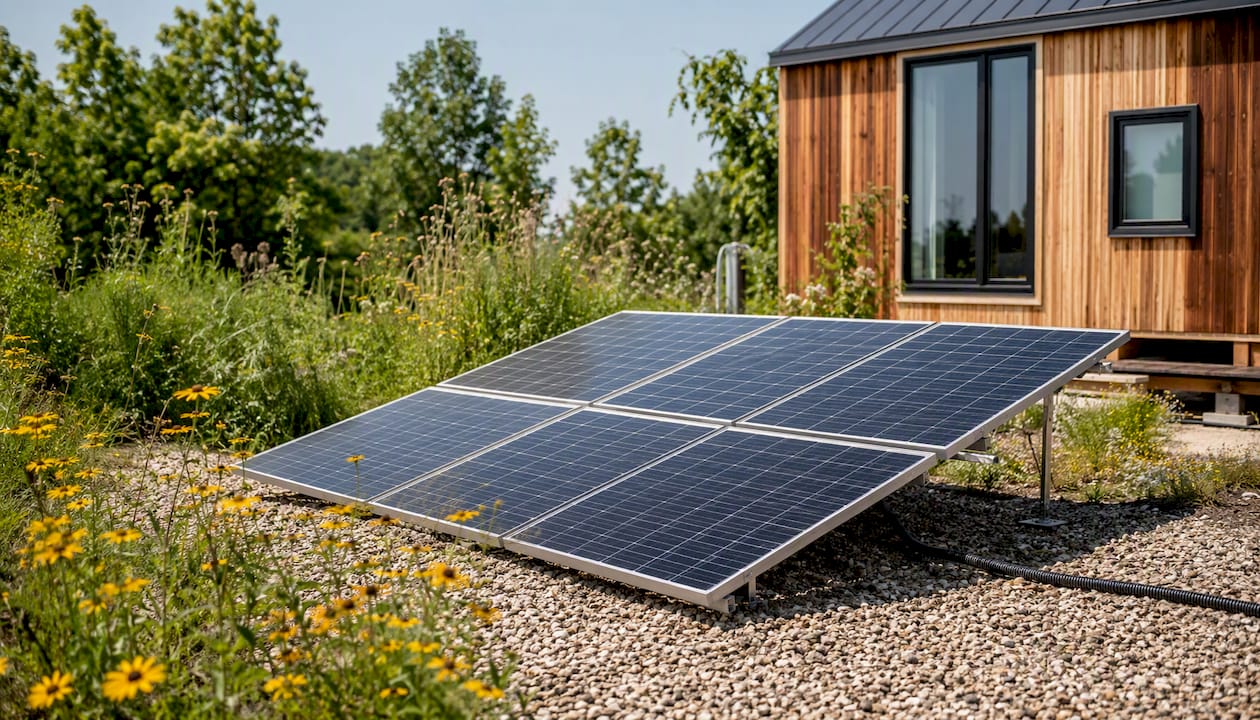
When roof space is limited or shaded, a ground mount solves both problems. You can orient and tilt panels precisely, clean them easily, and expand the array without touching the roof. The trade-off is land use and the cost of trenching conduit back to the house. Pole mounts work well on smaller arrays (1–2 kW) and can be repositioned seasonally.
Portable and folding panels
Briefcase-style folding kits are the right tool for weekend trips, supplemental charging, or testing your load assumptions before committing to a permanent install. They set up in minutes, require no roof penetrations, and can be repositioned to track the sun through the day.
Pro Tip: If your tiny house has a fixed primary parking spot, consider a small ground-mounted supplemental array there even if you already have roof panels. A 400–800 W ground array angled for winter sun can meaningfully extend your autonomy during low-production months without adding roof weight.
What does a tiny-house solar system cost?
Cost depends heavily on whether you DIY or hire out, and on system size.
| System | Equipment-only DIY | Professional install | After 30% ITC (pro install) |
|---|---|---|---|
| 1 kW array, no battery | $2,000 | $4,000–$5,000 | $3,500 |
| 2 kW array + 5 kWh battery | $3,500–$5,000 | $8,000–$12,000 | $4,000–$8,000 |
| 4 kW array + 10 kWh battery | $8,000–$12,000 | $12,000 | $8,000–$14,000 |
Keystonesandrivets’ complete guide puts installed costs for a 4 kW rooftop system at $8,000–$12,000 before incentives, with battery storage (5–10 kWh) adding $4,000–$8,000.
Tiny homes tend to see faster payback than full-size homes because their modest consumption means a small array covers a large share of total usage. Local electricity rates drive the actual payback window, so check your state’s rate data through the U.S. Energy Information Administration’s state energy profiles to run accurate numbers for your location.
For state and local rebates beyond the federal ITC, the Database of State Incentives for Renewables and Efficiency (DSIRE) at dsireusa.org is the authoritative lookup tool.
- The 30% ITC has no dollar cap for residential systems.
- Battery storage qualifies for the ITC when charged at least partially by solar.
- Some states stack additional rebates on top of the federal credit.
- Utility net metering policies vary by state and affect grid-tied payback math.
How to size a solar system for your tiny house
Follow these steps in order. Skipping the energy inventory is the single most common reason people end up with an undersized or oversized system.
- List every appliance and its wattage. Check the label or look up the spec sheet. Note whether it runs continuously or intermittently.
- Estimate daily hours of use per appliance. Multiply watts × hours to get watt-hours (Wh) per day. Sum all appliances for your daily total.
- Convert to kWh. Divide total Wh by 1,000. A typical tiny house lands at 3–5 kWh/day.
- Find your location’s peak sun hours. This is not daylight hours; it is the equivalent hours of full-intensity sun. Most of the continental U.S. ranges from 3.5 to 6 peak sun hours per day. Use December values for off-grid sizing.
- Apply the sizing formula. Green Energy Calculators gives the standard formula: Panels needed = (Daily kWh ÷ Peak Sun Hours) ÷ Panel kW × 1.25. The 1.25 factor accounts for system losses (wiring, temperature, inverter efficiency).
- Size your battery for desired autonomy. Multiply daily kWh × days of autonomy, then divide by your battery’s depth of discharge (DoD). LiFePO4 typically allows 80–90% DoD.
- Size your inverter. Add up the wattage of every appliance that could run simultaneously. That sum is your minimum continuous rating. Double it for surge headroom if you have motors or compressors.
- Verify roof or ground space. Confirm the physical footprint of your panel count fits your available area.
Worked example for a 3–5 kWh/day tiny house:
- Daily load: 4 kWh
- Location: 4.5 peak sun hours (December, mid-Atlantic)
- Formula: (4 ÷ 4.5) ÷ 0.4 kW × 1.25 = 2.78 panels at 400 W → round up to 3 panels (1.2 kW array)
- Battery: 4 kWh × 2 days autonomy ÷ 0.85 DoD = 9.4 kWh → choose a 10 kWh LiFePO4 bank
- Inverter: peak simultaneous load ~1,800 W continuous, 3,500 W surge
The Tiny House Solar Calculator can run this math automatically. A typical mobile build in its example outputs uses 2 × 400 W panels with a 4.3 kWh battery, which matches the light-use band in the table above.
Pro Tip: Before finalizing panel count, check whether good insulation and efficient appliances can cut your daily kWh target by 20–30%. Reducing load is almost always cheaper per kWh than adding panels.
Which Gridwiseliving kit fits your tiny-house setup?
Gridwiseliving offers a range of kits that map directly to the use cases above. Here is how to match them:
Mobile or short-stay use: The Gridwiseliving 100-Watt Portable Briefcase Offgrid Solar Panel Kit includes a 20-amp charge controller and folds flat for transport. It is the right starting point for weekend trips, testing your load assumptions, or supplementing a larger system at a remote parking spot.
Daily off-grid with a small battery: The Gridwiseliving 800-Watt Complete Solar Kit is a complete 12V off-grid package suited to tiny homes with modest loads: a 12V fridge, LED lighting, phone and laptop charging, and a water pump. It covers the 1.5–2.5 kWh/day band without requiring a complex install.
Backup and portable heavy loads: The Gridwiseliving Mega 3 Home Backup and Portable Power Station delivers 3,600 W continuous output and 3,072 Wh of storage. Pair it with additional panels for a no-wiring-required off-grid setup that handles a mini-split, induction cooktop, or power tools.
Primary residence with comfort loads: The Gridwiseliving Powerhouse Gen 2 Whole Home Solar Generator is built for whole-home off-grid use. It handles the all-electric comfort tier: mini-split, washer, induction, and general household loads simultaneously.
Mounting flexibility: The Gridwiseliving Nature’s Generator Universal Solar Panel Mount works with portable and fixed panels, making it easy to position panels for optimal angle at a stationary site without permanent roof penetrations.
Run your appliance list through the sizing checklist in the previous section, then match your daily kWh target to the kit tier above. If you land between tiers, size up. Gridwiseliving’s solar energy systems collection lists current inventory with full specs.
Pro Tip: Start with the Briefcase Kit or the 800-Watt Kit for your first season. Living with a real system for a few months reveals which loads you actually use and which you overestimated. Upgrading from a working small system is far less painful than troubleshooting an oversized one you built on paper assumptions.
Maintenance, safety, and permits: what you need to know
Routine maintenance
- Clean panels every 1–3 months, or after dust storms and heavy pollen seasons. Dirty panels lose 5–25% of output.
- Re-torque all electrical connections annually, especially on THOWs where road vibration loosens terminals.
- Check battery state of health every 6 months using your BMS app or a battery analyzer.
- Inspect wiring insulation, fuse holders, and conduit entry points for chafing or moisture intrusion once a year.
Safety essentials
Fuse or breaker-protect every battery bank within 18 inches of the positive terminal. This is not optional; an unfused battery cable is a fire waiting for a short circuit. For THOWs, the American Boat and Yacht Council (ABYC) wiring standards are widely used as a practical guide because they address vibration, marine-grade tinned wire, and fuse placement in ways that NEC alone does not fully cover for mobile applications. Use lock washers on all ring-terminal connections that will see road vibration.
Inverter placement matters. SolarReviews flags temperature and noise as real placement considerations. Inverters generate heat and a low hum under load; mount them in a ventilated cabinet away from sleeping areas and away from flammable materials.
Permits and interconnection
Off-grid systems on THOWs typically do not require a building permit, though local rules vary. Fixed foundation tiny homes almost always require an electrical permit for any new wiring, and a licensed electrician must sign off on grid-tied interconnection in most jurisdictions. Check with your county building department before starting. Grid-tied systems also require a utility interconnection agreement, which can take 2–8 weeks to process.
Why kit-first solar makes sense for tiny houses
The instinct to design a custom system from scratch is understandable, but for most tiny-house owners it creates unnecessary risk. A pre-engineered kit from a reputable source has already matched panel wattage, charge controller amperage, and inverter sizing to each other. That compatibility work is not trivial; mismatched components are the leading cause of premature battery failure and inverter trips in DIY builds.
At Gridwiseliving, the recommendation is to start with a kit that covers your current load, live with it for a season, and expand from there. Modular systems let you add panels, a second battery, or a larger inverter as your needs grow, without scrapping what you already have. That path also keeps permit exposure low at each stage, since a small off-grid kit rarely triggers the same review process as a full grid-tied install. The result is faster time to actual off-grid capability, lower upfront risk, and a system you genuinely understand because you built it in stages.
Ready to power your tiny house with solar?
Gridwiseliving’s solar kits are sized and matched for tiny-house use cases, from the compact 100-Watt Portable Briefcase Kit for mobile testing to the Powerhouse Gen 2 for full off-grid comfort living. Every kit ships with matched components, so you skip the compatibility guesswork that derails most DIY builds.

Run your appliance list through the sizing checklist above, pick the kit tier that matches your daily kWh target, and browse the full solar energy systems collection to see current inventory and specs. If you are also considering a Gridwiseliving tiny home as your foundation, the product pages include roof specs that make panel planning straightforward. Shop the collection and get your system ordered before the next season changes your production window.
Sources
- Tiny Home Solar System Guide (2026) | Off Grid Authority
- Tiny Home Solar Panels: A Complete Guide to Going Solar in 2026 - Keystonesandrivets
- How Many Solar Panels for a Tiny House? (2026 Sizing Guide) | Green Energy Calculators
- Solar panels for tiny houses — SolarReviews
- Tiny House Solar Calculator — Off-Grid and Mobile Sizing