

Skylights in Tiny Homes: Light, Ventilation & Energy Tips
Skylights are one of the most effective upgrades you can make to a tiny home. For most tiny-home situations, the answer is yes, add one, but the type matters enormously. Venting roof windows work best for loft spaces where airflow and emergency egress matter. Tubular skylights (sun tunnels) are the smarter pick for narrow corridors, bathrooms, and closets where a full roof cut isn’t practical; their low-impact installation and efficiency make them ideal for such small spaces as explained in Why Synthetic Grass & Pavers for Small Yards. Fixed glazed units make sense when the priority is a view or passive stargazing rather than ventilation.
The role of skylights in tiny homes goes well beyond aesthetics. Overhead daylight reaches deeper into a room than any vertical window can, and a venting unit doubles as a passive exhaust point that can drop interior temperatures fast. The tradeoff is real: a poorly specified or badly installed skylight will leak, overheat your space in summer, or fog with condensation. The Department of Energy recommends matching glazing performance to your climate and prioritizing proper installation above all else. Look for NFRC-labeled units so you can compare U-factor and Solar Heat Gain Coefficient (SHGC) across products. Gridwiseliving’s tiny-home lineup is designed with roof integration in mind, which makes skylight planning far less complicated from the start.
Quick type recommendations:
- Venting roof window: loft ventilation, passive cooling, egress backup
- Tubular skylight (sun tunnel): targeted daylight in tight or windowless rooms
- Fixed glazed skylight: views, stargazing, or south-facing passive solar gain
- Acrylic dome: budget retrofit where aesthetics are secondary
Table of Contents
- How skylights change natural light, space perception, and daily livability in tiny homes
- Skylight types for tiny homes: which one fits your situation?
- How venting skylights improve tiny-home airflow and emergency egress
- Energy impacts: glazing choices, U-value, SHGC, Low-E coatings, and climate strategies for tiny homes
- How to size and place skylights in tiny homes for even daylight, low glare, and privacy
- Installation basics: flashing, curb vs. deck mount, and tiny-on-wheels considerations
- Typical costs, materials, and realistic installation timelines
- Common downsides and how to manage them
- A decision checklist: questions to ask yourself and your installer
- Evidence summary: daylight and health outcomes for tiny-home living
- Key Takeaways
- The part most guides skip about skylights in tiny homes
- Gridwiseliving’s tiny homes are built with skylight integration in mind
- Authoritative sources and further reading
How skylights change natural light, space perception, and daily livability in tiny homes
Overhead daylight behaves differently from wall windows. It reaches the center and far corners of a room rather than washing one wall, which matters a lot when your entire living space is 200 square feet. A kitchen positioned under a skylight gets even illumination across the countertop. A loft with a roof window feels like a real room rather than a sleeping shelf.
The perceived-space effect is real and well-documented. Natural light from skylights is linked to better mood, lower blood pressure, reduced anxiety, and improved circadian rhythms. In a tiny home, where confined square footage can amplify stress, that benefit compounds. Ceilings feel taller when light enters from above, a phenomenon that pairs well with high ceiling design strategies already common in tiny-home builds.
Statistic: A single 30×46 skylight can produce roughly 37,000 lumens — the equivalent of about 11 standard 100-watt incandescent bulbs. That’s enough to transform a previously dim room without touching a light switch.
Operable skylights add an indoor air quality dimension that fixed windows can’t match. Hot, stale air rises and exits through the roof opening while cooler air is drawn in from lower vents. In a bathroom or loft, that exchange happens faster than any exhaust fan manages on its own.
- Overhead light eliminates the shadowed far wall common with side windows
- Perceived ceiling height increases, making compact lofts feel livable
- Circadian benefits are strongest in bedrooms and living areas with morning-oriented skylights
- Ventilating units reduce humidity in bathrooms and cooking smells in kitchens
Skylight types for tiny homes: which one fits your situation?
Choosing the wrong type is the most common mistake tiny-home owners make. Each type has a specific job, and the roof geometry of a tiny home often narrows the options further.
Tubular skylights (sun tunnels) are the low-impact workhorse for small spaces. A small dome on the roof feeds daylight down a highly reflective tube to a diffuser on the ceiling. Sun tunnels are an efficient, low-impact way to deliver daylight into small, windowless spaces where a traditional roof window is impractical. They require a minimal roof cut, add almost no structural load, and can be installed in a couple of hours. A 10-inch Solatube unit, for example, covers 150–200 square feet of floor area. Perfect for a bathroom, closet, or hallway where a full skylight would require rafter modification.
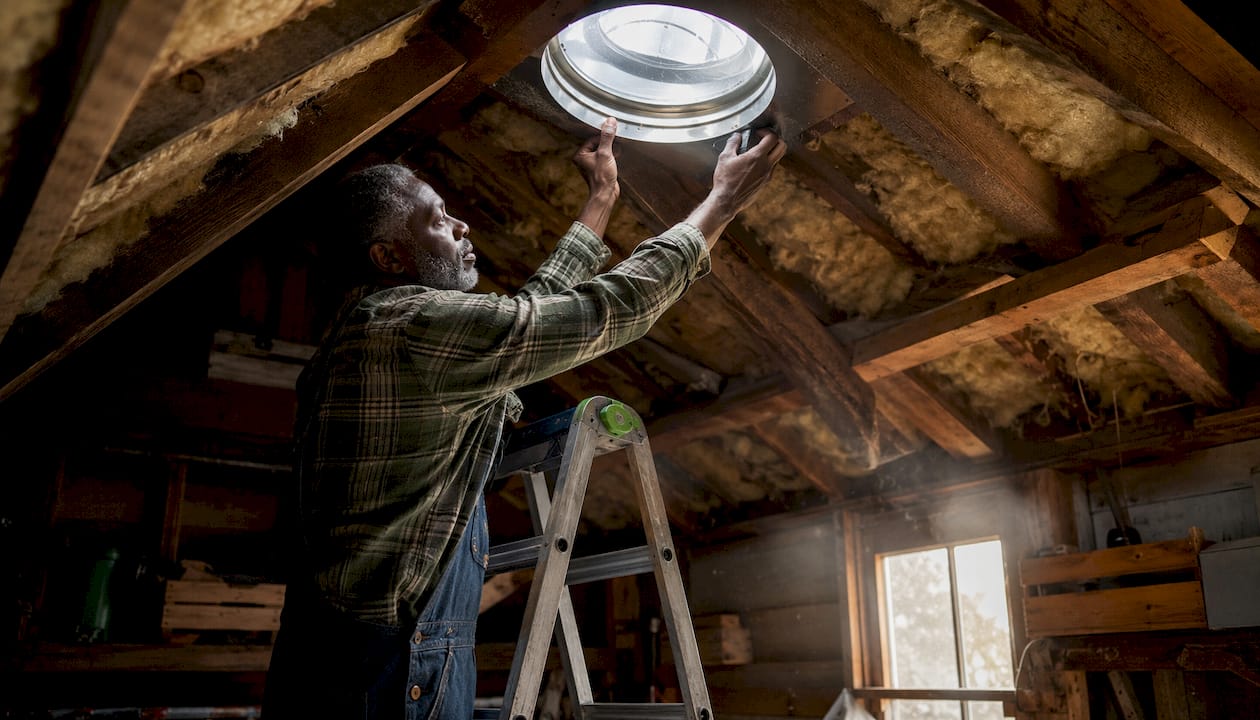
Fixed glazed skylights are the simplest structurally. No moving parts, no motor, no seal wear on an operating mechanism. They work well on south-facing roofs for passive solar gain in winter and are the go-to choice when the goal is a view of the sky from a loft bed. The downside: zero ventilation, so they need to be paired with another exhaust strategy.
Venting roof windows are the most versatile option for lofts and sleeping areas. They open outward, allow egress in an emergency, and create the stack-effect airflow that makes a tiny home livable in summer without air conditioning. Manual crank, chain, or motorized versions all exist. Motorized units with rain sensors close automatically, which matters when you’re away from a tiny home on a trailer.
Acrylic domes are the budget option and the most common on older tiny homes. They’re lightweight and cheap, but they scratch easily, yellow over time, and offer poor thermal performance. Fine for a shed or utility space; not the right call for a living area you care about.
- Tubular: narrow corridors, bathrooms, closets, hallways
- Fixed: south-facing lofts, stargazing, passive solar
- Venting roof window: loft sleeping areas, kitchens, any space needing egress
- Acrylic dome: utility spaces, budget retrofits only
How venting skylights improve tiny-home airflow and emergency egress
The stack effect is the physics behind why a venting skylight works so well in a tiny home. Hot air is less dense and rises. When you open a skylight at the highest interior point and crack a lower window or vent, you create a pressure differential that pulls fresh air through the space. Vented skylights positioned at the highest interior point can reduce interior temperatures by about 10°F in an hour under favorable conditions. In a 200-square-foot space, that’s the difference between sleeping comfortably and running a window unit all night.

Egress is a separate but related consideration. In a loft, a venting roof window that meets minimum opening dimensions can serve as a secondary escape route. U.S. building codes vary by jurisdiction, so confirm the specific opening size requirements with your local authority having jurisdiction (AHJ) before purchasing. A roof window with a minimum 5.7 square feet of clear opening area is a common threshold, but your local code governs. For tiny homes on wheels, NOAH certification standards address loft egress separately from site-built codes.
Pro Tip: Pair your venting skylight with a natural ventilation strategy that includes a lower intake vent. A skylight alone exhausts air; the lower opening is what drives the replacement airflow that makes the system work.
Egress and safety verification checklist:
- Confirm the skylight’s clear opening area meets your local code minimum
- Verify the unit opens wide enough for an adult to exit (measure the rough opening)
- Check that the operating mechanism (crank, chain, motor) works from inside without tools
- Confirm the roof window is accessible from the loft floor without a ladder
- Test the rain sensor or manual close before installation is complete
- Inspect operating seals annually and lubricate hinges per the manufacturer’s schedule
Energy impacts: glazing choices, U-value, SHGC, Low-E coatings, and climate strategies for tiny homes
Getting the glazing spec right is where most tiny-home skylight projects succeed or fail on energy performance. Four numbers matter: U-factor (heat loss rate, lower is better), SHGC (Solar Heat Gain Coefficient, how much solar radiation passes through), VT (Visible Transmittance, how much daylight comes through), and the presence of Low-E coatings and argon fill between panes.
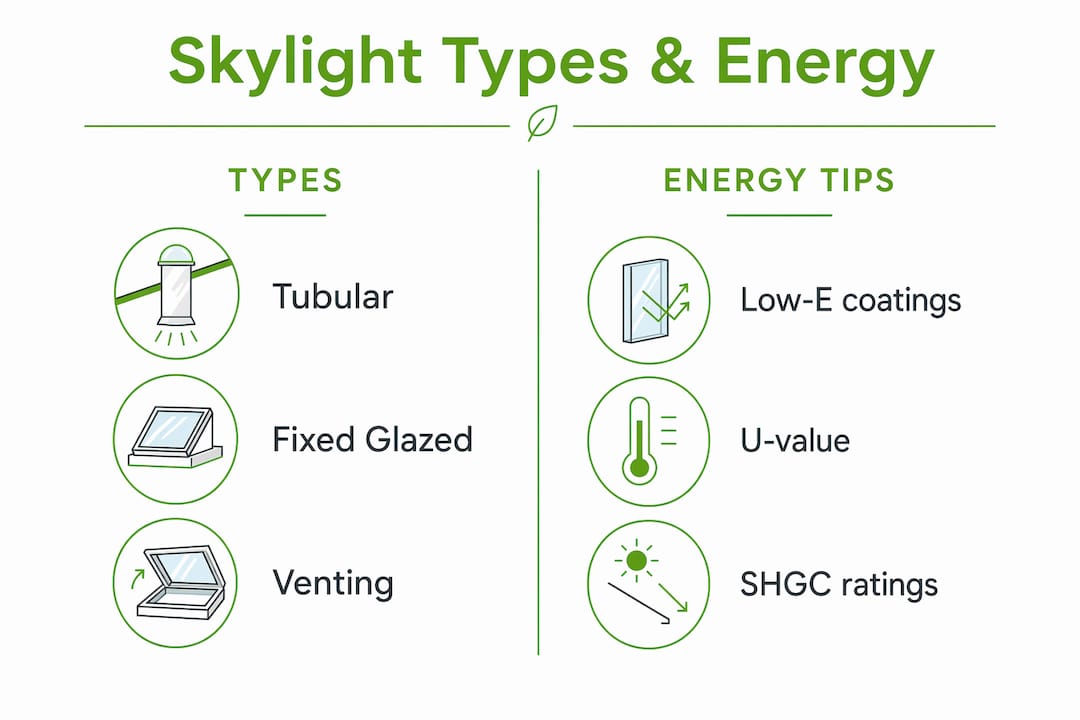
In hot climates like the Southwest or Southeast, choose a low SHGC (0.25 or below) to limit summer heat gain. In cold climates like the Upper Midwest or New England, a higher SHGC (0.40–0.55) on a south-facing unit lets you recover useful solar heat in winter. Modern skylights use thermally broken frames and double or triple glazing with Low-E coatings to reduce heat loss and unwanted solar gain. Double glazing with argon fill is the practical minimum for a conditioned tiny home. Triple glazing adds weight and cost but pays off in very cold climates where U-factor below 0.20 is worth pursuing.
Pairing your skylight with good roof insulation is non-negotiable. A high-performance skylight in a poorly insulated roof assembly will still underperform.
| Metric | What it measures | Target: hot climate | Target: cold climate |
|---|---|---|---|
| U-factor | Heat loss (lower = better) | — | — |
| SHGC | Solar heat admitted | ≤ 0.25 | 0.40–0.55 |
| VT | Daylight transmitted | — | — |
| Glazing layers | Insulation depth | Double min. | Double or triple |
| Low-E coating | Spectral selectivity | Yes (exterior coat) | Yes (interior coat) |
Daylighting savings are real. Annual lighting energy savings from skylights typically range from $80 to $220 depending on usage and climate. In a tiny home where total energy consumption is already low, this range represents a significant portion of the lighting budget. Interior cellular shades or exterior roller blinds add another layer of control for glare and summer heat management.
- Low-E coatings on the outer pane reduce summer heat gain; inner-pane coatings retain winter warmth
- Laminated inner panes add acoustic dampening and UV protection
- Argon fill between panes improves U-factor without adding visible thickness
- Exterior shading (overhangs, exterior blinds) outperforms interior shades at blocking summer heat before it enters
How to size and place skylights in tiny homes for even daylight, low glare, and privacy
The standard rule of thumb is that skylight area should equal roughly 5–10% of the floor area of the room it serves. In a 120-square-foot loft, that means 6–12 square feet of glazed area, which corresponds to one mid-sized roof window. In a 40-square-foot bathroom, a single tubular skylight or a small fixed unit is plenty.
Placement matters as much as size. Aligning a skylight so light bounces off a side wall extends illumination deeper into the room compared with centering it over open floor. For a kitchen, offset the skylight toward the counter rather than the center of the room. For a loft, position it near the head of the bed for morning light or toward the foot if you want to avoid early wake-ups.
Orientation shapes the character of the light. North-facing skylights deliver consistent, cool illumination with minimal glare, ideal for a workspace. South-facing units maximize winter solar gain but need shading in summer. East-facing skylights give you warm morning light; west-facing units bring afternoon heat. In dense neighborhoods or on trailer parks, privacy is a real concern. Skylights draw light from above rather than through walls, so they don’t create sight lines for neighbors, but a clear-glazed unit directly over a loft bed can feel exposed. Frosted or diffused glazing solves this without sacrificing much light.
| Space | Floor area | Recommended skylight area | Best type |
|---|---|---|---|
| Loft sleeping area | 60–100 sq ft | 5–8 sq ft | Venting roof window |
| Kitchen/living | 80–150 sq ft | 6–12 sq ft | Fixed or venting |
| Bathroom | 30 sq ft | 2–4 sq ft | Tubular or small fixed |
| Corridor/hallway | 15–30 sq ft | 1–3 sq ft | Tubular |
- Apply the 5–10% floor-area rule as a starting point, then adjust for roof pitch and orientation
- Offset placement toward primary task areas rather than centering over open floor
- Use frosted or diffused glazing in sleeping areas and bathrooms for privacy
- North-facing placement for glare-free work light; south-facing for passive solar gain
Installation basics: flashing, curb vs. deck mount, and tiny-on-wheels considerations
Leaks are the number-one complaint about skylights, and nearly all of them trace back to installation, not the unit itself. Most classic skylight leak problems stem from poor installation; modern best practice uses curb-mounted flashing and system-level waterproofing rather than sealant-only fixes. A bead of caulk around a skylight frame is not a flashing system. It’s a temporary fix that fails within a few seasons.
Curb-mounted vs. deck-mounted: A curb-mounted skylight sits on a raised wood frame (the curb) that lifts the unit above the roof deck. Layered metal step flashing, counter flashing, and a saddle at the head of the unit create a waterproofing system that sheds water mechanically. Deck-mounted units sit lower and rely more heavily on integrated flashing kits. For tiny homes, curb mounting is the more durable long-term choice, especially on low-pitch roofs where water moves slowly.
Tiny homes on trailers add a layer of complexity. The roof assembly flexes during transport, which can stress rigid flashing details and crack sealant joints. Use flexible flashing tape rated for movement, keep penetrations to a minimum, and favor lighter tubular skylights over heavy fixed units when weight is a concern. Motorized venting skylights draw power, so coordinate with your rooftop solar planning early to avoid conflicts between panel placement and skylight position.
Installation checklist:
- Confirm roof pitch is within the skylight manufacturer’s specified range
- Choose curb-mounted assembly for pitches under 4:12
- Verify rafter spacing allows the rough opening without major structural modification
- Use layered metal step flashing integrated with the roofing material, not sealant alone
- Install a sealed shaft with an air barrier between the roof deck and ceiling plane
- For trailers: use flexible flashing tape at all penetration edges
- Test the unit for operation and water tightness before closing up the interior ceiling
- Confirm the installer carries liability insurance and has done similar tiny-home work
When to hire a pro vs. DIY: Tubular skylights are genuinely DIY-friendly; most 10-inch units install in two hours with basic tools and no structural modification. Full-sized venting roof windows on a trailer roof are a different matter. The flashing integration, structural header, and electrical connection for a motorized unit are worth paying a professional to get right.
- Sealant-only installs are the leading cause of skylight leaks
- Curb mounting adds height but dramatically improves long-term waterproofing
- Flexible flashing tape is mandatory for trailer roofs that move during transport
- Coordinate skylight and solar panel positions before either is installed
Typical costs, materials, and realistic installation timelines
Skylight costs vary widely by type, glazing spec, and whether you’re retrofitting or building new.
Tubular skylights are the most affordable entry point. A quality 10-inch unit runs $200–$400 for the kit, and installation adds $150–$300 if you hire out. Total retrofit cost: $350–$700, often done in a single afternoon. Sun tunnels are faster to install and a cost-effective retrofit for small rooms compared with full-sized skylights.
Fixed glazed skylights range from $300–$900 for the unit, with professional installation adding $500–$1,200 depending on roof type, flashing kit complexity, and shaft construction. Budget $800–$2,100 all-in for a quality fixed unit on a tiny home.
Venting roof windows carry a premium for the operating mechanism and, if motorized, the electrical connection. Units run $600–$1,500; installation adds $700–$1,500. Total: $1,300–$3,000 for a professionally installed motorized venting unit.
Timeline: A tubular retrofit takes 2–4 hours. A fixed or venting skylight on a new build gets roughed in during framing and finished in a day. A retrofit on an existing tiny home, including interior shaft work, typically takes 1–2 days.
- Factor in the flashing kit separately; it’s often not included in base unit prices
- Motorization adds $200–$500 to the unit cost but pays back in convenience and rain-sensor protection
- Ask about the impact on your roof warranty before cutting; some roofing warranties require a certified installer
- A quality skylight with professional installation typically lasts 20 or more years; early failures trace to flashing, not the glazing
- Budget for an interior shaft and diffuser if the roof assembly is thick (spray foam insulation adds depth)
Common downsides and how to manage them
Every skylight has failure modes. Knowing them in advance lets you design around them rather than fix them after the fact.
Leaks are the most common complaint and almost always installation-related. The fix is a proper flashing system, not more sealant. If an installer proposes caulk as the primary waterproofing method, find a different installer.
Condensation forms on the interior glazing surface when warm, humid interior air contacts a cold pane. Thermally broken frames and double or triple glazing with Low-E coatings reduce the temperature differential that causes it. In a bathroom or kitchen, a venting unit that exhausts humidity directly is the most effective prevention.
Heat gain in summer is real, especially on south- and west-facing skylights without shading. Exterior roller blinds block heat before it enters the glazing. Interior cellular shades are less effective but easier to retrofit. Spectrally selective Low-E coatings on the outer pane cut solar heat gain without reducing visible light as much as tinted glazing does.
Glare is most noticeable in lofts and workspaces directly under a clear-glazed unit. Diffused or frosted glazing, or a light shaft angled to bounce light off a wall, solves most glare problems without sacrificing lumen output.
Privacy in dense settings is manageable. Frosted glazing or a tubular diffuser eliminates direct sight lines. Automated interior blinds on a timer handle the rest.
Pro Tip: Inspect skylight seals, flashing edges, and operating hardware every spring. Catching a hairline crack in the flashing tape or a stiff hinge mechanism early costs almost nothing to fix. Ignoring it until water appears inside costs significantly more.
- Thermally broken frames prevent condensation at the frame edge
- Laminated inner panes add acoustic dampening for rain noise, a real comfort issue on a metal tiny-home roof
- Rain sensors on motorized units prevent the “left the skylight open in a storm” problem
- Annual cleaning of the dome or glazing maintains light output and lets you spot seal damage early
A decision checklist: questions to ask yourself and your installer
Use this before you buy anything.
Self-assessment:
- What’s the primary goal: more light, ventilation, egress, or a view?
- What is the roof pitch, and does it fall within the manufacturer’s specified range for the unit you want?
- What climate zone are you in, and have you matched SHGC and U-factor accordingly?
- Is privacy a concern? If yes, specify frosted or diffused glazing.
- Does the roof assembly have enough structural depth for a shaft, or will a tubular unit work better?
- Is the tiny home on a trailer? If yes, plan for flexible flashing and weight limits.
Installer questions:
- What flashing method will you use, and is it a system or sealant-only?
- Is the unit NFRC-labeled so I can verify U-factor and SHGC?
- What is the product warranty, and does installation affect my roof warranty?
- Is the motor (if applicable) 12V DC compatible with an off-grid solar system?
- Do you have references for similar tiny-home or trailer-roof installations?
Red flags to stop the conversation:
- Installer proposes sealant as the primary waterproofing method
- Unit has no NFRC label and the installer can’t provide performance specs
- No written warranty on labor or product
- Installer has no experience with tiny homes or trailer roofs specifically
Evidence summary: daylight and health outcomes for tiny-home living
The health case for natural light in small spaces is well-supported. Daylight exposure is linked to better mood, lower blood pressure, reduced anxiety, and improved circadian rhythms, benefits that carry extra weight in confined living environments where the ratio of glazed area to floor space is already low.
Research published in the Journal of Clinical Sleep Medicine found that office workers with greater light exposure had longer sleep duration and better quality of life. The World Health Organization’s housing and health guidelines recommend adequate daylight in homes as a baseline for wellbeing. In a tiny home, a skylight over the sleeping loft is one of the most direct ways to deliver morning light exposure that supports circadian regulation.
Statistic: The Department of Energy notes that skylights provide both daylighting and ventilation, and that tubular skylights minimize heat loss in winter and heat gain in summer due to their small rooftop footprint, making them particularly well-suited to energy-conscious small-space design.
The NFRC label is the practical tool for verifying that a skylight’s performance claims are real. It’s the U.S. standard for independently tested glazing performance. The DOE’s Energy Saver guidance recommends matching skylight position and glazing to your home’s orientation and climate before purchasing.
- Morning-oriented skylights (east-facing) deliver the circadian light cue that matters most for sleep quality
- Smart blinds with programmable timers let you control morning light without manual operation
- Rain sensors on motorized units are a practical automation worth the cost in any climate
- Skylights over high-moisture areas (bathrooms, kitchens) double as indoor air quality tools when operable
Key Takeaways
Skylights deliver the most value in tiny homes when the type, glazing spec, and installation method are matched to the specific space and climate. Cutting corners on flashing or glazing performance erases the benefits quickly.
| Point | Details |
|---|---|
| Match type to goal | Venting roof windows for loft airflow and egress; tubular skylights for targeted light in tight spaces. |
| Spec glazing to climate | Low SHGC (≤ 0.25) in hot climates; higher SHGC (0.40–0.55) with low U-factor in cold climates. |
| Flashing is the system | Curb-mounted, layered metal flashing prevents leaks; sealant-only installs fail within a few seasons. |
| Size by floor area | Target 5–10% of room floor area in glazing; a typical 30×46 skylight produces about 37,000 lumens, enough to transform a previously dim room. |
| Gridwiseliving tiny homes | Gridwiseliving’s tiny-home lineup is designed with roof integration in mind, simplifying skylight and solar planning from the start. |
The part most guides skip about skylights in tiny homes
The conventional wisdom treats skylight selection as a product decision. Pick the right unit, install it, done. What that framing misses is that in a tiny home, every roof penetration is a systems decision. A skylight competes with solar panels for roof real estate. It interacts with your insulation assembly. On a trailer, it’s a potential flex point every time you move. Getting the product right is maybe 40% of the job.
The other 60% is placement, flashing, and integration. The most common regret I hear from tiny-home owners isn’t “I chose the wrong skylight.” It’s “I put it in the wrong spot” or “the installer used caulk and it leaked in year two.” A tubular skylight offset toward the kitchen counter does more useful work than a large fixed unit centered over the living area. A venting roof window with a rain sensor on a motorized unit is worth the extra cost on a trailer you leave unattended. These aren’t glamorous decisions, but they’re the ones that determine whether your skylight is a feature or a problem.
One more thing worth saying plainly: the health benefits are real, but they require morning light exposure to matter for circadian regulation. A skylight over a west-facing loft gives you afternoon heat and evening glare. An east-facing unit over the sleeping area gives you the morning light cue that actually shifts your sleep cycle. Orientation is not an afterthought.
Gridwiseliving’s tiny homes are built with skylight integration in mind
If you’re planning a tiny home from scratch, the easiest path to a well-lit, well-ventilated space is starting with a structure designed to accommodate it. Gridwiseliving’s tiny homes collection includes expandable and fully equipped models with roof assemblies that support skylight and solar integration without the structural gymnastics of a retrofit.

The expandable fully equipped tiny home is built for owners who want to pair natural light with off-grid energy independence. Gridwiseliving’s product team can walk you through skylight placement relative to your solar panel layout, roof pitch, and climate zone so you’re not solving those conflicts after the fact. The lineup is backed by product selection support and warranty coverage that extends to the roof assembly.
Ready to spec your tiny home with skylights built in from day one? Browse the Gridwiseliving tiny homes collection and request a consultation to get product recommendations matched to your climate, site, and energy setup.
Authoritative sources and further reading
These are the primary references worth bookmarking for deeper technical verification:
- Department of Energy — Skylights: The authoritative U.S. source for glazing performance guidance, climate-based SHGC and U-factor recommendations, and tubular skylight efficiency data.
- NFRC (National Fenestration Rating Council): The independent body that certifies U-factor, SHGC, and VT ratings for skylights sold in the U.S. Always check for the NFRC label before purchasing.
- This Old House — Benefits of Skylights: Practical placement guidance and a summary of daylight health benefits grounded in real installation experience.
- Sunsquare — Are Skylights Worth It?: Detailed coverage of installation best practices, flashing systems, glazing performance, and leak prevention.
- TinyLair — Tiny House Windows: Builder-level observations on passive cooling via vented skylights and climate-matched glazing choices for tiny homes.
- NRCA (National Roofing Contractors Association): Industry standard for roofing and flashing best practices; the reference point for system-based waterproofing around roof penetrations.
- NOAH Certified: The U.S. certification body for tiny homes on wheels; relevant for egress requirements and structural standards that affect skylight and loft design.