

Heat Your Greenhouse for Less: Installer Grade BTU Checklist for Homeowners
Electric heaters with a thermostat cover most small hobby greenhouses, while sealed propane or natural gas with poly-tube distribution handles larger or colder setups. Off-grid growers do best with a heat pump or solar-assisted thermal mass and a generator for backup, and anyone just fighting frost can often get by with thermal mass, thermal screens, and better sealing alone. Whatever you choose, size the equipment to your coldest nights, not your average ones.
TL;DR:
- Proper sizing of the heater should be based on the coldest nights rather than average conditions to ensure reliable frost protection.
- For small greenhouses, electric convection or fan heaters with thermostats are simple, precise, and suitable, but may be costly to run in extreme cold.
- Larger or colder setups benefit from sealed combustion propane or natural gas heaters with proper venting, selecting vented systems to avoid harmful gas buildup.
- Passive measures like thermal mass, sealing leaks, and thermal screens can significantly reduce active heating needs but unlikely replace the need for supplemental heat in freezing temperatures.
- Backup power sources like generators or solar with thermal mass improve reliability, especially during outages, which are critical for protecting high-value crops.
Table of Contents
- Greenhouse Heating Options: A Quick Comparison by Size and Budget
- Electric Heaters: Fan, Convection, and Infrared Models
- Propane and Natural Gas Heaters for Bigger, Colder Greenhouses
- Hydronic and Radiant Heat for Uniform, Long-Term Warmth
- Heat Pumps and Geothermal Systems for Off-Grid Efficiency
- Passive Solar, Thermal Mass, and Night Screens
- How to Size a Heater: BTU Basics Every Homeowner Should Know
- Spreading Heat Evenly and Planning for Power Outages
- Safety, Humidity, and Ventilation When You’re Heating a Greenhouse
- How to Choose the Right Heating Approach for Your Greenhouse
- What Homeowners Can Actually Do This Weekend
- A Homeowner’s Priorities: Insulation and Redundancy Over Flashy Claims
- A Different Way to Build Greenhouse Reliability
- Sources
- FAQ
Greenhouse Heating Options: A Quick Comparison by Size and Budget
Matching the heater to the greenhouse is where most people go wrong. A unit sized for a 10x12 hobby structure will struggle in a 20x40 hoop house, and a big propane heater in a small greenhouse will cook your seedlings on mild days if it lacks good control.
Here’s how the main scenarios break down:
- Small hobby greenhouse (under 200 sq ft), grid-connected: Electric convection or fan heater with a thermostat. Low install complexity, precise control, no combustion byproducts to manage.
- Medium to large hobby or small commercial (200 to 1,000+ sq ft): Vented or sealed-combustion propane or natural gas heater with poly-tube distribution. Higher BTU output per dollar of equipment, but requires venting and fuel logistics.
- Off-grid or minimal utility access: Heat pump paired with solar panels and battery storage, or a wood stove with thermal mass, backed by a generator for cold snaps.
- Frost protection only, mild climates: Thermal mass (water barrels, insulated tanks) plus a thermal screen and sealed joints. No active heater needed most nights.
- Any scenario with a high-value crop: Two smaller heaters instead of one large unit, so a single failure doesn’t wipe out the whole greenhouse.
The tradeoff running through all of these is upfront cost versus running cost. Electric heaters are cheap to install and simple to control but can cost more to run in extreme cold. Combustion heaters cost more to install correctly (venting, gas lines) but often run cheaper per BTU. Never install an unvented combustion heater in an occupied growing space. Always confirm your electrical circuit can handle the heater’s draw before plugging anything in.
Electric Heaters: Fan, Convection, and Infrared Models
Electric heaters dominate the small greenhouse market because they’re simple, clean, and precise. Fan heaters push warm air across the space quickly, which works well for greenhouses under a few hundred square feet where even heat distribution matters more than raw output. Convection heaters warm more slowly and steadily, better suited to spaces where you want fewer temperature swings. Infrared heaters heat plant surfaces directly rather than the air around them, which makes them useful for frost protection where you need fast recovery, though they can’t heat large volumes as efficiently as forced-air units.
Electric is the easiest option to install correctly. Check that your circuit can handle the load, use a GFCI-protected outlet given the humidity, and place the thermostat sensor at plant height rather than near the ceiling, where readings run warmer than what your crops actually feel. Pairing an electric heater with a water barrel or two for thermal mass reduces how hard the unit has to work overnight. For anyone growing something irreplaceable, two smaller electric heaters spread across the greenhouse beat one large unit that leaves you exposed if it fails.
Propane and Natural Gas Heaters for Bigger, Colder Greenhouses
Combustion heaters deliver more BTUs per dollar than electric resistance heat, which is why they show up in larger hobby greenhouses and small commercial operations. The critical distinction is sealed or vented units versus unvented ones. Unvented heaters exhaust directly into the growing space, and university extension guidance recommends against that setup for sensitive crops because vented and sealed-combustion systems avoid the ethylene and carbon monoxide buildup that unvented units can produce.
Bottled propane offers flexibility for sites without gas service, though fuel costs run higher per BTU than piped natural gas where it’s available. Larger structures typically distribute heat through poly-tube or ducting rather than relying on radiant spread from a single unit. Before installing either fuel type, check local permit requirements, confirm the venting path meets code, and install a carbon monoxide detector rated for greenhouse humidity.
Hydronic and Radiant Heat for Uniform, Long-Term Warmth
Hot-water systems circulate heated water through pipes run along the perimeter, under benches, or embedded in a concrete floor. That gives you far more even heat than a single point-source heater, which matters for crops sensitive to temperature swings. Hydronic systems can be more efficient for continuous heating once running, but the installation cost and complexity are considerably higher than a plug-in heater.
The system also responds slowly. It takes time to heat up and time to cool down, so it’s a poor fit if you need quick recovery after a door gets left open. Freeze protection for the pipes and boiler maintenance add ongoing upkeep. Hydronic heat makes sense mostly for larger, long-term operations where the crop value justifies the investment over several seasons.
Heat Pumps and Geothermal Systems for Off-Grid Efficiency
Air-source heat pumps move heat rather than generate it, which makes them highly efficient in mild cold but less so as temperatures drop. Their coefficient of performance declines as outdoor air gets colder, meaning you’ll likely need backup heat for the coldest nights in a true winter climate. Ground-source (geothermal) units sidestep that problem by pulling from stable underground temperatures, but the installation cost and complexity are significant.
Heat pumps pair well with solar panels and battery storage for off-grid or grid-reduction setups, since the electrical demand is steadier and more predictable than a resistance heater’s spikes. Combine one with thermal mass to smooth out performance dips during cold snaps, and always keep a backup source ready for extended freezes.
Passive Solar, Thermal Mass, and Night Screens
Water barrels, painted black and placed where they catch direct sun, absorb heat during the day and release it slowly overnight. Thermal mass reduces overnight temperature drops and can meaningfully cut how hard your heater has to work, but it rarely replaces active heating once outdoor temperatures drop into the teens or lower.
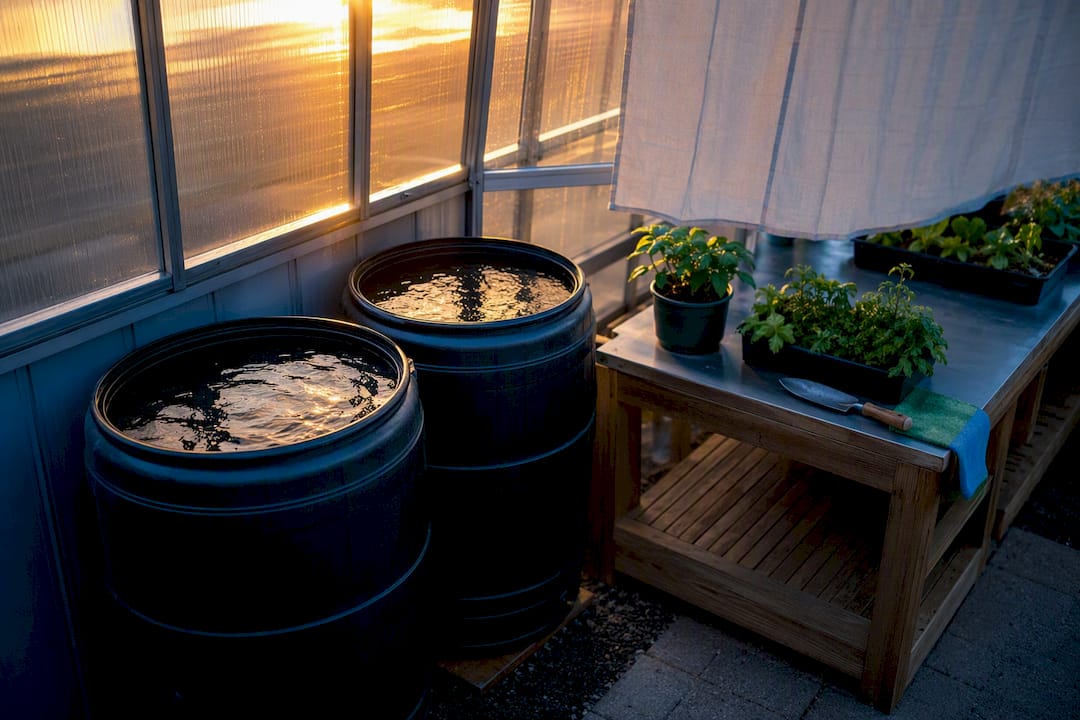
Double-layer plastic glazing, bubble wrap on the north wall, and a thermal night curtain over the growing area all cut heat loss for relatively little money. Sealing air leaks around doors and vents is one of the cheapest fixes available and often the first thing worth doing before buying any heater at all. Orientation matters too: a greenhouse angled to catch maximum winter sun needs less supplemental heat than one shaded half the day. Treat passive measures as load reduction, not a replacement for active heat in genuinely cold climates.
How to Size a Heater: BTU Basics Every Homeowner Should Know
Skip the square-foot rules of thumb. The accurate method multiplies your greenhouse’s surface area by the temperature difference between inside and outside, then factors in your glazing’s U-value, which measures how much heat escapes through the material.
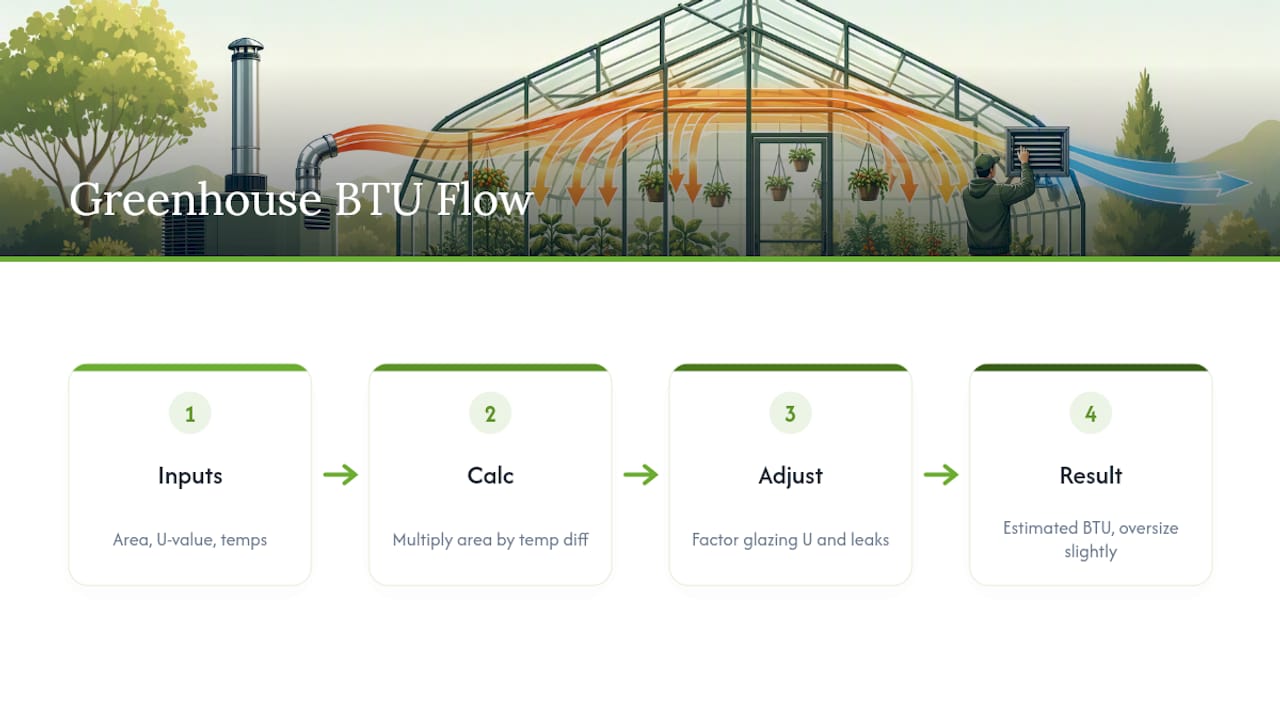
You’ll need four numbers: total surface area (walls plus roof), your glazing’s U-value (single poly, double poly, and polycarbonate all differ), your target nighttime temperature, and your area’s design low, the coldest temperature your region reasonably hits in winter. Air leakage adds another variable that’s harder to estimate without a blower-door style test, which is one reason a rough calculation still benefits from a second opinion. Size slightly above your historic design low rather than the average winter night, and lean toward two smaller heaters rather than one large one. For anything beyond a small hobby structure, run your numbers past your local extension office or a qualified installer before buying equipment.
Spreading Heat Evenly and Planning for Power Outages
Even the right-sized heater fails if the heat doesn’t reach every corner. HAF (horizontal airflow) fans keep air moving and prevent cold pockets near glazing. Poly-tube distribution, common with gas heaters, pushes warm air along the length of a greenhouse rather than dumping it all in one spot.
Set your thermostat sensor at plant height, not near the heater or ceiling, and consider two-stage controls that ease off during the day rather than swinging between full blast and off. For backup, a battery-backed alarm or generator auto-start protects against the kind of overnight equipment failure that wipes out a season’s growth. Test your backup system before the first hard freeze, not during it.
Safety, Humidity, and Ventilation When You’re Heating a Greenhouse
Combustion heaters need somewhere for exhaust to go. Unvented units risk carbon monoxide buildup and trace ethylene, which causes leaf drop and flower abortion in sensitive crops even at low concentrations. Sealed or vented systems avoid that risk entirely.
Burning fuel also adds moisture to the air, so pair any combustion heater with adequate ventilation to prevent the humidity spikes that invite disease. Install a carbon monoxide detector, check it seasonally, and confirm your setup meets local building and fire codes before your first cold night.
How to Choose the Right Heating Approach for Your Greenhouse
Start with three questions: how big is the space, how cold does it get, and is it grid-connected? From there, follow this order:
- Calculate your BTU need using surface area, ΔT, and U-value rather than guessing.
- Reduce heat loss first through sealing, insulation, and thermal mass before sizing equipment.
- Pick a heat source that matches your grid access and crop sensitivity, then add distribution (fans, poly-tube, ducting).
- Build in redundancy with two smaller units or a backup power source for critical crops.
Ask any installer about permit requirements, venting specifications, and warranty terms before signing anything. Red flags include unvented combustion heaters sold for indoor greenhouse use, undersized breakers for the heater’s draw, and no mention of a carbon monoxide alarm.
Pro Tip: Walk your greenhouse at night with a flashlight during the first cold week of the season. Cold drafts you can feel with your hand at plant height reveal sealing gaps that no thermostat will fix.
What Homeowners Can Actually Do This Weekend
Seal obvious drafts, add a water barrel or two for thermal mass, and set a battery alarm to catch overnight failures. DIY handles insulation and sealing fine; hire a licensed pro for gas lines, venting, and any electrical circuit upgrade. Start with site selection basics and a pre-freeze winterizing checklist.
A Homeowner’s Priorities: Insulation and Redundancy Over Flashy Claims
The cheapest greenhouse heating option is the heat you never lose in the first place. Sealing and thermal mass consistently outperform equipment upgrades on cost per degree saved, yet most people buy a bigger heater before they fix a drafty door. Prioritize redundancy for anything you can’t afford to lose overnight, and weigh running cost against how many nights a year you’ll actually need continuous heat, not just the coldest one.
— Gridwise
A Different Way to Build Greenhouse Reliability
If you’re weighing propane heaters against electric units against heat pumps, there’s a step before any of that: the greenhouse structure itself and what happens when the power goes out. Gridwiseliving sells greenhouse models built with tighter glazing and framing that reduce the heat loss driving your BTU calculation in the first place, so whatever heater you choose has less work to do.

For the outage scenario every heating plan eventually runs into, Gridwiseliving’s generators and solar energy systems keep a heater running through a cold-snap power failure instead of leaving your crop exposed for a night. If you’re still deciding on a structure, browse the current greenhouse lineup and pick the frame and glazing that matches your climate before you size a single heater.
Sources
- Calculating greenhouse heating requirements (Purdue University CEA)
- Greenhouses: Heating, cooling and ventilation (IFAS/University of Florida extension)
- Prevent ethylene and carbon monoxide from occurring in your greenhouse (MSU)
- Winter greenhouse heating guide (Sierra Greenhouse)
FAQ
How Did the Amish Traditionally Heat Greenhouses in Winter?
Amish growers commonly rely on wood stoves and thermal mass, such as water barrels or stone, combined with heavy insulation and minimal glazing area to hold heat overnight without electricity.
What Is the Most Efficient Way to Heat a Greenhouse?
Reducing heat loss through insulation, sealing, and thermal mass first, then using a properly sized heat pump or sealed-combustion heater, delivers the best efficiency for most climates. A heat-loss calculation based on surface area, temperature difference, and U-value tells you exactly how much capacity you need rather than overbuying.
What Is the Cheapest Way to Heat a Greenhouse?
Passive thermal mass, thermal screens, and sealing drafts cost the least and can significantly cut how much active heat you need, though they rarely eliminate the need for a heater in genuinely cold climates. Among active options, a small electric heater sized correctly for the space usually keeps running costs lowest for frost protection.
How Cold Is Too Cold for a Greenhouse?
That depends entirely on your crops, but most common vegetable and flower starts suffer damage once temperatures drop below freezing without supplemental heat. Annual heating costs for a typical 8x12 hobby greenhouse range from roughly $200 to $1,400 depending on fuel type and target temperature, which reflects how much active heat most climates actually require.