

How to Choose the Best Site for Your Backyard Greenhouse
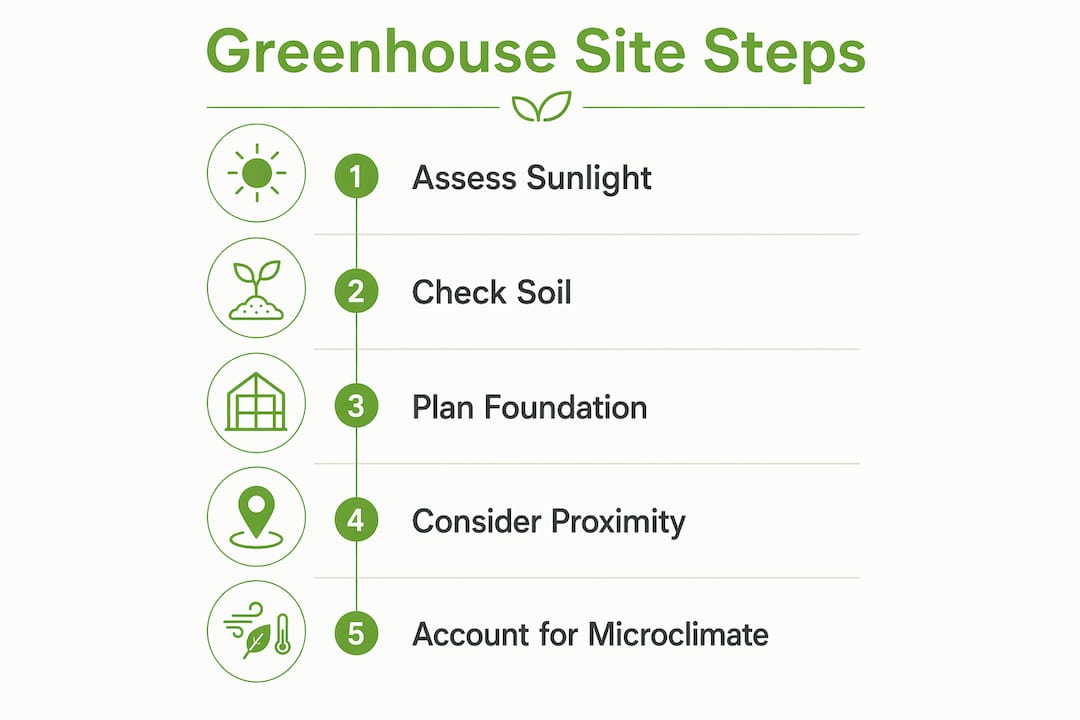
Choosing the right location is the single most important decision you’ll make for your backyard greenhouse. Get it wrong, and you’ll fight poor light, soggy floors, and cold drafts for years. Get it right, and the structure practically runs itself. The core requirements for site selection in a backyard greenhouse come down to six fundamentals:
- Sunlight: At least 5–6 hours of direct, unobstructed winter sun daily
- Drainage: Level, well-drained ground with no water pooling after rain
- Stability: Firm, flat soil that supports a solid foundation without settling
- Proximity: Close enough to your home, water spigot, and electrical outlet for daily use
- Wind protection: Shielded from prevailing winds without creating shade or a wind tunnel
- Clearance: Enough space around all sides for cleaning, repairs, and ventilation
Site selection for a backyard greenhouse starts with sunlight
Sunlight drives everything inside a greenhouse. Plants need at least 5–6 hours of direct, unobstructed light daily, and that minimum is hardest to hit in december and january when the sun sits low and shadows stretch long. A spot that looks open and bright in june can be half-shaded by october.
Ridge orientation matters more than most homeowners realize. An east-west ridge orientation captures low-angle winter sunlight through the long side of the structure, making it the better choice for year-round growing. A north-south ridge distributes light more evenly across seasons and suits growers focused on spring and summer production.
The south or southeast side of your property is the first choice for placement. The east side is second best, capturing the most light from november through february. North-facing spots are the worst option; heating costs climb and plant selection shrinks.
Winter shadows from buildings and trees are longer and more damaging than summer shadows. A tree that barely grazes your proposed site in july can block two hours of morning light in january. Before you commit to a location, observe shadow patterns on a clear december day or use a sun path chart to map exactly when and where shade falls.
- Avoid large evergreen trees to the south; they shade year-round
- Deciduous trees to the west can work well, providing summer shade and letting winter light through bare branches
- Keep the greenhouse on the south or southeast side of any structure that might cast a shadow
Pro Tip: Use a free online sun path calculator for your zip code, then walk your yard at noon on the winter solstice. Mark where shadows fall. That 20-minute exercise can save you from a costly placement mistake.
How soil quality and drainage affect your greenhouse foundation

Poor drainage is one of the fastest ways to ruin a greenhouse. Low-lying areas collect cold air and standing water, which leads to waterlogged floors, root rot, and foundation damage over time. The ground beneath your greenhouse should drain freely after heavy rain, with no puddles lingering more than a few hours.
A slight slope toward the south helps with both drainage and passive solar gain. If your best available spot is flat or mildly damp, you can build up a raised base using gravel or pavers to keep water moving away from the structure. Grading the site before installation is far cheaper than fixing a flooded floor after the fact.
- Avoid any area where water visibly pools during or after rain
- Check that the soil is firm enough to support a foundation without excessive settling
- If planting directly in the ground inside the greenhouse, test soil composition and amend as needed before building
- Budget for grading and utility trenching early; these costs are often underestimated but are foundational to the project
Soil fertility matters if you plan to grow directly in the ground rather than in raised beds or containers. Sandy soils drain well but need organic matter; clay soils hold too much water and may require amendment or a raised bed approach. For gardeners exploring flexible growing options, container gardening strategies can work well inside a greenhouse on any soil type.
What foundation type works best for a backyard greenhouse?
The right foundation depends on your greenhouse size, local climate, and how permanent you want the structure to be. Three options cover most backyard setups:
- Gravel base: Excellent drainage, low cost, easy to install. Works well for smaller hobby kits and temporary structures. Gravel compacts over time and may need topping up.
- Concrete slab: Maximum stability and longevity. Best for larger or permanent greenhouses. Requires proper drainage channels built in, since concrete itself does not drain.
- Perimeter wall with treated lumber or concrete blocks: A middle-ground option that elevates the frame off the ground, improves drainage, and allows for insulation. Common for mid-size backyard setups.
Whatever foundation you choose, the base must be level. An uneven foundation puts stress on the frame, causes panels to warp or pop out, and makes doors difficult to open and close. Take time to level the site before any materials go down.
Maintain at least 3 feet of clearance around all sides of the structure. That space lets you walk the perimeter for cleaning, glazing replacement, and repairs. Skipping that clearance is a common mistake that turns routine maintenance into a frustrating squeeze.
How proximity to your home affects daily greenhouse use
Distance is the enemy of consistent greenhouse care. A greenhouse that requires a long walk across the yard, especially in january or during a rainstorm, tends to get neglected. Placing your greenhouse too far away leads to missed venting, skipped watering, and plants that suffer for it.
The practical target is close enough to your home that checking on the greenhouse feels like a quick errand, not a chore. That usually means within easy sight of a door or window.
- Water access: A nearby spigot is close to non-negotiable. Running a long hose across the yard every day wears thin fast, especially in cold weather.
- Electrical access: If you plan to run heaters, fans, or grow lights, plan the electrical run before you build. Retrofitting power later costs significantly more.
- Path quality: A solid, all-weather path to the greenhouse door makes a real difference on muddy spring mornings.
- Future expansion: Leave room beside or behind the structure for a cold frame, additional beds, or a larger greenhouse later.
The Willow 9’ x 6’ Cedar Wood greenhouse kit includes a built-in PowerPort, which simplifies electrical planning considerably for homeowners who want to run a small heater or fan without a major wiring project.
How site selection shapes your energy costs and climate control
A south-facing, sunny site reduces winter heating costs through passive solar gain, but that same sun exposure creates overheating risk in summer without proper ventilation. The two problems are linked, and site selection influences both.
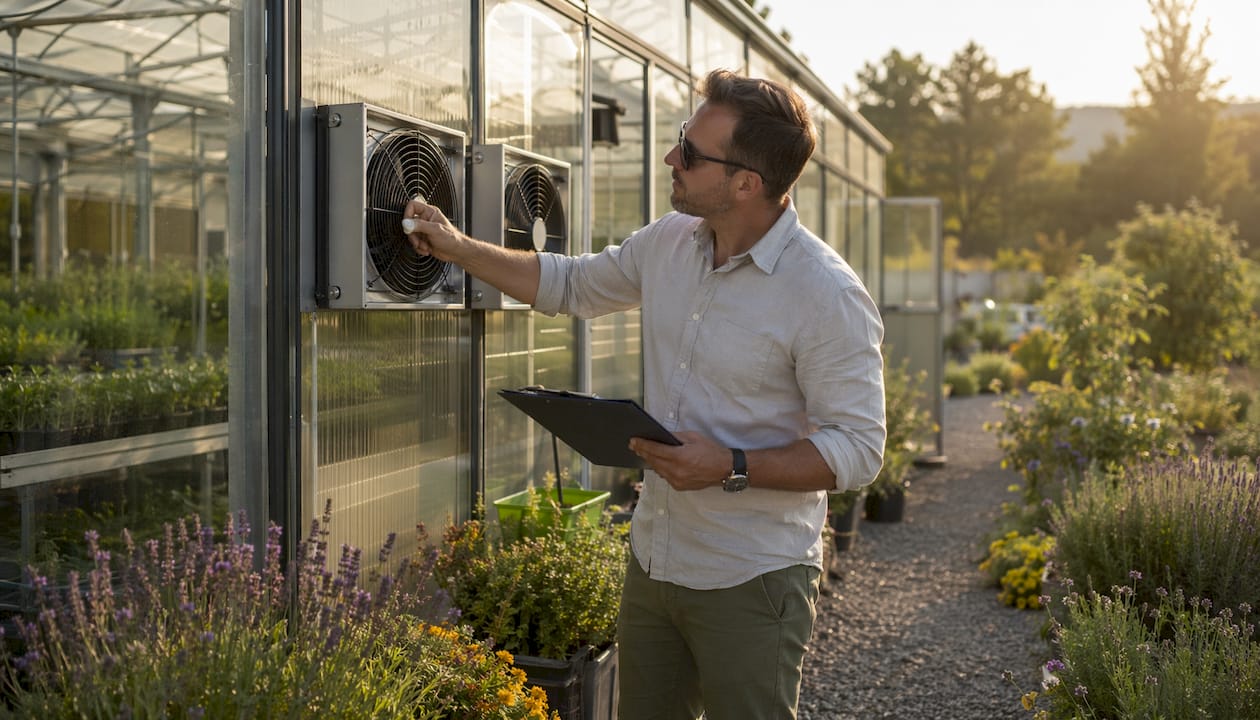
Pro Tip: Position your greenhouse so exhaust vents and fans work with the prevailing summer breeze rather than against it. That alignment can cut fan runtime significantly and keep temperatures stable without extra electricity. Pairing smart placement with home energy efficiency habits compounds the savings across your whole property.
Natural windbreaks, such as a hedge, fence, or existing building, reduce heat loss in winter and protect the structure from storm damage. The key is distance: place your greenhouse 2–3 times the height of the windbreak away from it. Too close and you lose sunlight; too far and you lose the protection. Never site a greenhouse directly between two buildings, where wind accelerates through the gap and creates damaging pressure on the frame.
For homeowners interested in taking solar orientation further, the same principles that govern solar positioning for small structures apply directly to greenhouse placement and passive heat gain.
Why microclimates in your yard can make or break your greenhouse
Not every corner of your yard behaves the same way, even when they look identical. Small differences in elevation, slope, and proximity to structures create microclimates that affect temperature, frost risk, and airflow in ways that matter enormously for a greenhouse.
Frost pockets form in low-lying areas where cold air drains downhill and settles overnight. A greenhouse placed in a frost pocket will experience colder overnight temperatures than the rest of your yard, driving up heating costs and increasing the risk of plant damage on borderline nights. Moving the structure uphill by even a few feet can eliminate that problem entirely.
Hilltop sites avoid frost pockets but introduce wind exposure, which carries its own heating penalty and structural risk. The sweet spot is usually a gentle mid-slope position with a natural windbreak on the prevailing wind side. Spend time in your yard during different seasons and weather conditions before finalizing placement. Morning frost patterns, wind direction during storms, and where snow melts first all reveal the microclimate map of your property.
Zoning rules and permits you need to check before you build
Local zoning regulations and homeowners association rules can restrict where and how you build a backyard greenhouse, and finding out after construction is expensive. Check these before you buy a kit or break ground.
Most municipalities treat a permanent greenhouse as an accessory structure, subject to setback requirements from property lines, maximum height limits, and sometimes a permit. Setback rules vary widely: some jurisdictions require 5 feet from a property line, others 10 feet or more. A structure attached to your home may fall under different rules than a freestanding one.
HOA rules add another layer. Some associations prohibit visible outbuildings entirely; others require approval of materials, colors, or placement. Review your HOA covenants before purchasing.
Permit requirements also affect your insurance. A structure built without a required permit may not be covered if it’s damaged in a storm. Contact your homeowner’s insurance carrier before construction begins to understand how a greenhouse affects your policy.
The practical checklist before you build:
- Call your local building department and ask about accessory structure permits and setback requirements
- Review HOA covenants if applicable
- Confirm utility easements on your property, since you cannot build over them
- Check whether a concrete foundation triggers different permit requirements than a gravel base
Key Takeaways
Optimal backyard greenhouse placement requires at least 5–6 hours of direct winter sun, well-drained level ground, wind protection at the right distance, and close proximity to your home and utilities.
| Point | Details |
|---|---|
| Winter sunlight is the baseline | Greenhouses need at least 5–6 hours of direct sun daily, prioritizing winter exposure for consistent plant growth. |
| Ridge orientation affects seasonal output | East-west orientation maximizes low-angle winter light; north-south suits spring and summer growing. |
| Windbreak distance has a formula | Place the greenhouse 2–3 times the height of any windbreak away to balance protection and sunlight. |
| Proximity prevents neglect | A greenhouse too far from the house gets skipped; daily venting, watering, and monitoring require easy access. |
| Permits and zoning come first | Check local setback rules, HOA covenants, and permit requirements before purchasing or building. |
Ready to put these principles into practice? Gridwiseliving offers a full range of backyard greenhouse kits built for homeowners who want durable, practical structures that work with their site, not against it. From compact cedar-frame models to heavy-duty aluminum walk-ins, there’s a kit sized for the spot you’ve already scouted.
