

How to Winterize a Backyard Greenhouse Before First Frost
Seal every draft, add insulation where light loss won’t hurt, stack in some thermal mass, cut back watering, and stage your heating and backup systems before the first frost hits. That five-part sequence is the entire job. Do those steps in that order and most winter crops in a backyard greenhouse survive the cold just fine.
Here’s the fast version, if you’re standing in your greenhouse right now wondering where to start:
- Weatherstrip doors and vents, then seal skirt gaps and conduit penetrations
- Insulate the north wall and end walls first, glazing only where light loss is acceptable
- Add a moderate amount of water in barrels or similar thermal mass for nighttime buffering
- Set up gentle air circulation and cut watering frequency to reduce fungal risk
- Drain and protect irrigation lines, then test heaters, thermostats, and freeze alarms
Start this two to six weeks before your local first-frost date, adjusting for your hardiness zone. The University of Missouri Extension notes that most crops survive around 50°F (10°C), while cool-season crops tolerate down to 35 to 40°F. Cold-sensitive plants generally need temperatures above 55°F, which typically requires active heat, not just insulation.
Pro Tip: Seal before you insulate. A drafty door or an unsealed skirt gap will undo thousands of dollars in thermal screens. The heat you save through sealing is heat you never have to generate or pay for in the first place.
One caution up front: don’t over-insulate your glazing. Cover too much of it with bubble wrap or thermal screen and you starve your plants of the low winter sun they need to survive, even if the temperature holds steady. Gridwiseliving builds greenhouses with polycarbonate glazing specifically to balance that trade-off, since it insulates better than single-pane glass without you needing to bury it under layers of plastic.
Key Takeaways
Winterizing a backyard greenhouse works when you seal the structure first, add insulation and thermal mass second, then stage heating and monitoring as your final layer of protection.
| Point | Details |
|---|---|
| Seal before you insulate | Weatherstrip doors, foam-seal the skirt, and check for drafts before spending money on thermal screens. |
| Insulate selectively | Cover the north wall and end walls, but leave south-facing glazing clear to capture winter sun. |
| Moisture beats cold as the real threat | Water mid-morning, run circulation fans, and vent briefly on sunny days to prevent fungal disease. |
| Test your heating chain monthly | Run heater, thermostat, backup power, and freeze alarm together, not just individually. |
| Choose a structure built for winter | Gridwiseliving’s polycarbonate, aluminum-framed greenhouses reduce the sealing and insulating workload from the start. |
Table of Contents
- When Should You Start Your Winterize Backyard Greenhouse Guide Timeline?
- What Are the Core Steps to Winterize a Greenhouse?
- Which Insulation Materials Work Best for a Greenhouse?
- What Heating System Should You Use in a Backyard Greenhouse?
- How Much Ventilation Does a Greenhouse Need in Winter?
- How Should You Adjust Watering in Winter?
- How Do You Protect a Greenhouse From Snow and Wind?
- What Should You Monitor Through Winter?
- How Much Does It Cost to Winterize a Greenhouse?
- Can Compost or Hotbeds Replace Active Heating?
- Why Sealing and Moisture Control Come Before Everything Else
- Get a Winter-Ready Greenhouse Instead of Retrofitting an Old One
- Frequently Asked Questions
- Sources
When Should You Start Your Winterize Backyard Greenhouse Guide Timeline?
Your timeline starts with one number: your local first-frost date. Look it up through your regional extension office or a frost-date calculator, then work backward from there. Everything else in your winterize backyard greenhouse guide hinges on that single date.
Here’s how the schedule breaks down in practice:
- Six weeks before frost: Inspect the structure, order any parts you’re missing (weatherstripping, thermal screen, heat tape), and book a heater service check if you’re running propane or hydronic systems.
- Three to four weeks before frost: Seal every gap you can find, install thermal screens or bubble wrap where you’ve decided it belongs, and finish structural reinforcement.
- One to two weeks before frost: Install thermal mass, test your heaters and thermostats under load, drain and protect irrigation lines, and confirm your freeze alarm is actually sending alerts to your phone.
Zone matters more than most guides admit. In USDA zones 7 through 9, you might delay active heating setup until late fall since nights stay above freezing longer. In zones 3 through 5, you need heaters staged and tested by early October, because a single hard freeze can arrive before Halloween in a bad year.
- Milder zones: focus spending on sealing and passive thermal mass; heating may only run on the coldest nights
- Cold zones: budget for a heater that runs nightly for months, plus a genuine backup power plan
- Transitional zones (6 to 7): a hybrid approach works best, thermal mass for most nights, heat reserved for cold snaps
Build in buffer time. Heat tape sells out fast once the first cold forecast hits the news, and propane heater tune-ups get booked solid. Order parts before you actually need them, not after a frost warning shows up on your weather app.
What Are the Core Steps to Winterize a Greenhouse?
The order matters here almost as much as the tasks themselves. Work through structure first, then sealing, then insulation, then irrigation, then air, then heat.
- Clear out and deep clean. Remove dead plants, empty pots, and any debris that harbors pests over winter. Disinfect benches and wash glazing inside and out, since dirty panels can block a meaningful share of the low winter sun you’re trying to capture.
- Inspect the structure. Check framing for rust or rot, look at every glazing panel for cracks, and test each anchor bolt. Tighten fasteners and reseat any loose polycarbonate panels now, not after the first windstorm.
- Seal every gap. Weatherstrip doors, add foam closure strips along the base skirt, and reseal vents and any conduit penetrations where wiring or pipes pass through the wall. A smoke pencil or a lit candle held near seams will show you exactly where air is escaping.
- Add insulation strategically. Bubble wrap or thermal screens go on the north wall, end walls, and around benches, not across every pane of glazing you own.
- Protect irrigation. Drain exterior lines, install heat tape or freeze-proof valves on anything that stays outdoors, flush drip systems so they don’t crack from ice expansion, and label every shutoff valve so you’re not guessing during an emergency.
- Adjust ventilation. Set automatic vent openers to trigger during sunny daytime hours and install a horizontal airflow fan to keep air moving without creating cold pockets.
- Stage your heating. Pick a heater sized for your square footage, set your thermostat, and arrange backup power or a generator trigger in case the grid goes down during a storm.
- Install a freeze alarm. A phone-alert temperature alarm is the cheapest insurance policy you’ll buy all season.
- Weatherstripping and foam tape run under $30 and take an afternoon
- A smoke pencil costs about the same as a cup of coffee and saves you guessing where drafts originate
- Reseating a polycarbonate panel takes ten minutes with the right screwdriver and no special skill
Pro Tip: Test your heater and freeze alarm together, on purpose, before the first cold night. Turn the heater off, let the temperature drop, and confirm the alarm actually fires and the alert actually reaches your phone. Discovering a dead alarm battery during a hard freeze is how greenhouse owners lose an entire season’s crop in one night.
Combustion heaters (propane, natural gas, kerosene) need dedicated ventilation and carbon monoxide detection, full stop. Never run an unvented combustion heater inside an enclosed greenhouse. Keep any heater at least three feet from plants, benches, and anything flammable, and have your electrical circuits checked if you’re running heaters, fans, and lighting off the same panel.
Which Insulation Materials Work Best for a Greenhouse?
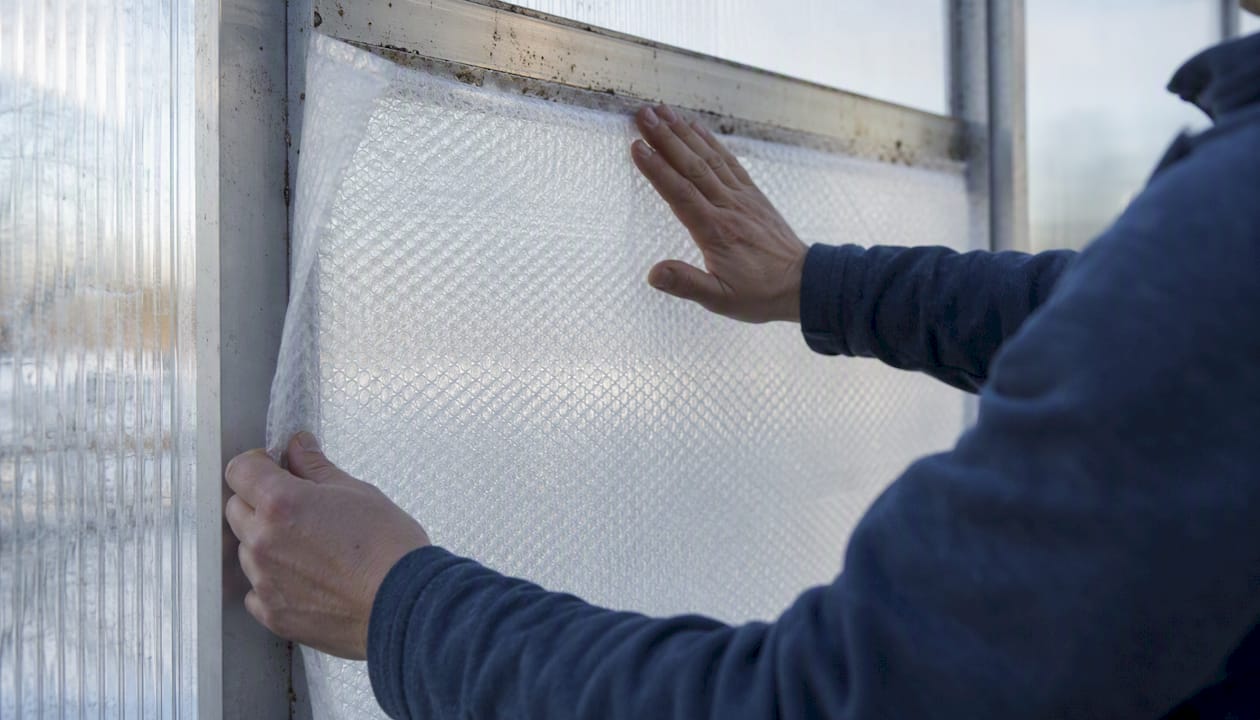
Every insulation option trades light for warmth, and the right choice depends on where in the structure you’re applying it. The RHS notes that a single layer of bubble wrap or clear plastic typically cuts light by around 10 percent while meaningfully improving heat retention, which is a fair trade on a north wall but a bad one across your main south-facing glazing.
| Material | Light loss | Cost | Best use |
|---|---|---|---|
| Bubble wrap | Moderate (roughly 10% per layer) | Low | North wall, end walls, temporary winter use |
| Double poly (inflated) | Low to moderate | Low to medium | Full structure on hoop houses and poly tunnels |
| Twin-wall polycarbonate | Low, built into the glazing itself | Medium to high | Permanent glazing replacement, year-round use |
| Night thermal screens | None during the day (retracted) | Medium to high | Automated nightly coverage on larger structures |
Where you place insulation matters as much as which material you pick. The north wall and end walls get the heaviest treatment since they capture the least useful winter light anyway. Benches and internal plant tunnels benefit from a second layer of protection close to the plants themselves, which is often more efficient than trying to heat the whole structure evenly.
Thermal mass does a different job entirely. Water barrels, stacked stone, or masonry absorb heat during the day and release it slowly overnight, flattening out the worst temperature swings. A rough rule of thumb: 55 to 200 gallons of water, painted a dark color to absorb more solar heat, positioned where they get direct sun and stay clear of walkways. Water is dramatically better at this than stone for the same footprint, since it holds far more heat per gallon than an equivalent volume of masonry.
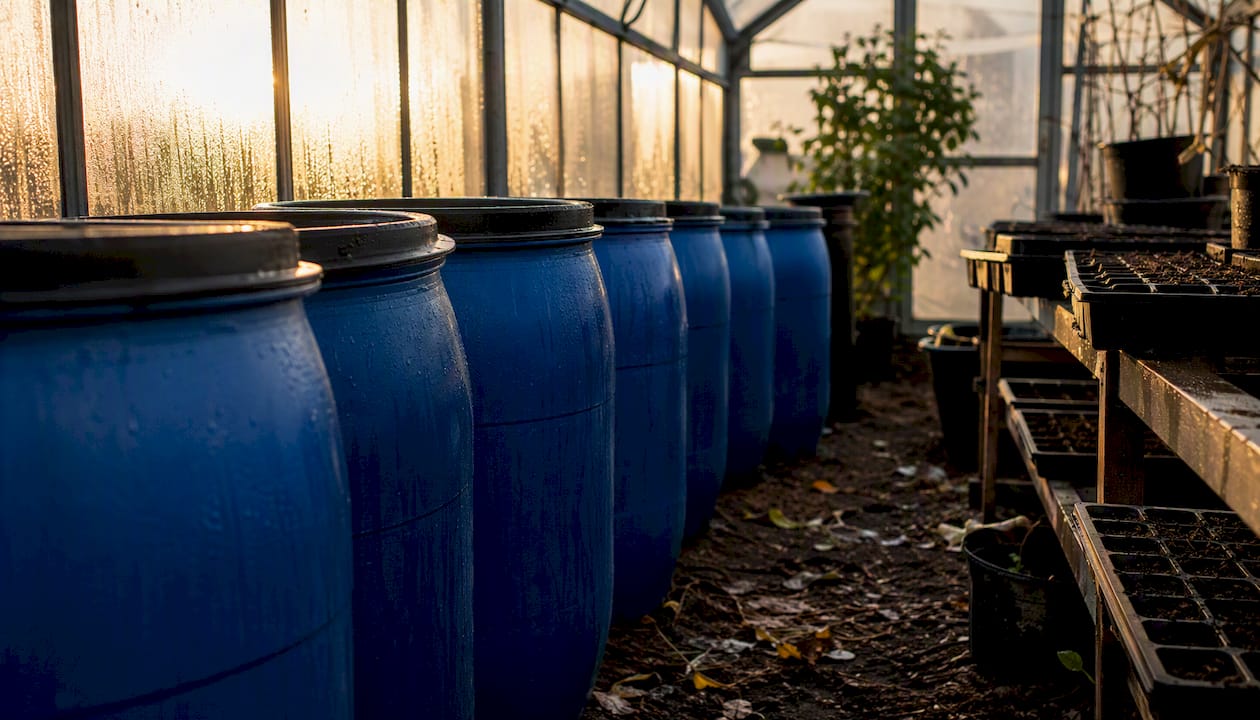
Secure barrels against tipping, especially near benches or foot traffic. If you’re protecting tender seedlings, a temporary inner tunnel made from clear poly over hoops, sometimes called a “greenhouse within a greenhouse,” adds another buffer layer without insulating your entire structure.
Pro Tip: Apply insulation selectively on the north and west walls, then open or remove it on sunny winter days. Full-time insulation on every surface blocks the free solar gain you get for nothing on a clear February afternoon.
What Heating System Should You Use in a Backyard Greenhouse?
Match the heater to your structure size, your crop’s temperature needs, and your fuel access, not just whatever’s cheapest at the hardware store.
- Electric fan heaters work well for small to mid-size hobby greenhouses with reliable grid power nearby; no ventilation concerns, but they’re expensive to run continuously in a hard freeze.
- Tube heaters distribute gentle, even heat along benches, good for seed-starting zones where you want warmth without blasting air directly on foliage.
- Hydronic systems circulate heated water through pipes for even, low-maintenance warmth in larger structures, but installation cost is higher upfront.
- Propane or paraffin heaters deliver strong heat output per dollar but absolutely require outdoor ventilation and carbon monoxide monitoring.
- Standard space heaters can work in a pinch for small structures but were rarely designed for humid greenhouse conditions and can fail early.
Sizing a heater roughly means calculating your greenhouse’s square footage and glazing type, then checking manufacturer BTU charts against your coldest expected outdoor temperature. When in doubt, size up and run the heater at a lower setting; an undersized heater working flat out all night is far more likely to fail exactly when you need it most.
- Install a max/min thermometer to track your coldest and warmest points over 24 hours.
- Set your thermostat with a differential of a few degrees so the heater isn’t cycling on and off constantly.
- Choose setpoints by crop: roughly 35 to 40°F for frost-tolerant cool-season crops, 55°F or higher for tender plants and starts.
- Install a freeze alarm with phone notifications as a backstop to your thermostat.
- Test your backup power source, whether a generator or a battery system, on a schedule, not just when a storm is forecast.
Pro Tip: Run a monthly test of your entire heating chain: heater, thermostat, backup power, and alarm, together, as a system. Individual components rarely fail in isolation, but a dead battery in your alarm combined with a tripped breaker on your heater is exactly the kind of double failure that happens during a real cold snap.
Carbon monoxide monitoring is non-negotiable with any combustion heater. Keep clearances around heaters, check gas lines and connections each season, and never run a generator inside the greenhouse itself, even during a power outage.
How Much Ventilation Does a Greenhouse Need in Winter?
Winter ventilation matters just as much as summer ventilation, only for different reasons. Condensation builds on cold glazing overnight, and stagnant, humid air is exactly what fungal diseases like botrytis need to take hold. A completely sealed greenhouse in winter is a greenhouse setting itself up for a mold problem by February.
Horizontal airflow (HAF) fans solve this without dumping your hard-won heat outside. Rather than exhausting air like a summer cooling fan would, HAF fans create a gentle, continuous loop that keeps warm and cool pockets from forming in corners and near the floor.
Open your automatic vents briefly on sunny days, even in the dead of winter, and run short venting bursts rather than leaving vents cracked for hours. A five to ten minute burst around midday lets built-up humidity escape without dragging your interior temperature down to match the outside air.
Do:
- Run a circulation fan continuously, even on cold nights
- Vent briefly during sunny midday hours to release humidity
- Use a hygrometer to track actual conditions rather than guessing
Don’t:
- Seal every vent shut for the entire winter
- Leave vents open for extended periods on cold, cloudy days
- Ignore visible condensation dripping from the roof structure
Pro Tip: Watch for dew forming on the underside of your glazing at dawn. That’s your earliest warning sign that humidity is running too high, well before you’d see any actual mold or mildew on your plants.
How Should You Adjust Watering in Winter?
Overwatering is the single most common mistake greenhouse owners make once temperatures drop, according to UMass Extension’s greenhouse floriculture guidance. Plants use far less water in low light and cool temperatures, so a summer watering schedule left unchanged through winter almost guarantees root rot and fungal disease.
Water mid-morning rather than evening, so foliage has hours of daylight to dry before nightfall. Slow, deep watering or drip irrigation beats a quick surface spray, since it delivers moisture to the root zone without leaving wet leaves and standing surface moisture that invite disease. Let the soil dry out more between waterings than you would in July; a moisture meter takes the guesswork out of this and is worth the modest cost.
Irrigation hardware needs its own winterizing pass. Drain every exterior line before the first hard freeze, flush drip systems to clear mineral buildup, and replace any hose that’s gone brittle with age. Test your shutoff valves now, while it’s still convenient, and label them clearly so you’re not hunting for the right valve during an actual emergency.
Heat tape can protect essential internal lines that must stay operational through winter, but keep electric heat tape away from standing water or wet zones, since that combination is a real electrical hazard.
Pro Tip: Chase root-zone temperature stability, not air temperature spikes. A soil moisture meter paired with a simple soil thermometer tells you far more about plant stress than watching the air temperature swing 20 degrees between noon and midnight.
How Do You Protect a Greenhouse From Snow and Wind?
Structural failure during a heavy snow or wind event is almost always preventable with an inspection done weeks earlier, not a scramble the night before a storm.
- Check every anchor bolt, frame joint, and fastener for looseness or corrosion.
- Inspect glazing panels for hairline cracks that a heavy snow load could turn into a full break.
- Add diagonal or ridge bracing if your structure sits in a location with regular heavy snowfall.
- Reinforce end walls, since they take the brunt of wind load on most greenhouse designs.
- Add guy wires on hoop-style structures for extra wind resistance.
- Reinforce door thresholds, which take repeated stress from opening and closing in freezing conditions.
- Snow removal on poly or fabric roofs: use a soft push broom from the ground, never climb onto a poly structure
- Snow removal on rigid polycarbonate or glass: a roof rake with a padded edge works from ground level in most cases
- Call a professional if snow accumulation exceeds your structure’s rated load or if you can’t safely reach it from ground level
Windbreaks matter more than most homeowners realize when siting a greenhouse. A row of shrubs or a fence on the prevailing wind side cuts heat loss significantly, and it’s far cheaper than compensating with a bigger heater every winter. Watch for frost pockets too. Low-lying areas where cold air settles overnight will run colder than the rest of your yard, driving up your heating costs for no reason other than poor placement. If you haven’t finalized your greenhouse location yet, choosing the right site before you build saves you money every winter after.
Clear snow away from exit paths and doors after every storm, and be careful on icy or snow-covered surfaces around the structure itself; a fall while trying to clear a roof is a far more common injury than any greenhouse failure.
What Should You Monitor Through Winter?
A short weekly routine catches problems while they’re still cheap to fix. Skip it, and you find out about a failed heater the same morning you find your tomato starts frozen solid.
- Check your max/min thermometer log for overnight lows and any unexpected spikes
- Confirm vents opened and closed on schedule
- Listen for the heater cycling normally, and check that the thermostat differential feels right
- Inspect irrigation lines and valves for any sign of freezing or leaks
- Look for early mold, mildew, or pest activity on leaves and soil surface
- Walk the exterior structure after any storm for loose panels or bent framing
- Max/min thermometer, tracks your coldest and warmest points automatically
- Hygrometer, measures humidity so you’re not guessing about mold risk
- Infrared thermometer, spot-checks surface temperatures on glazing and benches
- Soil moisture probe, keeps your watering schedule honest
- Temperature alarm with phone alerts, your last line of defense against a silent heater failure
Setpoints vary by what you’re growing. Leafy greens and root crops tolerate 35 to 40°F without complaint. Herbs generally prefer a slightly warmer 45 to 55°F range. Tender starts and any frost-intolerant seedlings need 55°F or higher consistently, which almost always means active heat rather than passive insulation alone.
A quick printable round: log temperature and humidity, check vents, confirm heater sound and thermostat setting, glance at soil moisture, walk the perimeter for storm damage. Five minutes, once a week, catches most problems before they become expensive.
How Much Does It Cost to Winterize a Greenhouse?
Costs scale with how much active heat you need, and that depends heavily on your zone and how tender your winter crops are.
- Low cost: Weatherstripping, foam closure strips, and basic sealing materials, usually under $50 total
- Low to medium cost: Bubble wrap or a basic thermal screen kit, generally $30 to $150 depending on structure size
- Low cost: Water barrels or other thermal mass, often just the cost of the barrels themselves if you’re filling them with a garden hose
- Medium cost: A basic electric heater with a thermostat, typically $100 to $400 for a hobby-size greenhouse
- High cost: Hydronic heating systems or a backup generator, often running into four figures depending on capacity
Time investment follows a similar pattern. Cleaning and sealing takes roughly a day for an average backyard structure. Installing insulation and thermal mass adds another one to two days. Staging and testing heaters takes a few hours once materials are on hand. After that, it’s ongoing weekly checks through the season, not another major project.
Prioritize spending in this order: sealing and irrigation protection are must-do before frost, since a burst pipe or an unsealed draft costs you more in the long run than any insulation upgrade. Thermal mass and night screens are good-to-do if your budget allows. Hydronic heating and full automation are genuine upgrades, worth considering once the basics are locked down, not before.
Can Compost or Hotbeds Replace Active Heating?
Hotbeds are one of the oldest tricks in greenhouse growing, and they still work. A hotbed is a raised bed filled with decomposing organic matter, traditionally fresh manure mixed with straw, that generates steady, low-grade heat as microbial activity breaks the material down. The University of Missouri Extension documents this as a genuine passive heating method, particularly effective for root crops and hardy greens that don’t need much more than frost protection.
- Dig or frame a bed roughly 18 to 24 inches deep.
- Layer fresh manure and straw at the bottom, tamping it down in stages as you fill.
- Top with 6 to 8 inches of growing medium once the base layer is packed.
- Insulate the sides of the bed with straw bales or rigid foam to hold heat in.
- Monitor temperature with a soil thermometer for the first week; a properly built hotbed often runs warm enough to plant into within several days as decomposition ramps up.
- Watch for overheating or anaerobic, sour-smelling zones, and turn or adjust the material if the bed runs hotter than expected or develops a foul odor.
A hotbed buffers root zones and extends your season for hardy crops, but it has real limits. It typically cannot carry frost-intolerant plants through a sustained deep freeze the way active heating can, and the heat output tapers off as decomposition slows over weeks. Pathogen risk is real with fresh manure, so keep it away from edible crop contact and let it compost sufficiently before planting directly into it. Ventilate the greenhouse if you’re running a hotbed inside an enclosed space, since decomposition can produce odors and moisture that need somewhere to go.
Pro Tip: Treat a hotbed as a supplement to your winter heating plan, not a replacement for it. It buys you real margin on cold nights for hardy crops, but tender starts and anything rated for temperatures above 55°F still need a backup heater on the coldest nights.
Why Sealing and Moisture Control Come Before Everything Else
The trade-offs in winterizing a greenhouse are rarely about finding the perfect product. They’re about sequencing effort correctly. Homeowners tend to reach for a heater first because it feels like the obvious fix for cold, but a leaky, unsealed structure will burn through heating dollars endlessly without ever solving the underlying problem.
Sealing gets prioritized first in this guide because it’s cheap, it’s fast, and it multiplies the value of every dollar you spend afterward on insulation or heat. Moisture control comes second for a less obvious reason: most winter crop losses aren’t from cold at all, they’re from fungal disease caused by stagnant, humid air sitting on wet foliage. A structure that’s slightly colder but well ventilated usually outperforms one that’s warmer but stagnant.
Structural choices matter more here than most guides admit. A rigid polycarbonate greenhouse with heavy-duty aluminum framing, the kind Gridwiseliving builds into its snow-load rated models, needs less seasonal sealing work than a poly-film hoop house because the glazing itself already insulates better and doesn’t flex and gap the way plastic sheeting does over a winter. A structure with an integrated powerport also removes one of the more annoying parts of winter prep: running extension cords across a wet path to power a heater or a backup alarm system.
None of this replaces the safety basics. Carbon monoxide monitoring and electrical load checks come before you ever plug in a heater for the season, regardless of how good your structure is. Test your systems on a mild weekend, not during the first real cold snap, so you find the weak link while fixing it is still convenient rather than urgent.
Get a Winter-Ready Greenhouse Instead of Retrofitting an Old One
If everything above sounds like a lot of retrofitting work on an aging structure, there’s a simpler starting point: buy a greenhouse built for winter from the beginning. Gridwiseliving’s heavy-duty aluminum and polycarbonate greenhouses come with roof vents already positioned for winter airflow bursts, reinforced anchoring for snow and wind load, and, on several models, an integrated powerport that lets you run a heater or backup alarm without stringing cords across a wet path.

That framing matters more in January than it does in the sales brochure. A polycarbonate panel insulates meaningfully better than single-pane glass or thin poly film, which means less bubble wrap, fewer thermal screens, and a smaller heater running fewer hours to hold the same temperature. The heavy-duty 10x32 aluminum polycarbonate model was built specifically with snow load and swing-door access in mind, which solves two of the structural headaches this guide walks through in detail. For a smaller backyard footprint, the Willow cedar and polycarbonate kit with powerport covers the same ground for a compact space.
Browse the full greenhouse collection and find the model that matches your growing goals and your climate before the next frost warning shows up on your phone.
Frequently Asked Questions
Will an unheated greenhouse keep my plants from freezing? Not reliably in most climates. Passive methods like sealing, insulation, and thermal mass raise your baseline temperature and buy you real protection on mild winter nights, but the University of Missouri Extension is clear that cold-sensitive plants need active heating once temperatures drop below roughly 55°F for extended periods.
How early should I start winterizing my greenhouse? Begin structural checks and material ordering about six weeks before your local first-frost date, then move through sealing, insulation, and heater testing over the following weeks so everything is finished a few days before that date arrives.
What’s the biggest mistake people make winterizing a greenhouse? Overwatering, by a wide margin. Plants need far less water in winter’s low light and cool temperatures, and wet foliage combined with stagnant air is the leading cause of fungal disease in an otherwise well-prepared structure.
Can I use a space heater in my greenhouse? A standard indoor space heater can work in a small structure for short-term use, but it wasn’t designed for humid greenhouse conditions and tends to fail earlier than purpose-built greenhouse heaters. Any combustion heater, including propane, needs outdoor ventilation and a working carbon monoxide detector.
How much light does bubble wrap insulation actually block? Around 10 percent per layer, according to the RHS, which is why it’s best applied to north walls and end walls rather than across your main light-collecting glazing.
What temperature should I keep my greenhouse at in winter? It depends on what you’re growing. Cool-season crops like kale and spinach tolerate 35 to 40°F, herbs generally do better around 45 to 55°F, and tender seedlings or frost-intolerant plants need 55°F or higher maintained consistently.
Do I need a backup power source for my greenhouse heater? If you’re growing anything frost-intolerant through a cold winter, yes. A power outage during a hard freeze without backup heat can wipe out weeks of growth in a single night, and a battery-based backup or generator with a tested trigger closes that gap.
Sources
- University of Missouri Extension: G6965
- UMass Greenhouse Floriculture: Hand watering greenhouse crops
- RHS: Heating greenhouses efficiently