

How to Assemble a Prefab Greenhouse Step by Step
Most homeowners can assemble a prefab greenhouse kit over one to three weekends, with basic carpentry skills and at least one helper. That’s the short answer. The longer one involves six phases you need to work through in order: site selection, foundation and base, frame assembly, panel installation, hardware and vents, and final sealing and anchoring. Skip or rush any phase and you’ll pay for it later with leaks, a racking frame, or a door that won’t close.
Small walk-in kits (under 6×8 ft) are genuinely solo-friendly and take a single weekend. Mid-size hobby kits (8×12 to 10×16 ft) go faster with two people and typically need two full days. Larger multi-bay structures often require a small crew of three or four and may push into a third day. Whatever the size, the first thing you do before picking up a single tool is open every box, count every part against the manufacturer’s parts list, and read the manual cover to cover. That one step prevents more assembly problems than any other.
Key Takeaways
Assembling a prefab greenhouse kit successfully comes down to sequencing: square the base before the frame goes up, follow the manufacturer’s order, and never overtighten panel fasteners.
| Point | Details |
|---|---|
| Inventory before you build | Open all boxes, count every part against the manual, and photograph parts before assembly begins. |
| Level and square the base | Both diagonal measurements must match before any uprights are installed. |
| Follow manufacturer sequence | Base → uprights → rafters → ridge → purlins → bracing; check plumb and level at each stage. |
| Never overtighten panel screws | Use oversized pilot holes and panel washers; snug, not cranked, prevents cracking and allows thermal expansion. |
| Size vents for the floor area | Target roughly 15% of floor area in vent opening; add thermostatic openers for passive climate control. |
| Gridwiseliving kits | Pre-cut frames, matched fasteners, and U.S. support make assembly faster and reduce rework risk. |
Table of Contents
- What tools and materials do you need before you start?
- How do you pick the best site and plan your layout?
- What foundation options work best for a prefab greenhouse?
- How to unpack, sort, and verify your kit before building
- How to assemble the frame: base through ridge and bracing
- How do you install polycarbonate panels without cracking or leaking?
- How to install doors, vents, latches, and gutters
- Setting up ventilation, climate control, and exterior finishing
- Common assembly mistakes and how to fix them
- Seasonal maintenance that keeps your greenhouse performing for years
- When should you hire a professional, and what permits do you need?
- Final pre-plant readiness checklist
- How to connect an irrigation or watering system
- Gridwise Living’s practical view on prefab greenhouse kits
- Gridwise Living greenhouse kits make assembly straightforward
- Sources
What tools and materials do you need before you start?
Getting the right tools together before day one saves you from mid-build hardware store runs. Prefab kits rarely include everything you need.
Essentials:
- Tape measure (25 ft minimum)
- 4-ft and 2-ft levels
- Socket set and combination wrenches
- Cordless drill or impact driver with Phillips and hex bit sets
- Caulk gun and utility knife
- Rubber mallet
- Ladder (height matched to your kit’s ridge)
- Safety glasses and work gloves
- Hearing protection when using power tools
- Fall protection harness for roof work on kits taller than 8 ft
Nice to have:
- Battery impact driver (speeds up self-tapping screws considerably)
- Sawhorses for staging panels
- Ratchet straps to hold frame sections while you fasten them
- Speed square and chalk line
Hardware and consumables most kits don’t include:
- Butyl tape for horizontal panel overlaps
- Panel washers sized for polycarbonate thermal movement
- Stainless or corrosion-resistant self-tapping screws (buy extra)
- Exterior-grade silicone sealant and a UV-resistant caulk
- Zip ties for temporary cable management
- Extra washers in the panel screw size
Kit assembly documentation commonly specifies self-tapping screws and recommends using a powered screwdriver to drive them consistently without stripping.
Pro Tip: Buy corrosion-resistant fasteners from the start. Zinc-plated screws rust through in two to three seasons in humid climates, and replacing fasteners on an assembled frame is miserable work. Stainless or coated screws cost a few dollars more per box and last the life of the kit.
How do you pick the best site and plan your layout?
The right location does more for your greenhouse than any upgrade you can buy. Get this wrong and you’re fighting the sun, drainage, or your local building department for years.
The ideal site: full sun for at least six hours a day, well-drained soil or a prepared pad, easy access to a water source, and some natural shelter from prevailing winds. Orient the long axis east-west to maximize passive solar gain across the full day. A south-facing glazed wall captures the most winter light in the northern hemisphere, which matters if you’re growing year-round.
Slope and drainage are underrated. A site that pools water after rain will rot a wood base and corrode metal anchors faster than anything else. If your yard slopes, plan to cut and fill or build up the low side before you start. For detailed siting guidance, choosing the right backyard location covers orientation, drainage, and wind exposure in depth.
U.S. permit triggers to check early:
- Structures over a certain square footage (often 120–200 sq ft, but this varies by municipality)
- Permanent foundations attached to utilities or existing structures
- Electrical installations inside the greenhouse
- Setback requirements from property lines, fences, and neighboring structures
Call your local building office before you buy the kit. Bring the model name and dimensions. A five-minute call can save you from pouring a foundation that violates a setback rule.
Site prep checklist before assembly day:
- Pad leveled and compacted
- Base material (gravel or compacted rock) in place
- Utility locations marked (call 811 before digging)
- Staging area cleared for parts and panels
- Water and electrical access points confirmed
What foundation options work best for a prefab greenhouse?
The right base depends on kit size and your soil. Small kits can sit on a compacted gravel pad or a treated-wood perimeter frame. Large kits, especially those with permanent glazing and heavy snow loads, usually need a concrete slab or driven posts.
Family Handyman’s greenhouse build guide describes removing topsoil, compacting a rock base, and laying landscape fabric as a standard foundation practice that delivers drainage and a stable, level surface.
Building a treated-wood perimeter base (most common for hobby kits):
- Measure and mark the exact footprint of your kit using stakes and string lines.
- Use the 3-4-5 rule or a transit to confirm 90° corners before digging.
- Excavate 4–6 inches and compact the base with a hand tamper or plate compactor.
- Fill with compacted gravel for drainage.
- Lay pressure-treated 2×6 lumber around the perimeter, pre-drilling to avoid splitting.
- Check diagonal measurements corner to corner. Both diagonals must be equal before you fasten anything permanently.
- Attach sill anchor points per the kit’s anchor spacing guidance.
Gothic Premium greenhouse assembly documentation recommends using a transit or the 3-4-5 rule to confirm accurate right angles when positioning ground posts.
Pro Tip: Lock the wood perimeter frame with a temporary diagonal brace before you start stacking frame parts on it. A frame that shifts even half an inch throws off every panel and door alignment above it.
| Base type | Best for | Key advantage | Anchor method |
|---|---|---|---|
| Compacted gravel pad | Small walk-in kits | Fast, low cost, good drainage | Ground screws or driven stakes |
| Treated-wood perimeter | Small to mid-size kits | Easy to level and adjust | Anchor bolts through lumber |
| Concrete slab | Large or permanent kits | Maximum stability | Expansion anchors or embedded bolts |
| Driven ground posts | Soft soil, no excavation | No concrete needed | Posts driven to manufacturer depth |
How to unpack, sort, and verify your kit before building
Open every box before you touch a tool. Lay parts out by category on a tarp or in your staging area: frame sections, fasteners, panels, seals, and hardware. Then check every part count against the manufacturer’s parts list.
Inventory workflow:
- Photograph each category of parts before moving anything. This is your before-build record.
- Count fasteners by type and bag them separately, labeled by size.
- Cross-reference every part number against the parts list in the manual.
- Note any damaged or missing items immediately and contact customer service before starting assembly.
- Store the manual in a zip-lock bag or weather-safe folder at the job site.
Practical DIY guidance recommends photographing parts and retaining packaging and the manual until the build is complete. If a part fails or a warranty claim comes up, you’ll need those box labels and part numbers.
Keep all boxes until the final panel is in and the doors swing clean. Returns and replacement part requests go much faster when you have the original packaging.
How to assemble the frame: base through ridge and bracing
Frame assembly is where most DIY builds go wrong, usually because someone skips the squareness checks or rushes the rafter lifts. Work in the manufacturer’s recommended order and check alignment at every stage.
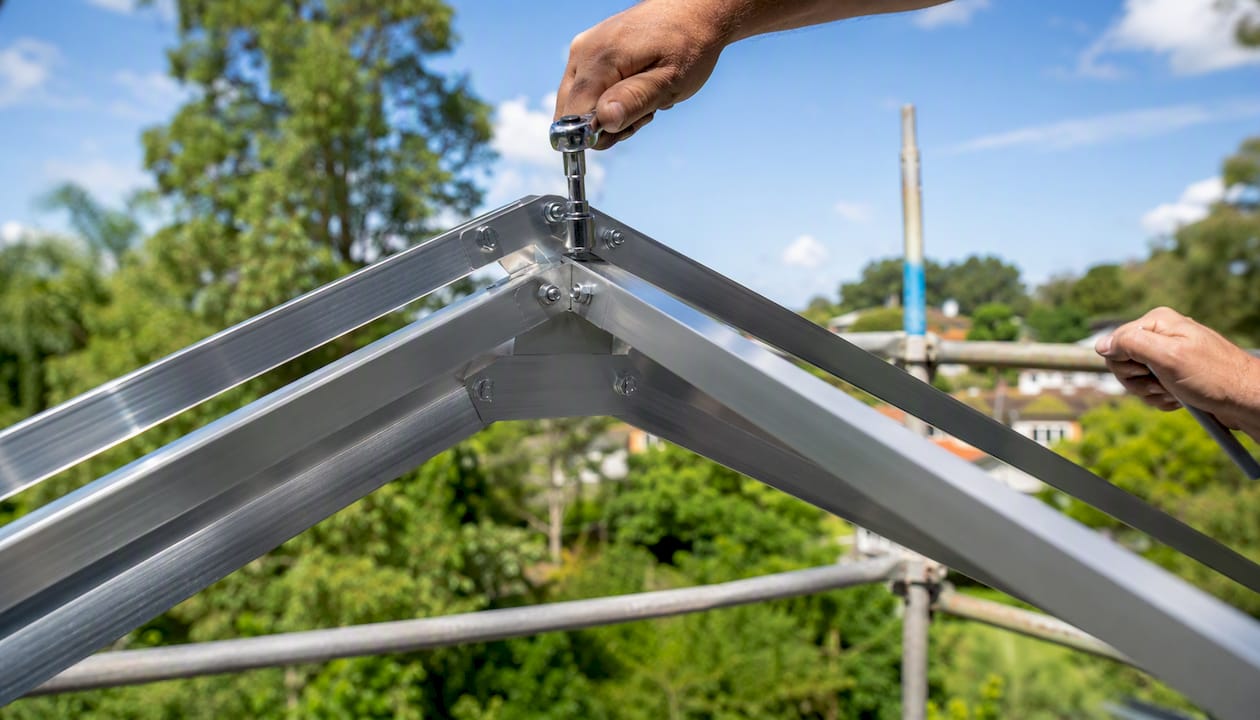
Commercial greenhouse assembly manuals recommend using string lines and diagonal measurements to square the building, pre-marking purlins before lifting, and using temporary bracing while raising rafters.
Frame assembly sequence:
- Attach base plates or sill channels to the foundation, checking level across all four sides.
- Stand uprights/ground posts and hand-tighten only. Check plumb with a level before final tightening.
- Install eave plates or side rails connecting the uprights. Recheck level.
- Measure diagonals at the base: both must match within 1/8 inch before you proceed.
- Lift and set rafters or trusses. Two-person lifts for anything over 6 ft span. Use temporary bracing to hold each rafter plumb until the ridge is in.
- Install the ridge beam, connecting to each rafter. Check that the ridge is level end to end.
- Add purlins (horizontal cross-members). Pre-mark spacing on the uprights before lifting purlins into position.
- Install diagonal bracing per the kit’s plan. Do not skip this step on exposed sites.
- Verify all connections, then torque fasteners to the manufacturer’s specification.
HomeSteady’s step-by-step greenhouse guide notes that building trusses on a flat platform and using templates for repetitive cuts keeps parts consistent and speeds the process significantly.
Safety callout: For kits with a ridge height above 10 ft, use scaffolding or a pump jack rather than a ladder for rafter work. A helper on the ground steadying the rafter while you fasten at the peak is not optional.
| Joint type | Recommended fastener | Notes |
|---|---|---|
| Base plate to foundation | Expansion anchor or anchor bolt | Per substrate type |
| Upright to base plate | Machine bolt with washer and nut | Torque to spec; recheck after first season |
| Rafter to eave plate | Self-tapping hex screw | Pre-drill aluminum; avoid overtightening |
| Purlin to rafter | Self-tapping screw | Snug, not cranked down |
| Ridge to rafter apex | Machine bolt or kit-specific connector | Follow manufacturer torque guidance |
Pro Tip: Don’t fully tighten any connection until the entire frame is standing and square. Snug everything first, check diagonals one more time, then make a second pass to final torque. Tightening as you go locks in any misalignment.
How do you install polycarbonate panels without cracking or leaking?
Panels are the most expensive part of your kit and the easiest to damage during installation. Slow down here.
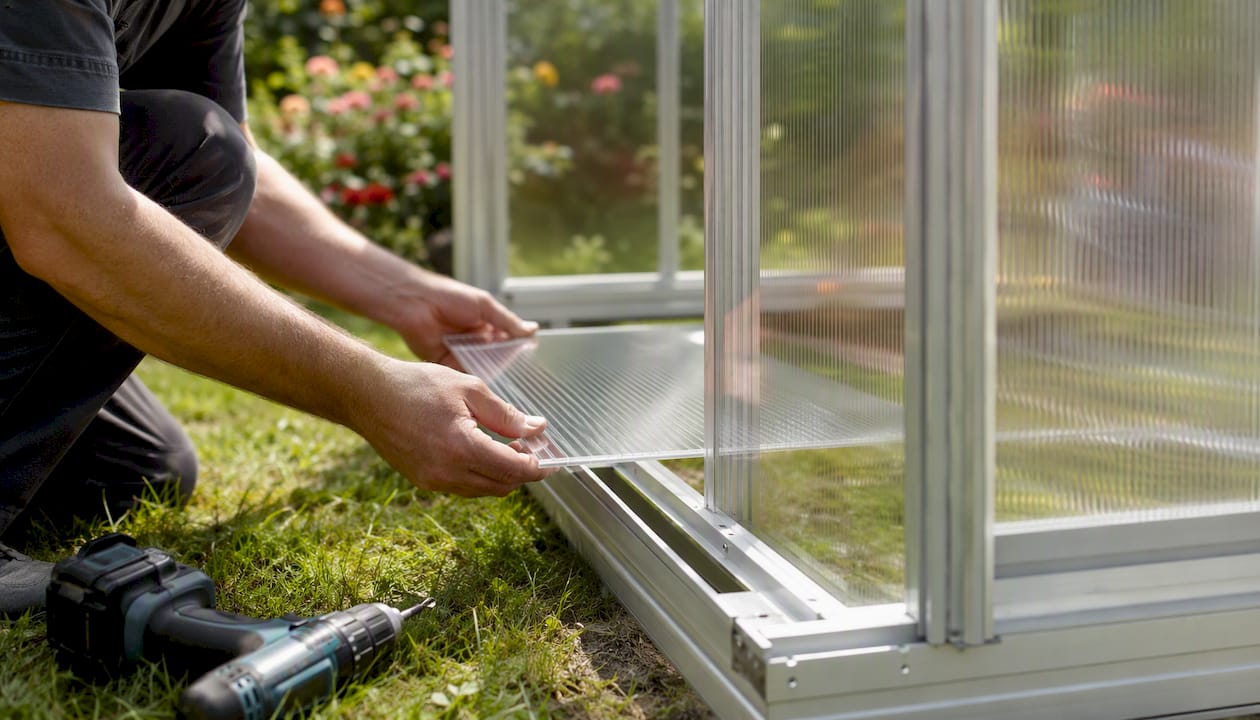
Kit documentation advises removing approximately 2 inches of protective film from sheet edges before installation and removing all remaining film immediately after construction to prevent adhesion or trapped moisture.
Panel installation checklist:
- Pre-fit panels on the ground before lifting. Confirm they drop into the glazing channels cleanly.
- Check the manufacturer’s orientation guidance. Multi-wall polycarbonate channels must run vertically so condensation drains out.
- Pre-drill pilot holes when required. Never drive screws into polycarbonate without a pilot hole.
- Use panel washers with neoprene gaskets. These distribute load and allow thermal movement.
- Seal end caps on the top edge of each polycarbonate sheet with aluminum tape before installing.
- Apply butyl tape or the manufacturer’s recommended gasket on horizontal overlaps.
- Leave the expansion gap the manual specifies. Polycarbonate expands and contracts with temperature, and a tight fit will buckle or crack.
- Avoid installing panels on windy days. Even moderate wind can flex a large panel enough to crack it or throw off alignment.
Store panels flat or standing upright against a wall until you’re ready to install. Laying them at an angle on an uneven surface causes warping that makes installation much harder.
Pro Tip: Use oversized pilot holes for polycarbonate panel screws, not snug ones. The hole needs to be large enough that the panel can slide slightly as it expands in summer heat. A screw driven tight into a snug hole will crack the panel within one season.
How to install doors, vents, latches, and gutters
Hang the doors before you seal the final panels around the door frame. That sequence gives you room to shim and adjust without fighting sealed glazing.
Door alignment steps:
- Set the door frame in the opening and check plumb and level on all four sides.
- Insert temporary shims at the hinge side to hold the door at the correct height.
- Hand-tighten hinge fasteners, then cycle the door open and closed several times.
- Adjust shims until the door swings freely and the latch engages without forcing.
- Final-tighten hinge fasteners and apply weatherstrip per the manufacturer’s guidance.
Vent types and placement:
- Manual louvers: best placed high on the end walls for stack-effect ventilation.
- Thermostatic (automatic) openers: mount on roof vents; they open at a set temperature without any power source. Reliable and low-maintenance for hobby setups.
- Powered exhaust fans: best for larger structures or hot climates; require an electrical connection.
For cross-ventilation, place intake vents low on the windward side and exhaust vents high on the leeward side or at the ridge. That temperature differential drives airflow even without a fan.
If your kit includes gutters and downpipes, attach them after the roof panels are sealed. Confirm downpipe outlets direct water away from the foundation. Rainwater collection from greenhouse gutters is legal in most U.S. states, and a simple barrel setup at the downpipe outlet gives you a free irrigation source.
Setting up ventilation, climate control, and exterior finishing
Ventilation and sealing are where most hobby greenhouse owners underinvest, and they pay for it with overheated plants in July and leaks in November.
Passive ventilation relies on ridge-and-soffit airflow: cool air enters low, warm air exits high. Most hobby kits fall short of that with their standard vent count, so adding one or two extra roof vents is worth considering.
Active options include thermostatic vent openers (mechanical, no power needed) and electric exhaust fans. For most hobby setups under 200 sq ft, two or three thermostatic openers on roof vents handle summer heat reliably. Set them to open at around 75°F and you’ll rarely need to think about them.
Finishing tasks in order:
- Seal all frame-to-panel joints with UV-resistant silicone or the manufacturer’s recommended sealant.
- Install drip edges and trim pieces at the eaves and ridge.
- Attach gutters and confirm downpipe drainage direction.
- Caulk any gap where the base frame meets the foundation.
- Install a thermometer and hygrometer inside so you can monitor conditions before planting.
Common assembly mistakes and how to fix them
The most predictable failures come from three sources: a base that isn’t square, panel screws driven too tight, and anchors that aren’t matched to the soil.
Frequent mistakes and one-line fixes:
- Base not square: Re-measure both diagonals and adjust the perimeter frame before any uprights go up.
- Panel screws overtightened: Replace cracked panels and switch to the correct washer-and-pilot-hole method.
- Wrong anchor type for soil: Pull existing anchors and upgrade to ground screws or driven posts matched to your soil type.
- Frame racking (leaning to one side): Add diagonal bracing per the kit plan; loosen connections, re-square, and re-tighten.
- Panel gaps at joints: Re-seat the panel in its channel and apply butyl tape or the recommended gasket.
- Door misalignment: Loosen hinge fasteners, shim to correct position, cycle the door, and re-tighten.
Anchoring and reinforcement guidance for exposed locations recommends adding extra anchors and reinforcing the frame for wind and snow loads, particularly in climates with heavy winter weather.
Safety callout on snow load: Check your kit’s rated snow load before the first winter. If heavy snow is likely in your area, clear the roof after significant snowfall and do not use the structure until you’ve confirmed it meets local snow-load requirements.
Seasonal maintenance that keeps your greenhouse performing for years
A twice-yearly inspection catches almost every problem before it becomes expensive.
Spring (before planting season):
- Inspect all anchor points and tighten any that have shifted.
- Check seals at joints and around door frames; re-apply sealant where cracking or gaps appear.
- Clean polycarbonate panels with mild dish soap and a soft brush. Avoid abrasive pads and high-pressure washers, both of which scratch the surface and accelerate UV degradation.
- Lubricate door hinges, latch mechanisms, and vent opener arms with a silicone-based lubricant.
Summer:
- Confirm ventilation is working. Verify thermostatic openers are triggering at the correct temperature.
- Add shade cloth if interior temperatures are regularly exceeding 95°F.
Fall/Winter:
- Clear snow from the roof promptly after heavy falls.
- Insulate vulnerable areas (door gaps, base perimeter) with foam weatherstrip if you’re growing through winter.
- Check anchors after the first hard freeze; frost heave can loosen ground screws.
Pro Tip: Keep a small spare parts kit in the greenhouse: a handful of panel screws, a few extra washers, a small tube of silicone, and a spare panel piece. Log maintenance dates in a notebook or phone app. When something fails two years from now, you’ll know exactly when you last inspected it.
When should you hire a professional, and what permits do you need?
Most small and mid-size prefab kits are genuinely DIY-friendly. The decision to hire a pro comes down to three factors: kit size, foundation type, and local code requirements.
Hire a professional when:
- The kit spans more than 16 ft and requires structural plans for the foundation.
- Local code requires a licensed contractor for electrical work inside the structure.
- The foundation is a poured concrete slab that needs a permit and inspection.
- The site requires grading, retaining walls, or drainage work beyond basic leveling.
Prefab kits remove many fit-and-function problems compared to raw-material builds, but large-span kits or those on permanent foundations can still exceed what a typical homeowner should tackle alone. For exterior structural work, professional installation services that handle anchoring and framing can be worth consulting when the job exceeds DIY scope.
Common U.S. permit triggers:
- Structures over 120–200 sq ft (threshold varies by municipality)
- Any permanent electrical installation
- Permanent plumbing connections
- Attachment to an existing permitted structure
- Poured concrete foundations in regulated setback zones
Pro Tip: Call your local building office with the kit’s model name and exact dimensions before you start. Most offices will tell you in five minutes whether you need a permit. That call also reveals setback requirements that could force you to move the site.
Final pre-plant readiness checklist
Before you bring in a single plant, run through this list.
- All anchor points tight and confirmed.
- Every panel joint sealed with no visible gaps.
- Roof vents open and close freely; thermostatic openers trigger at the set temperature.
- Door swings clean, latches without forcing, and weatherstrip seats fully.
- No sharp edges or loose fasteners anywhere inside.
- Any electrical connections installed to code or by a licensed electrician.
- Water supply confirmed safe (no cross-connections with non-potable sources).
- Thermometer and hygrometer installed and reading correctly.
- Shelving or benches secured to the frame, not just resting against panels.
- Emergency access path to the door is clear.
How to connect an irrigation or watering system
A drip irrigation system is the most practical watering setup for a hobby greenhouse. It delivers water directly to the root zone, reduces humidity at the leaf level (which cuts fungal disease), and runs on a timer so you don’t have to be there every day.
Basic drip system setup:
- Connect a main supply line to your outdoor spigot or a dedicated water line. Use a backflow preventer at the connection point to protect your home’s water supply.
- Run a 1/2-inch polyethylene main line along the length of the greenhouse, secured to the base frame or bench legs with line clips.
- Branch 1/4-inch micro-tubing from the main line to each planting bed or pot, using barbed fittings.
- Install drip emitters at each plant location. Match emitter flow rate to your plant type: most vegetables do well with 0.5–1 gallon-per-hour emitters.
- Add a battery-powered timer at the spigot connection. Set it to water in the early morning, which gives foliage time to dry before evening.
- Flush the system before connecting emitters to clear any debris from the lines.
If you’re pairing the greenhouse with an off-grid power setup, a small solar energy system can run a low-voltage pump and timer without tapping your home’s electrical panel.
For rainwater collection, connect a first-flush diverter to your downpipe before the collection barrel. This diverts the first few gallons of roof runoff (which carry the most debris and contaminants) and sends cleaner water to the barrel. Check your state’s rainwater collection rules before installing a large-capacity system.
Gridwise Living’s practical view on prefab greenhouse kits
Prefab kits have earned their place in the hobby gardening world for a straightforward reason: the engineering is already done. The parts are pre-cut, the connections are matched, and the instructions are written for homeowners rather than contractors. This removes a significant layer of risk that comes with raw-material builds, where a miscalculation in framing or glazing can mean wasted material and a structure that doesn’t perform as expected.
What Gridwiseliving consistently hears from customers is that three things matter most: hardware that holds up after the first winter, instructions that don’t require a second interpretation, and support when something doesn’t line up. Those priorities translate directly to assembly speed and safety. A kit with pre-drilled holes, color-coded parts, and a clear torque spec gets built faster and more accurately than one that leaves those decisions to the builder.
For any kit-specific question during your build, Gridwiseliving’s support team is reachable through Gridwiseliving and can help with part identification, missing hardware, or assembly sequence questions.
Gridwise Living greenhouse kits make assembly straightforward

Gridwiseliving’s greenhouse collection is built around one principle: a homeowner with basic tools and a free weekend should be able to complete the build without calling a contractor. The kits arrive with pre-cut aluminum frames, matched fasteners, and pre-drilled connection points that eliminate the guesswork that slows most DIY builds.
The 10×32 ft heavy-duty aluminum polycarbonate greenhouse is a strong example: roof vents and swing doors are included in the kit, the 4mm polycarbonate panels are pre-sized, and U.S.-based support is available if a part count doesn’t match or a connection point needs clarification. For smaller projects, the Harmony 6×4 ft DIY greenhouse kit is a genuine one-person weekend build.
Browse the full Gridwiseliving greenhouse collection to compare model specs, download assembly guides, and find the kit that fits your site and growing goals.
Sources
These references cover the technical details that vary by kit model and region. Consult them alongside your manufacturer manual.
- Gothic Premium Greenhouses
- How to Build a Greenhouse (DIY) | Family Handyman
- How to Build a Greenhouse: Step by Step for Beginners - The Home Steady
- Assembly Instructions