

Grow Food Year Round in a Greenhouse: A Practical Plan
You can produce fresh food year-round in a modest home greenhouse by matching crop temperature groups to seasonal light, insulating the structure properly, and applying simple climate-moderation tactics. Here is a basic step plan:
- Site your greenhouse on the south-facing side of your property with a good amount of direct winter sun.
- Glaze and insulate with a minimum of 8 mm twin-wall polycarbonate panels.
- Match temperature bands to crop groups: cold-hardy greens survive 25–30°F, cool-season crops need 32–40°F, and warm-season crops want 45–55°F or higher.
- Succession plant every two to three weeks to keep harvests continuous rather than feast-or-famine.
- Add thermal mass or a backup heater before your first hard frost to buffer overnight temperature swings.
Colorado State University Extension and Clemson HGIC both confirm that structure and scheduling decisions drive year-round success more than any single crop choice. Gridwiseliving offers greenhouse kits, seeds, and solar power options that map directly to each of these steps.
Table of Contents
- How does greenhouse structure actually enable year-round food production?
- How do you manage temperature for crops in every season?
- When do you need supplemental lighting, and how much?
- What should you grow each season, and how do you keep harvests continuous?
- What irrigation and fertility routines keep production steady?
- How do you prevent and manage pests and diseases year-round?
- How do you run daily operations and keep your layout working for you?
- What do the technical specs actually tell you about glazing and insulation?
- Seasonal task checklist and maintenance routines
- How should you prepare and amend greenhouse soil for continuous production?
- How do crop rotation and companion planting work inside a greenhouse?
- What do you do when extreme weather threatens your greenhouse?
- Key Takeaways
- Realistic expectations for a home grower doing year-round production
- How Gridwiseliving can help you get started
- Useful sources and extension resources for further reading
How does greenhouse structure actually enable year-round food production?
Year-round greenhouse gardening is primarily a design challenge. Get the structure right and crop selection becomes straightforward; for construction and insulation ideas, see going green. Get it wrong and no amount of clever planting will compensate for heat loss, condensation, or poor light.
Glazing options and their trade-offs
8 mm twin-wall polycarbonate is the minimum recommended thickness for year-round insulation in USDA Zones 3–6; for colder climates in Zones 3–5, use 16 mm multi-wall polycarbonate layered on the north wall and roof. Single-pane glass looks beautiful but loses heat roughly twice as fast. Plastic film hoop houses are cheap and effective for season extension, but they rarely hold enough heat for true winter production without significant supplemental heating.
Framing, sealing, and siting
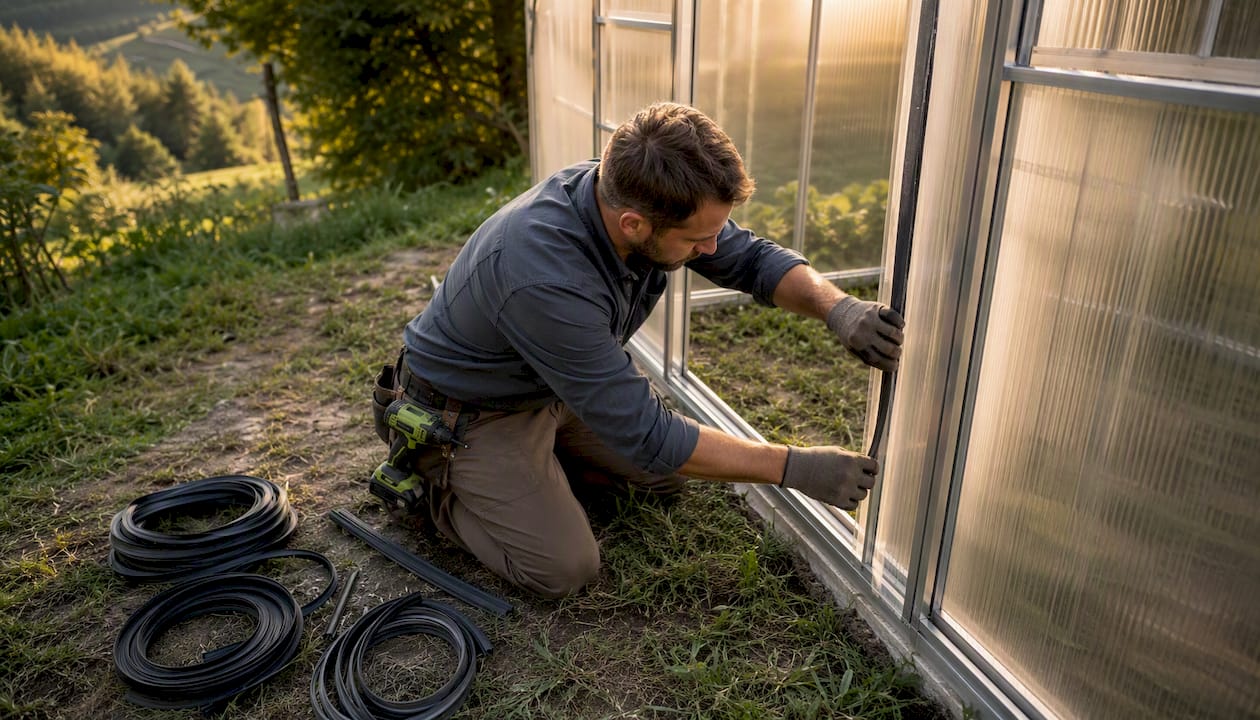
Aluminum framing resists rot and handles snow loads well. Wood framing offers better insulation at the joints but requires annual maintenance. Whichever you choose, airtightness matters more than most guides admit: a drafty greenhouse loses heat faster than a well-sealed one with thinner glazing. Seal every panel joint with foam tape before the first freeze.
For siting, orient the long axis east-to-west so the south-facing wall captures maximum winter sun. A windbreak on the north side, whether a fence, hedge, or building wall, cuts convective heat loss significantly. Read the detailed site-selection guidance before you pour a foundation or set posts.
Pro Tip: Paint the north interior wall white or line it with reflective film. That single change can increase usable light on your growing benches by a significant percentage during short winter days.
How do you manage temperature for crops in every season?
Crop temperature bands
Cold-hardy greens tolerate low temperatures, cool-season crops need moderately cool nights, and moderate-growth crops require warmer minimum temperatures. These temperature thresholds are the single most useful planning tool you have: they tell you exactly how much heat you need to buy or generate.
Forcing tomatoes or peppers through a northern winter is possible but rarely worth it for a home grower. CSU Extension research is direct on this point: winter production of warm-season fruiting crops is cost-effective only in highly energy-efficient structures with substantial solar collection. Stick to cold-hardy and cool-season crops in winter and save your warm-season bench space for spring.
Thermal mass: the underrated heat buffer
Several black-painted large water drums placed inside a greenhouse can store a meaningful amount of heat to buffer temperature swings, absorbing heat during the day and releasing it overnight. That buffering effect can reduce heater runtime by several hours on clear winter nights. Smaller structures can use dark-painted five-gallon buckets or stone pavers with similar logic.
Pro Tip: For a small greenhouse under 100 square feet, a single 1,500-watt electric infrared heater on a thermostat set to 35°F will protect cool-season crops on most nights in Zones 6–7 without running continuously. Pair it with a solar power kit to cut operating costs.
Summer cooling
Ventilation is the first line of defense. Roof vents should cover at least 15–20% of the floor area; side vents add cross-flow. A small oscillating fan keeps air moving on still days. Shade cloth rated at 30–50% cuts solar gain without blocking too much light for leafy crops. In dry climates, a simple evaporative cooler or wet-pad system drops interior temperatures by 10–15°F on hot afternoons.
When do you need supplemental lighting, and how much?
Temperature and daylength are separate problems. A greenhouse can be warm enough for growth but still too dark for productive yields. The Persephone Period, named by market gardeners for the stretch when daylight drops below about 10 hours, is when plant growth slows dramatically regardless of temperature. In most of the northern United States, this runs from late November through late January.
Leafy greens tolerate low light better than fruiting crops. Lettuce, spinach, and arugula can produce usable harvests with as little as 10–12 hours of combined natural and supplemental light. Tomatoes and cucumbers need 14–16 hours and higher intensity, making winter supplemental lighting for fruiting crops expensive and often impractical for small home setups.
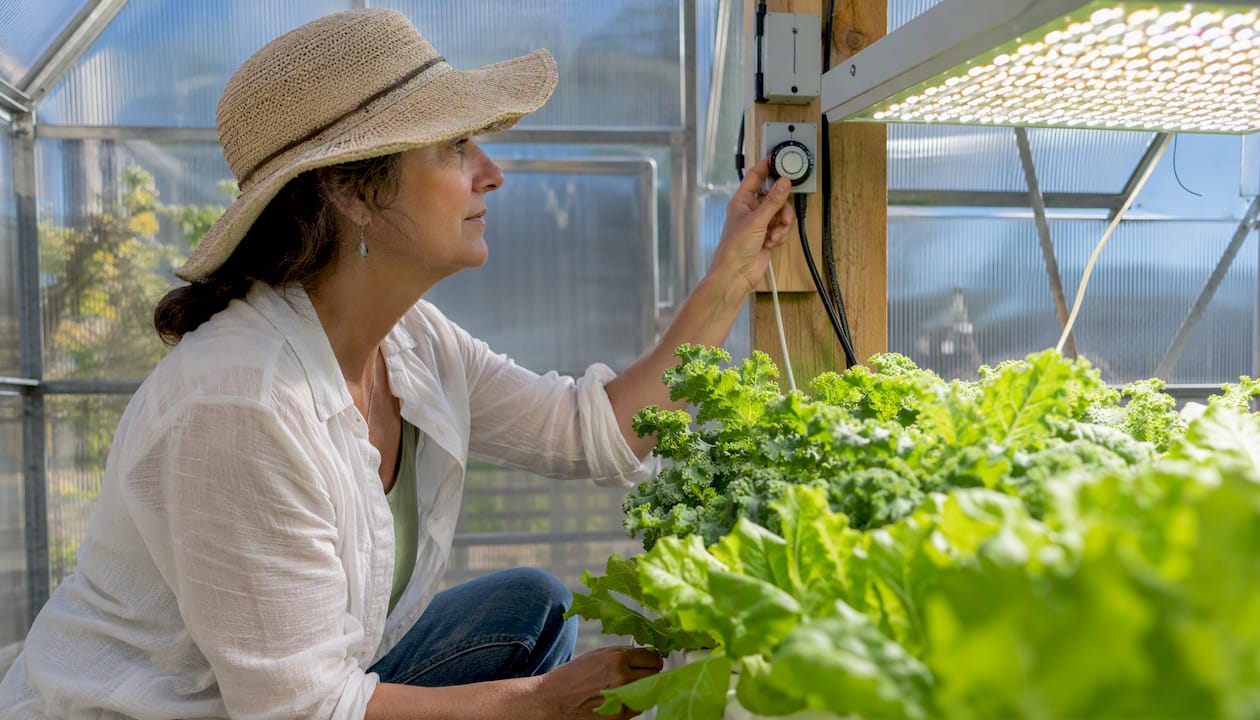
For greens, a simple T5 fluorescent or LED grow light positioned 6–12 inches above the canopy and run for 4–6 hours in the evening extends effective daylength cheaply. Full-spectrum LEDs draw less power and last longer. Succession planting records help you track which varieties performed during short-day months so you can repeat what worked.
Pro Tip: Use a simple plug-in timer for grow lights. Set it to run from 5 PM to 9 PM to extend the photoperiod without disrupting the natural morning light cycle, which many crops use as a germination cue.
What should you grow each season, and how do you keep harvests continuous?
Season-by-season crop plan
| Season | Crops to Prioritize | Temp Band | Days to Maturity / Sow Interval |
|---|---|---|---|
| Winter | Spinach, mâche, kale, arugula, claytonia | 25–40°F | 40–60 days; sow every 3 weeks |
| Spring | Lettuce, chard, peas, radishes, cilantro | 32–55°F | 25–45 days; sow every 2 weeks |
| Summer | Tomatoes, cucumbers, basil, beans, peppers | 45–55°F or higher | — |
| Fall | Brassicas, spinach, carrots, beets, leeks | 32–50°F | — |
Fast-maturing and multi-harvest crops like mixed greens, radishes, and kale are the backbone of a small greenhouse. They turn over quickly, tolerate cool temperatures, and give you something to harvest while warm-season crops are still establishing.
Succession planting on a 4x8 bench
Divide a single 4x8 bench into four two-square-foot blocks. Sow block one with lettuce mix on week one. Sow block two on week three. Transplant a tomato start into block three in late March. Keep block four as a nursery tray zone for germinating the next round. Rotate: when block one is harvested and cleared, it becomes the new nursery zone. This staggered approach keeps at least one block in active harvest at all times.
- Sow microgreens seeds in trays as a fast-turn filler crop between successions (7–14 days to harvest).
- Time fall sowings to reach near-maturity before the Persephone Period begins in your zone.
- Use days-to-maturity on seed packets as your planning anchor, counting backward from your target harvest date.
What irrigation and fertility routines keep production steady?
Hand-watering works fine for greenhouses under 150 square feet if you check moisture daily. The problem is consistency: a missed day in summer heat can stress crops irreversibly. A simple drip system on a battery-powered timer costs under $50 and removes that risk entirely. For raised beds and growbags, check moisture at two-inch depth before watering; containers dry out faster than in-ground beds.
Substrate choice shapes everything downstream. A mix of one-third compost, one-third perlite, and one-third quality potting mix drains well, holds nutrients, and supports root health across seasons. Avoid garden soil in containers: it compacts, drains poorly, and carries pathogens.
For fertility, a simple monthly rhythm works:
- January–February: No feeding for cold-hardy crops in slow growth; light liquid kelp if plants look pale.
- March–May: Begin monthly balanced organic fertilizer as growth accelerates.
- June–August: Feed fruiting crops every two weeks with a higher-phosphorus formula; leafy greens monthly.
- September–November: Taper feeding as daylength shortens; one application of organic cottonseed meal works well as a slow-release nitrogen source heading into fall.
Test soil pH each spring. Greenhouse soils tend to acidify over time with repeated watering and fertilizing. Target pH 6.0–6.8 for most vegetables.
Pro Tip: Add a container gardening approach using growbags for tomatoes and cucumbers. They’re easy to replace between seasons, which breaks pest and disease cycles without full bed renovation.
How do you prevent and manage pests and diseases year-round?
The greenhouse environment that accelerates plant growth also accelerates pest reproduction. Aphids, whiteflies, and spider mites cycle faster indoors than out. Powdery mildew and Botrytis (gray mold) spike in winter when humidity is high and airflow is low.
Prevention first:
- Space plants so leaves do not touch between rows.
- Run a small fan continuously to maintain air movement, especially overnight.
- Remove dead or yellowing leaves immediately; they are the primary entry point for Botrytis.
- Inspect the undersides of leaves weekly; aphid colonies establish fast in warm corners.
- Wipe down benches and trays with diluted hydrogen peroxide between successions.
Poor airflow in winter directly contributes to powdery mildew and Botrytis outbreaks, and the damage spreads faster when plants are touching. Resist the urge to fill every inch of bench space from November through January.
For remediation, insecticidal soap handles aphids and whiteflies on contact. Neem oil works against spider mites and early-stage powdery mildew. Remove heavily infected plants entirely rather than treating in place when more than 30% of the foliage is affected; the disease load is rarely worth the risk to neighboring crops.
Pro Tip: Yellow sticky traps hung at canopy height give you an early-warning system for whiteflies and fungus gnats. Check them weekly and replace monthly.
How do you run daily operations and keep your layout working for you?
A 15-minute daily routine beats a two-hour weekend session for continuous harvests. Daily tasks: check temperature and humidity, water where needed, harvest anything ready, and remove dead material. That is it. Weekly, spend 30 minutes checking for pests, reviewing succession timing, and noting what needs to be sown or transplanted.
Layout principles
Place the tallest crops (tomatoes, cucumbers on vertical strings) on the north side so they do not shade shorter crops. Keep a dedicated propagation zone near the door where light is lower and foot traffic is highest. Pathways should be at least 18 inches wide for comfortable access and airflow.
For record-keeping, a simple notebook or spreadsheet with four columns does the job: variety, sow date, expected harvest date, and actual yield. After one full year, those records tell you exactly which varieties performed in your specific greenhouse during the Persephone Period, which is worth more than any general planting guide.
Pro Tip: When turning over a bed between successions, add two inches of fresh compost before replanting. It takes three minutes and eliminates the need for immediate fertilizing on the new planting.
What do the technical specs actually tell you about glazing and insulation?
Most guides mention polycarbonate without specifying thickness. The difference between 4 mm and 8 mm is not cosmetic: 8 mm twin-wall polycarbonate is the minimum recommended glazing for year-round production in USDA Zones 3–6, and 16 mm multi-wall panels on the north wall and roof meaningfully reduce heat loss in colder zones.
| Crop Group | Min. Night Temp | Glazing Needed | Supplemental Heat? |
|---|---|---|---|
| Cold-hardy (spinach, kale, mâche) | 25–30°F | 8 mm twin-wall minimum | Rarely, in Zones 6–7 |
| Cool-season (lettuce, chard, brassicas) | 32–40°F | 8 mm twin-wall | Yes, in Zones 4–5 |
| Moderate-growth (herbs, cucumbers) | 45–55°F | 16 mm or double-wall | Yes, most zones |
| Warm-season fruiting (tomatoes, peppers) | — | 16 mm + active heating | Yes, all zones in winter |
The thermal mass math is worth understanding once. A 12x20 greenhouse with 6–8 black-painted 55-gallon water drums stores approximately 14,000 BTUs per 30°F temperature swing. On a clear winter night, that buffering capacity can carry the interior temperature through several hours of cold without the heater firing. On a cloudy stretch, it buys you time but does not replace a heater.
CSU Extension is clear that forcing warm-season fruiting crops through winter in a hobby greenhouse is rarely cost-effective without high energy-efficiency structures and substantial solar collection. The practical takeaway: grow cold-hardy and cool-season crops in winter, use thermal mass to reduce heating costs, and save your energy budget for spring startup.
Seasonal task checklist and maintenance routines
Spring (March–May)
- Clean glazing panels inside and out to maximize light transmission.
- Inspect and repair any cracked or loose panels before temperatures rise.
- Start warm-season transplants indoors or in a heated propagation zone.
- Begin succession sowing of lettuce, radishes, and peas every two weeks.
- Service ventilation fans and check thermostat calibration.
Summer (June–August)
- Install shade cloth (30–50%) by late May in most U.S. zones.
- Check roof vents daily; open fully on days above 80°F.
- Water fruiting crops deeply every one to two days; monitor for heat stress.
- Scout for spider mites weekly; they thrive in hot, dry conditions.
- Harvest cucumbers and beans frequently to keep plants producing.
Fall (September–November)
- Remove summer crops as they decline; clean beds and add compost.
- Sow cold-hardy greens 8–10 weeks before your expected first frost date.
- Add or refill thermal mass water drums before the first hard freeze.
- Seal any glazing gaps identified during summer; check door seals.
- Reduce watering frequency as temperatures and growth rates drop.
Winter (December–February)
- Monitor nighttime temperatures with a min/max thermometer; adjust heater thermostat as needed.
- Water sparingly; most cold-hardy crops need water only every five to seven days.
- Harvest outer leaves of kale and chard rather than whole plants to extend production.
- Check for Botrytis and powdery mildew weekly; remove affected material immediately.
- Plan spring successions and order seeds before February.
How should you prepare and amend greenhouse soil for continuous production?
Greenhouse soil degrades faster than garden soil. Repeated watering leaches nutrients, pH drifts acidic, and pathogen pressure builds when the same crops grow in the same beds year after year. Address this proactively rather than reactively.
Each season, remove the top two to three inches of existing bed mix and replace with fresh compost. This single practice refreshes microbial activity, improves drainage, and dilutes any accumulated salt from fertilizers. For raised beds, a complete mix refresh every two to three years prevents the compaction and pathogen buildup that accumulates in permanent greenhouse beds.
Test pH each spring with an inexpensive soil test kit. Most vegetables perform best between pH 6.0 and 6.8. If pH drops below 5.8, work in agricultural lime at the rate your test recommends. For nitrogen, feather meal is a slow-release organic option that feeds steadily over several months without the salt load of synthetic fertilizers.
Perlite or coarse sand mixed into heavy beds at 20–25% by volume improves drainage and prevents the waterlogging that kills roots in winter when evaporation is slow. In containers and growbags, replace the entire mix between crop cycles rather than amending in place.
How do crop rotation and companion planting work inside a greenhouse?
Crop rotation in a small greenhouse is constrained by space, but the principle still applies. Avoid growing the same plant family in the same bed in consecutive seasons. Tomatoes and peppers (Solanaceae) should not follow each other in the same container or bed; rotate them to a fresh spot or replace the growing medium entirely.
A practical three-zone rotation for a small greenhouse: zone one for fruiting crops (tomatoes, cucumbers, peppers), zone two for leafy greens and brassicas, zone three for root crops and herbs. Rotate zones each season. This simple system breaks pest and disease cycles without requiring a large footprint.
Companion planting works in greenhouses with some adjustments. Basil planted near tomatoes deters aphids and improves flavor. Marigolds in containers near the door reduce whitefly pressure. Nasturtiums act as trap crops for aphids, drawing them away from more valuable plants. The key difference from outdoor companion planting: greenhouse companions need to fit within your bench space without shading shorter crops, so keep tall companions on the north side.
What do you do when extreme weather threatens your greenhouse?
A hard freeze warning, a heat dome, or a major wind event each require a different response. Having a protocol ready before the emergency is the difference between losing a crop and losing a season.
For extreme cold (below 15°F forecast):
- Add a second layer of bubble wrap or floating row cover inside the greenhouse over sensitive crops.
- Fill any empty thermal mass containers with water the day before.
- Run the heater at a higher setpoint (40°F instead of 35°F) for the duration of the event.
- Have a backup propane or kerosene heater ready if your primary heat source is electric and power outages are possible. A home backup power station can keep a small electric heater running through a short outage.
For extreme heat (above 100°F forecast):
- Open all vents and doors by 7 AM before temperatures climb.
- Hang additional shade cloth or whitewash the glazing temporarily.
- Run a misting system or place wet burlap over benches to add evaporative cooling.
- Water crops in the early morning only; afternoon watering in extreme heat can scald roots.
For high winds or structural threats:
- Inspect and tighten all panel fasteners before storm season each fall.
- Remove shade cloth before high-wind events; it acts as a sail and can damage framing.
- Keep a roll of greenhouse repair tape on hand for emergency panel cracks.
Key Takeaways
A well-insulated greenhouse with 8 mm twin-wall polycarbonate glazing as the baseline, and 16 mm layering on the north wall or roof in USDA Zones 3–5, matched crop temperature groups, and a consistent succession-planting schedule is the most reliable path to continuous harvests for home gardeners in the United States.
| Glazing is the foundation | Use at least 8 mm twin-wall polycarbonate; upgrade to 16 mm on the north wall or roof in USDA Zones 3–5. | Temperature bands drive crop choice | Cold-hardy crops survive 25–30°F; cool-season crops need 32–40°F; warm-season crops need 45–55°F or higher. | | Thermal mass reduces heating costs | Several large black water drums in a greenhouse store a notable amount of heat to buffer temperature swings. | | Succession planting prevents gaps | Sow new batches of greens regularly every few weeks; time fall sowings to reach near-maturity before the Persephone Period. | | Gridwiseliving for implementation | Greenhouse kits, organic fertilizers, seeds, and solar power options from Gridwiseliving map directly to each step in this guide. |
Realistic expectations for a home grower doing year-round production
Year-round greenhouse growing is genuinely achievable, but the gap between “achievable” and “effortless” is real and worth naming. A modest 8x12 or 10x16 greenhouse, properly insulated and sited, will produce fresh greens through a northern winter. It will not replace your grocery store. What it will do is give you salad greens, herbs, and cold-hardy vegetables from November through March when everything outside is frozen, and that is a meaningful outcome.
The 15-minute daily model works for maintenance after system establishment. The first season will take extra effort for routines, learning temperature swings, and identifying best-performing varieties, with some learning curve before predictable harvests.
Prioritize consistent small wins over chasing out-of-season miracles. A steady supply of spinach, kale, and lettuce through winter is more valuable, practically and emotionally, than one heroic tomato harvest in February that cost you three times what the fruit is worth in heating bills.
How Gridwiseliving can help you get started
The tactics in this guide work best when the structure underneath them is built for the job. Gridwiseliving’s greenhouse collection includes aluminum-framed, polycarbonate-glazed kits sized for home gardeners, from compact backyard models to larger structures suited for serious year-round production. The kits are designed for durability and ease of assembly, which matters when you are setting up in fall and need the structure weather-tight before the first freeze.

Beyond the structure itself, Gridwiseliving carries organic fertilizers including cottonseed meal and feather meal for continuous fertility, seeds for fast-turn crops, and solar energy systems that can power grow lights, fans, and small heaters off-grid. For growers in areas with unreliable winter power, pairing a greenhouse kit with a backup power solution removes one of the biggest risks to a winter crop. Browse the greenhouse collection, check the product descriptions for glazing thickness and frame specs, and choose the kit that matches your zone and space. Every product comes with Gridwiseliving’s durability guarantee.
Useful sources and extension resources for further reading
The sources below were used to build this guide. Each one is worth bookmarking for region-specific adaptation.
- Growing Vegetables in a Hobby Greenhouse (Colorado State University Extension): The most practical U.S.-focused guide on hobby greenhouse economics, crop selection, and energy efficiency. Read this before investing in heating equipment.
- How Much to Grow: Planning for Year-Round Garden Productivity (Clemson HGIC): Excellent succession-planting framework and days-to-maturity guidance for continuous harvest planning.
- Year-Round Vegetable Gardening (Grit): Practical explanation of the Persephone Period and how to schedule crops around it.
- Grow Plants Year-Round in a Greenhouse (Mother Earth News): Strong on spacing, airflow, and winter disease prevention.
- Greenhouse Vegetable Production (NMSU Extension): Technical reference for crop culture, temperature management, and commercial-scale context useful for home growers scaling up.
- Off-Grid Greenhouse Heating and Construction (Off Grid Foundry): Specific glazing thickness recommendations and thermal mass calculations for cold-climate year-round growing.
For implementation, the Gridwiseliving greenhouse collection and the types of home greenhouses guide are practical starting points for choosing the right structure for your space and climate zone.