

How to Weatherproof Your Home and Reduce Energy Loss
Air sealing and attic insulation are the two highest-return moves you can make to weatherproof your home and reduce energy loss. ENERGY STAR data shows that combining air sealing with insulation typically reduces heating and cooling costs by roughly 15 percent on average, with even greater savings possible in older or extreme-climate homes. Duct sealing and rim-joist work follow close behind. Windows, doors, and exterior upgrades improve comfort and long-term performance, but they rarely beat the payback speed of sealing and insulating first.
Before you spend a dollar on a contractor, run through these four checks this weekend:
- Replace worn weatherstripping on every exterior door you can feel a draft through.
- Caulk visible gaps around window frames, pipe penetrations, and where walls meet the foundation.
- Add a door sweep to any exterior door with daylight visible at the bottom.
- Check your attic hatch for insulation and a foam-gasket seal — most are bare wood with zero air barrier.
If your utility bills stay stubbornly high or rooms feel uncomfortable after those fixes, schedule a professional blower-door audit. It will show you exactly where conditioned air is escaping and rank the repairs by impact.
Table of Contents
- 1. Where to find and seal air leaks in your home
- 2. Insulation: which spaces to prioritize and how to choose the right type
- 3. Windows and doors: when to repair and when to replace
- 5. HVAC and ducts: maintenance, filter strategy, and duct sealing
- 6. Floors, crawlspaces, and basements: stopping cold floors and foundation leaks
- 7. Start with a home energy audit to know where your money goes
- Key Takeaways
- What retrofits actually teach you that guides don’t say
- Gridwiseliving products that support energy independence after weatherization
- Useful resources for audits, incentives, and technical guidance
1. Where to find and seal air leaks in your home
Air leaks account for a significant share of heating and cooling waste in a typical house, and most of them hide in places you rarely look: the attic floor, top plates above interior walls, plumbing and electrical penetrations, the attic hatch, and recessed light cans that open directly into unconditioned space. Start there, not at the windows.
The sequence matters. Walk the attic floor with a flashlight and look for gaps where framing meets drywall, where pipes or wires punch through the top plate, and where the chimney chase meets the framing. Caulk handles gaps under about a quarter inch. Low-expansion spray foam fills larger voids around pipes and wires. Around chimneys and flues, use only high-temperature sealant or sheet metal flashing — standard foam is a fire hazard near those surfaces.
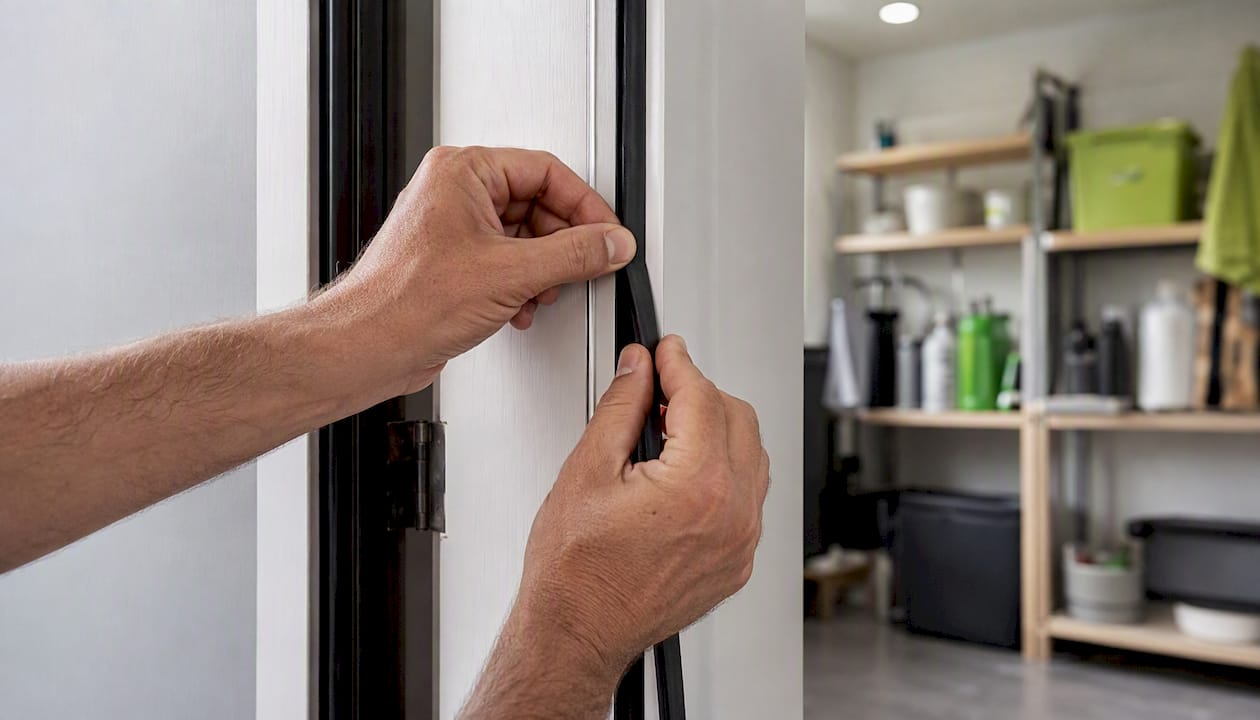
For doors and windows, the fix is usually weatherstripping and caulk. Foam-backed tape, V-strip, and door sweeps cover most residential applications and cost under $30 per door. A caulk gun loaded with paintable latex caulk handles window frames and trim gaps in an afternoon.
Seal before you insulate. Laying insulation over an unsealed attic floor traps air leaks underneath it, where they keep working against you invisibly. The insulation masks the problem without solving it. Seal every penetration you can reach first, then add insulation on top.
DIY air sealing materials typically run under $500 for most homes, and the savings show up in the first heating season. Professional whole-house air sealing costs more but delivers larger leakage reductions, especially in homes with complex framing or finished ceilings that limit attic access.
Call a professional when you encounter structural openings, large chimney bypasses, or a blower-door test confirms leakage well above average. Complex penetrations through fire-rated assemblies also warrant a pro, both for performance and code compliance.
Pro Tip: Run a stick of incense along baseboards, electrical outlets, and attic hatch edges on a cold, windy day. Smoke drift toward the wall tells you exactly where to caulk or foam.
2. Insulation: which spaces to prioritize and how to choose the right type
The attic is almost always the first place to insulate. Heat rises, and an under-insulated attic is the single largest thermal hole in most homes. Rim joists (the framing that sits on top of your foundation wall) are a close second — they’re exposed to outdoor temperatures on three sides and are frequently left bare. After those two, accessible basement walls, crawlspace floors, and floors above unconditioned garages round out the priority list.
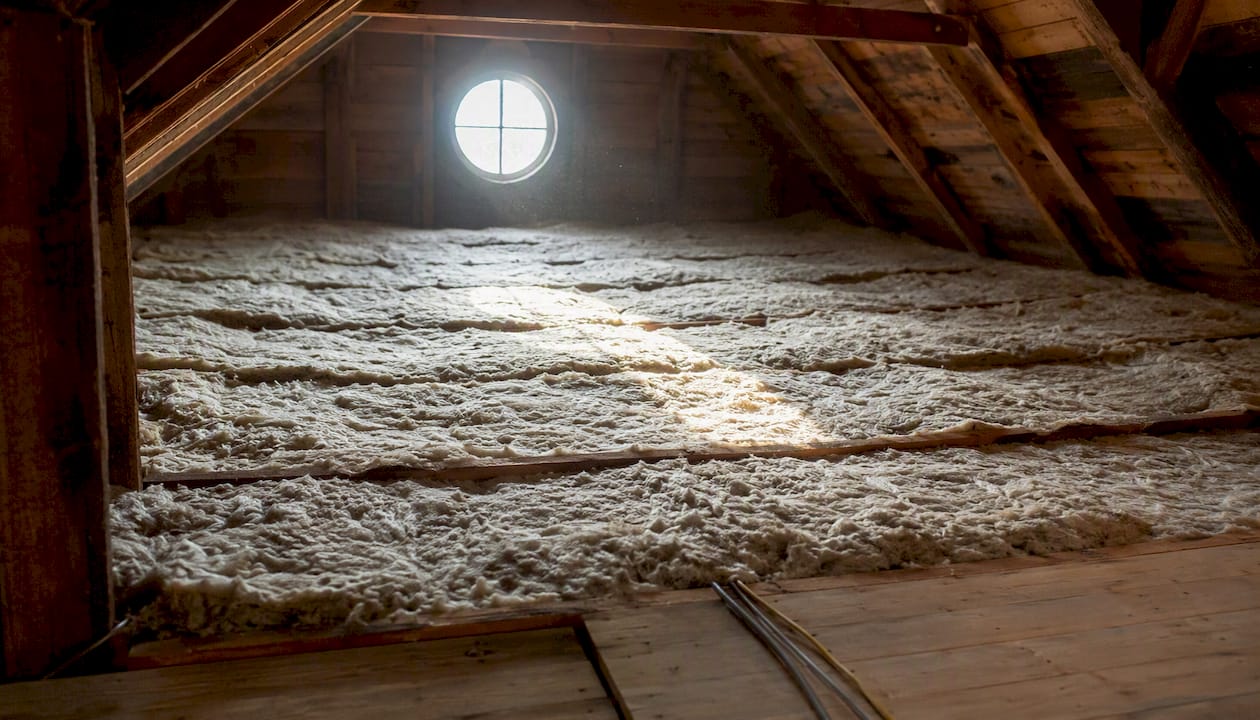
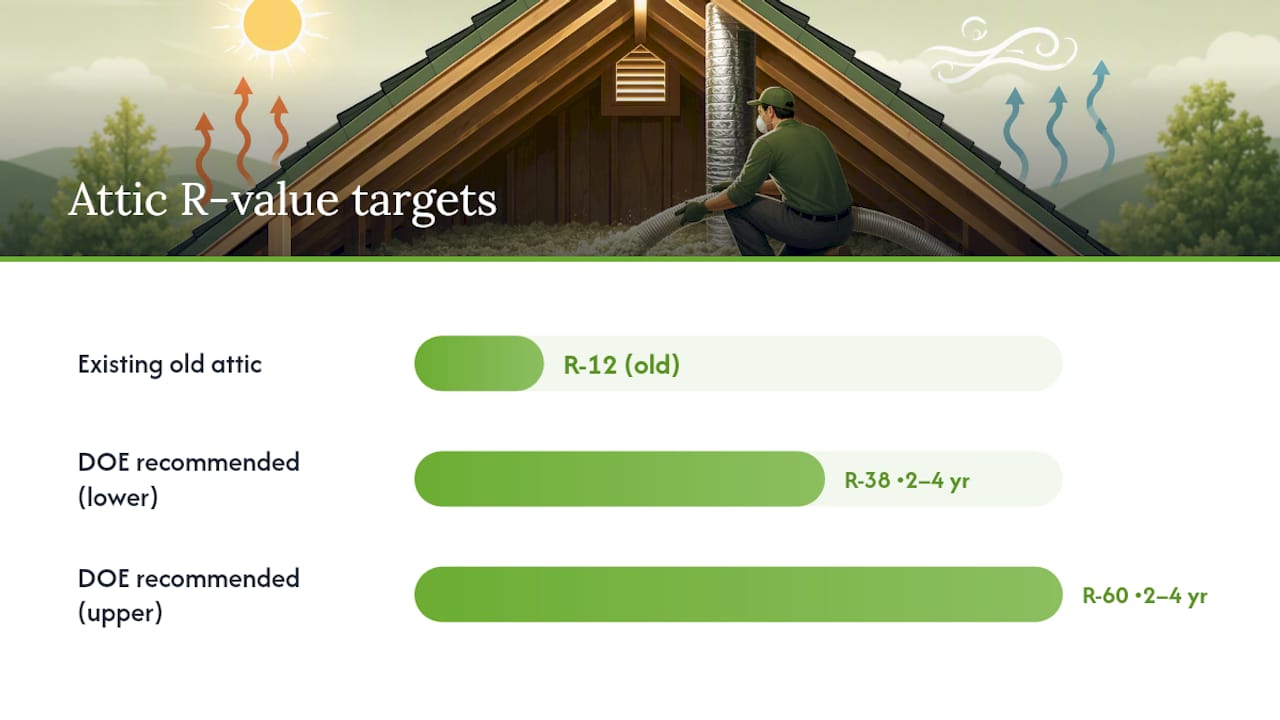
R-value measures resistance to heat flow. Higher numbers mean better insulation. The Department of Energy’s insulation guidance recommends R-values that vary by climate zone and location in the house. A home in Minnesota needs significantly more attic insulation than one in Georgia. Check your existing attic depth: fiberglass batts run roughly R-3 per inch, loose-fill cellulose about R-3.5 per inch. If you have 4 inches of old fiberglass, you’re sitting at roughly R-12 — well below the R-38 to R-60 the DOE recommends for most U.S. attics.
Common insulation materials and their trade-offs:
- Radiant barriers: — Reflective foil installed in hot-climate attics to reduce radiant heat gain. Effective in the South and Southwest; less useful in heating-dominated climates.
Two installation warnings that trip up DIYers: compressing a batt to fit a thinner cavity reduces its R-value proportionally, and adding insulation over a wet or moldy surface locks in moisture damage. Address any water intrusion before you insulate.
DOE R-value guidance by climate zone shows that attic upgrades to recommended levels often pay back in two to four years. That’s a faster return than most home improvements, and it compounds every year after. ENERGY STAR’s home upgrade program documents the combined savings potential when sealing and insulation work together.
3. Windows and doors: when to repair and when to replace
Most windows don’t need replacing. That’s the honest answer, and it saves a lot of money. A single-pane window in decent condition with new weatherstripping, a fresh bead of caulk, and a low-emissivity window film can perform surprisingly close to a basic double-pane replacement — at a fraction of the cost.
Replace when you see these conditions:
- Single-pane glass in a heating-dominated climate — where comfort complaints are chronic and the window is a primary source of cold radiation.
ENERGY STAR-certified windows meet performance thresholds for solar heat gain and U-factor (the rate of heat transfer through the glass assembly) that vary by climate zone. In cold climates, look for a low U-factor. In hot climates, a low solar heat gain coefficient matters more. The DOE’s home upgrades page lists current federal tax credits that can offset a portion of window replacement costs.
Window replacement has a longer payback than air sealing or insulation. Budget for it as a comfort and durability upgrade rather than a quick-ROI move. For doors, the calculus is similar: a solid-core door with new weatherstripping and a door sweep outperforms a leaky new door every time.
Pro Tip: Before buying replacement windows, check whether your existing frames are still square and solid. A warped frame means the new window won’t seal properly either — fix the frame first or the replacement is wasted money.
For homeowners curious how new interior doors affect efficiency in older homes, the short answer is that air sealing around the door frame matters as much as the door itself.
5. HVAC and ducts: maintenance, filter strategy, and duct sealing
Tighten the building shell before you resize HVAC equipment. This is the sequencing rule that saves homeowners from buying oversized systems that short-cycle and perform poorly. A Manual J load calculation — the engineering method contractors use to size heating and cooling equipment — will show a lower load after you’ve sealed and insulated, which means a smaller, less expensive system may be appropriate.
Routine maintenance checklist:
- Change filters every 1–3 months depending on filter type and household dust load.
- Schedule an annual HVAC tune-up before heating or cooling season.
- Program or set a smart thermostat to reduce conditioning during unoccupied hours.
- Clear return-air vents of furniture and debris.
Ducts deserve serious attention. Ducts routed through unconditioned attics, crawlspaces, or garages can lose a substantial share of conditioned air through leaks and thermal loss before it reaches the living space. Sealing duct joints with mastic sealant (a paste-like compound brushed onto joints) is more durable than foil tape and is the professional standard. Foil-backed tape rated UL 181 is an acceptable DIY option for accessible joints. After sealing, wrap ducts in unconditioned spaces with duct insulation to reduce thermal loss.
Pro Tip: Mastic sealant is messy but it doesn’t peel. Foil tape fails at temperature extremes over time. If you’re hiring a duct contractor, ask specifically whether they use mastic — it’s a quick quality signal.
Heat pump upgrades make the most sense after shell improvements are complete. A tighter, better-insulated home needs less heating and cooling capacity, which lets you right-size a heat pump correctly and get the full efficiency benefit of the technology.
6. Floors, crawlspaces, and basements: stopping cold floors and foundation leaks
Cold floors in winter are almost always a foundation-level problem: uninsulated rim joists, a ventilated crawlspace open to outdoor air, or a bare concrete slab with no edge insulation. Each one is fixable, and the fixes are among the most cost-effective in the house.
- Crawlspace vents: — In many climates, sealing crawlspace vents and conditioning the space (encapsulation) outperforms the old ventilated-crawlspace approach. A sealed crawlspace with a vapor barrier on the floor and insulation on the walls stays closer to indoor temperatures, which eliminates the cold-floor problem above it.
Moisture is the complicating factor in every crawlspace decision. A vapor barrier alone won’t solve a crawlspace with standing water or active groundwater intrusion — drainage has to come first. Pests (termites, rodents) also affect insulation choices; spray foam in crawlspaces can hide pest activity, so weigh that trade-off in regions with high termite pressure.
7. Start with a home energy audit to know where your money goes
A professional home energy audit gives you the data to prioritize fixes rather than guess. Without it, homeowners routinely spend money on the wrong upgrades first. Audit recommendations, when followed, often cut energy use by 5–30% depending on the home’s starting condition.
What a full audit includes:
- Blower-door test: A calibrated fan mounted in an exterior door depressurizes the house, and the auditor measures total air leakage. This single number tells you how leaky your home is relative to code and to similar homes.
- Infrared (thermal) scan: With the house depressurized, an infrared camera reveals cold spots (air leaks, missing insulation) that are invisible to the naked eye. Rim joists, attic hatches, and electrical outlets show up clearly.
- Duct leakage test: A blower-door variant that pressurizes the duct system to measure how much conditioned air escapes before reaching the registers.
- Combustion safety check: The auditor tests gas appliances and water heaters for backdrafting — a safety issue that becomes more likely after aggressive air sealing.
Choosing a qualified auditor:
- Look for BPI (Building Performance Institute) or RESNET certification.
- Confirm the audit includes a blower-door test and infrared scan — some “audits” are visual-only walkthroughs.
- Ask for a sample report showing prioritized recommendations with estimated savings.
- Check whether your utility or state energy office subsidizes the audit cost.
Incentives available now:
| Upgrade | Federal Incentive | Notes |
|---|---|---|
| Home energy audit | — | Per IRS guidance under the Inflation Reduction Act |
| Insulation and air sealing | Up to 30% of cost | Applies to materials meeting efficiency standards |
| Heat pump (heating/cooling) | Up to 30% | Higher cap than most other upgrades |
| ENERGY STAR windows | Up to 30% | Per-window limits apply |
| Low-income households | Free weatherization via WAP | Weatherization Assistance Program |
Check energy.gov’s home upgrades page for current program details and your state’s rebate database before scheduling any major work. Incentives change, and stacking a federal tax credit with a utility rebate can cut net costs by a third or more.
Sequencing after an audit: air seal first, then insulate, then address mechanicals (HVAC, ducts), then consider renewables. Following this sequence prevents the common mistake of sizing a solar system or heat pump for a leaky, under-insulated home.
Key Takeaways
Air sealing and attic insulation deliver the fastest, largest energy savings for most U.S. homeowners, and a professional audit helps prioritize the fixes that return the most savings per dollar.
| Point | Details |
|---|---|
| Air seal before insulating | Sealing attic penetrations and rim joists before adding insulation prevents hidden leaks from undermining R-value gains. |
| Audit first for complex homes | A blower-door and infrared audit reveals leaks homeowners miss and following audit recommendations often cuts energy use by 5–30%. |
| Incentives cut net costs | Federal tax credits cover a substantial portion of insulation, audit, and heat pump costs; stacking them with utility rebates can reduce net expenses before large purchases. |
| Sequence upgrades correctly | Shell improvements (seal, insulate) come before HVAC resizing or solar — a tighter home needs less equipment capacity. |
| Gridwiseliving for resilience | Once the shell is tight, Gridwiseliving’s solar kits and backup power systems let you offset remaining loads and build energy independence. |
What retrofits actually teach you that guides don’t say
The conventional wisdom on home weatherproofing gets the big picture right but consistently undersells two things: how much the attic hatch matters, and how easy it is to sequence projects badly.
An attic hatch is a piece of bare plywood sitting in a hole in your ceiling with no insulation and no air seal. On a cold night, it’s essentially an open window to the attic. Homeowners who add a foam-gasket seal and a rigid-foam lid to their attic hatch often notice a draft reduction in the rooms below within days. It takes 45 minutes and costs about $30. That ratio of effort to result is hard to beat anywhere else in the house.
The sequencing mistake is more expensive. Insulating before sealing is the most common one, but the second most common is upgrading HVAC before tightening the shell. A new heat pump installed in a leaky, under-insulated house will run constantly, underperform its rated efficiency, and be oversized once the shell work is eventually done. The right order is always: seal, insulate, then right-size equipment. Budget your retrofit in phases that respect that sequence, and stack your incentive claims accordingly — the IRS allows the insulation credit and the heat pump credit in separate tax years, so you don’t have to do everything at once to capture both.
Gridwiseliving products that support energy independence after weatherization
Weatherization cuts what your home needs. Gridwiseliving’s product line addresses what happens after: generating and storing your own power so the energy you do use costs less and comes from sources you control.

Once your shell is tight and your HVAC load is reduced, a solar energy system sized for your actual consumption makes far more economic sense than one sized for a leaky house. Gridwiseliving carries solar kits from portable 100-watt briefcase panels to full off-grid setups, alongside whole-home backup power stations like the Mega 3 (3,600W, 3,072Wh) for households that want resilience against outages. For homeowners considering a smaller, better-insulated footprint entirely, Gridwiseliving’s tiny home options are built with efficiency in mind from the ground up — a natural complement to the insulation principles covered in this guide. Prioritize weatherproofing first, then visit Gridwiseliving to size the right energy system for the home you’ve actually built.
Useful resources for audits, incentives, and technical guidance
- ENERGY STAR Home Upgrade
- How to Weatherize Your Home | Reviews by Wirecutter
- Insulation | Department of Energy
- Home Insulation and Weatherization: The Biggest Energy Win | Watt Wise
- Home Upgrades | energy.gov
- Guide to home insulation (DOE PDF)
- How to plan home energy upgrades without wasting money | Home Energy Decisions
- Weatherization | energy.gov
This article provides general information for educational purposes. Consult a certified energy auditor or qualified contractor to evaluate your specific home, and verify current incentive eligibility with the IRS or your state energy office before making purchasing decisions.