

Greenhouse Shade Cloth: Best Options and How to Use Them
A knitted HDPE shade cloth in the 40–50% range is the right starting point for most greenhouse owners. It works across a wide range of crops, cuts cleanly without fraying, and strikes a balance between cooling and usable light that suits mixed plantings from tomatoes to herbs. The Everyday Greenhouse recommends this range as a broadly effective, low-maintenance choice for beginners and experienced growers alike.
- Why it works: Knitted HDPE allows airflow through the weave, resists UV degradation better than woven polypropylene, and can be trimmed on-site without unraveling. The 40–50% shade factor keeps most vegetables productive without starving them of light.
- One caveat: Push to 60–70% for ferns, orchids, or shade-loving plants, and for greenhouses in the Deep South or Southwest where summer temperatures regularly exceed 100°F.
Products like the Grow It Depot 50% White Heavy-Duty Shade Cloth and the Grow1 UV Resistant 50% shade cloth from Hydrobuilder both show what a solid 50% knitted HDPE spec looks like in practice: UV-treated, available in multiple widths, and rated for multi-season use.
Key Takeaways
A knitted HDPE shade cloth in the 40–50% range is the best starting choice for most greenhouse owners, covering the widest range of crops with minimal installation complexity.
| Point | Details |
|---|---|
| Start with 40–50% knitted HDPE | Covers most vegetables and herbs; adjust up to 60–70% for shade-loving plants or extreme heat climates. |
| Exterior mounts cool best, interior lasts longer | Exterior intercepts heat before it enters glazing; interior is easier to maintain and protected from wind wear. |
| Finish details matter at purchase | Look for factory grommets, sewn hems, and UV-stabilization ratings; these determine how long the cloth holds up. |
| Fasten every 24–36 inches | Close fastening spacing prevents flapping that tears grommets and fatigues seams, especially on exterior installs. |
| Gridwiseliving greenhouses simplify shade attachment | Aluminum frame rails and roof vents on Gridwiseliving structures make seasonal shade cloth installation and removal straightforward. |
Table of Contents
- What types of greenhouse shade cloth material should you choose?
- How do shade percentages work, and which percentage fits your crops?
- What sizes and finishes do you need when ordering shade cloth?
- Exterior vs. interior mounting: which installation approach works best?
- How to pick the right shade cloth: a quick buying checklist
- DIY shade cloth: what actually works and how to build it
- How long does shade cloth last, and how do you maintain it?
- Where to buy shade cloth in the U.S.
- How shade cloth affects greenhouse humidity and ventilation
- Environmental impact and sustainability of shade cloth materials
- Seasonal adjustments and removable shade cloth options
- What Gridwiseliving’s experience with shade planning actually shows
- Gridwiseliving greenhouses pair naturally with shade solutions
- Sources
What types of greenhouse shade cloth material should you choose?
The two main constructions are knitted HDPE and woven polypropylene, and the difference matters more than most buyers expect.
Knitted HDPE is the more forgiving option. The interlocked loops mean you can cut it with scissors or a utility knife and the edge will not unravel. Airflow passes through the open weave, which helps moderate humidity inside the greenhouse. Most commercial greenhouse shade cloth sold in the U.S. today is knitted HDPE, and it typically carries explicit UV-stabilization treatment that slows degradation from sun exposure.
Woven polypropylene is denser and blocks light more uniformly, which suits applications where precise light control matters. The trade-off: cut a woven panel without a hemmed edge and it frays fast. Any woven cloth you buy should arrive factory-hemmed or you should seal the cut edges with a heat tool or binding tape before installation.
Aluminet (a reflective knitted fabric with a metallic finish) is a third option worth knowing. It reflects solar radiation rather than absorbing it, which keeps the greenhouse structure itself cooler. It costs more than standard HDPE cloth, but in regions with intense summer sun, the temperature difference inside the structure can be significant. Gardener’s Path notes that white and light-colored cloth reflects more solar energy and tends to keep the greenhouse cooler than dark colors, with aluminet and reflective options performing best in very hot conditions.
Color choices and what they actually do
White cloth reflects heat and keeps interior temperatures lower. Black and dark green absorb more radiation and are better suited to moderate climates where you want warmth retention in shoulder seasons. Green blends visually with plantings. For hot-climate growers, white or aluminet is the practical choice.
Pro Tip: UV stabilization is not a marketing phrase to ignore. A cloth without it can become brittle and tear within a single season in high-UV regions. Ask vendors for the UV-life rating or warranty period before buying.
How do shade percentages work, and which percentage fits your crops?
The shade percentage tells you how much of the incoming solar radiation the cloth blocks. A 50% cloth passes roughly half the available light. That sounds simple, but the practical effect on plant health depends on your baseline light levels, the season, and what you are growing.
Too little shade and heat stress slows growth, causes tip burn in lettuce, and can kill seedlings. Too much shade and fruiting crops like tomatoes and peppers produce poorly because photosynthesis drops below what they need to set fruit.
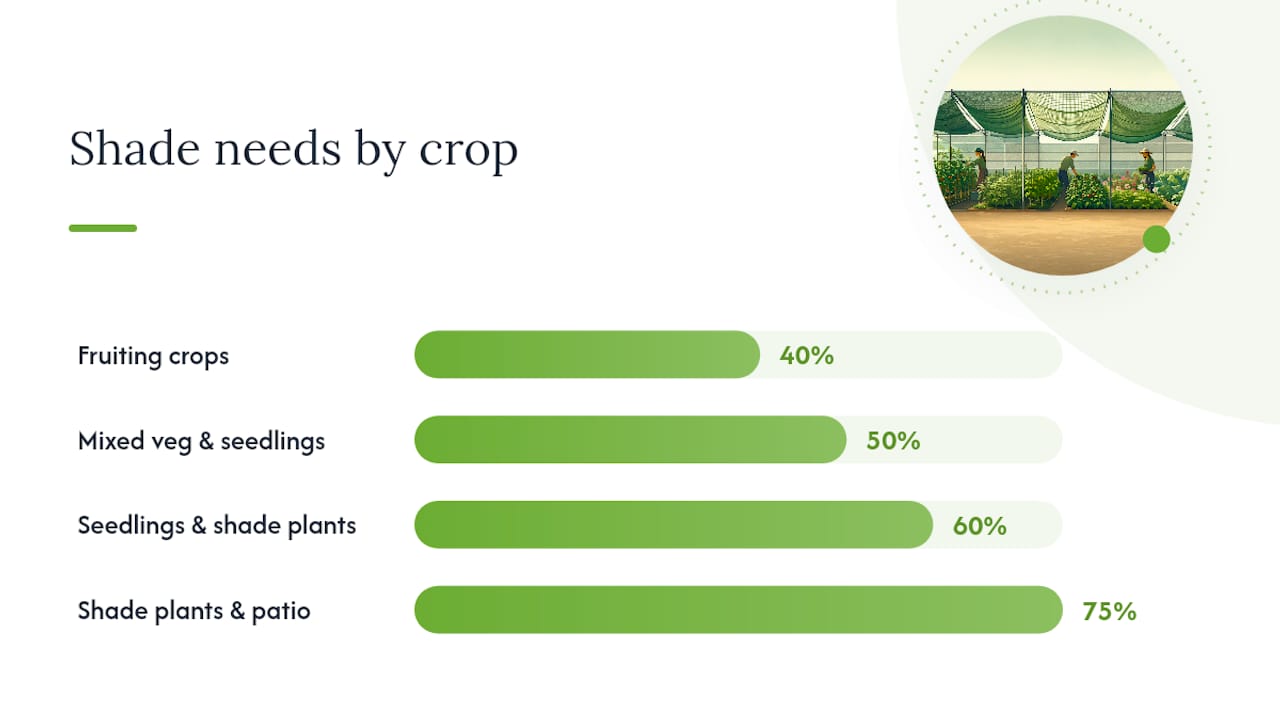
| Crop / Use | Recommended Shade % |
|---|---|
| Tomatoes, peppers, cucumbers | 30–40% |
| Mixed vegetables, herbs | 40–50% |
| Seedlings and transplants | 50–60% |
| Orchids, ferns, shade plants | 60–75% |
| Patio / human comfort seating | 60–75% |
A few decision points worth thinking through before you order:
-
Hot southern summers (USDA zones 8–11): Start at 50% for vegetables; consider 60% for seedling areas.
-
Mild northern summers (zones 4–6): 30–40% is often enough for most vegetables; 50% for seedlings.
-
Overcast or maritime climates: Shade cloth may only be needed for a few weeks at peak summer; a removable 30–40% panel is usually sufficient.
-
Reflective options: In the Southwest or Southeast where peak temperatures regularly exceed 95°F, aluminet at 50–60% can outperform standard black or green cloth at the same percentage because it reflects heat rather than absorbing it.
The shade factor is a starting point, not a fixed prescription. Observe your plants in the first two weeks after installation. Pale, stretched growth means too much shade; scorched leaf margins or wilting at midday means you need more.
What sizes and finishes do you need when ordering shade cloth?
Pre-cut panels cover most standard greenhouse sizes, but the finish details, grommets, hems, and edge treatment, determine how well the cloth actually installs and holds up.
Measuring before you order:
- Measure hip-to-hip across the widest span of the roof, not just the footprint.
- Add 12–18 inches of overhang on each side for exterior mounting, or plan for a snug fit if mounting to interior purlins.
- For gable ends, measure separately; most growers use a separate panel rather than trying to cut one piece to fit.
Finish options that matter:
- Factory grommets: Brass or aluminum grommets every 12–18 inches along the hem are the most secure attachment point. Farm Plastic Supply sells panels with hemmed edges and grommets, which is the finish to look for when you want a ready-to-hang panel.
- Sewn hems: A folded and stitched edge prevents fraying and distributes tension across the fastening points. Without a hem, a grommet can tear through the cloth under wind load.
- Lock-channel compatible edges: Some greenhouse frames use an aluminum extrusion channel that accepts a spline, locking the cloth edge in place without grommets. If your frame has this feature, order cloth with a compatible edge or a raw edge you can insert directly.
- UV-bonded seams: On large custom panels, seams should be bonded or sewn rather than just overlapped.
Pre-cut vs. custom:
Pre-cut rolls and panels from marketplaces like Amazon (the Agfabric 60% grommeted cover is a widely available example) work well for standard greenhouse widths. For irregular spans, long runs over 100 feet, or frames with integrated lock-channel edges, ordering from a custom shade cloth vendor is worth the extra lead time. Custom suppliers let you specify shade factor, color, material, size, and finish in a single order, which eliminates the guesswork of piecing together standard panels.
- Specialty retailers and custom shops: Best for exact-fit panels, lock-channel edges, and unusual shade percentages. Expect 5–10 business days lead time for fabricated orders.
- Big-box and online marketplaces: Faster shipping, lower prices, but limited size options and no custom finishing.
- Local greenhouse suppliers: Useful for seeing material samples in person before committing to a large order.
Exterior vs. interior mounting: which installation approach works best?
According to Gardener’s Path, exterior mounting cools more effectively because it intercepts solar radiation before it crosses the glazing. Interior mounting lasts longer and is easier to maintain because the cloth is protected from wind and weather. Neither is universally better; the right choice depends on your climate and how much you want to manage the cloth seasonally.
Exterior mounting is the higher-performance option in hot climates. The cloth sits above or against the outside of the glazing, blocking heat before it enters the structure. The downside: wind puts constant stress on the fabric and fasteners. Exterior cloth needs to be fastened every 24–36 inches along all edges, and in areas with regular strong winds, every 18–24 inches.
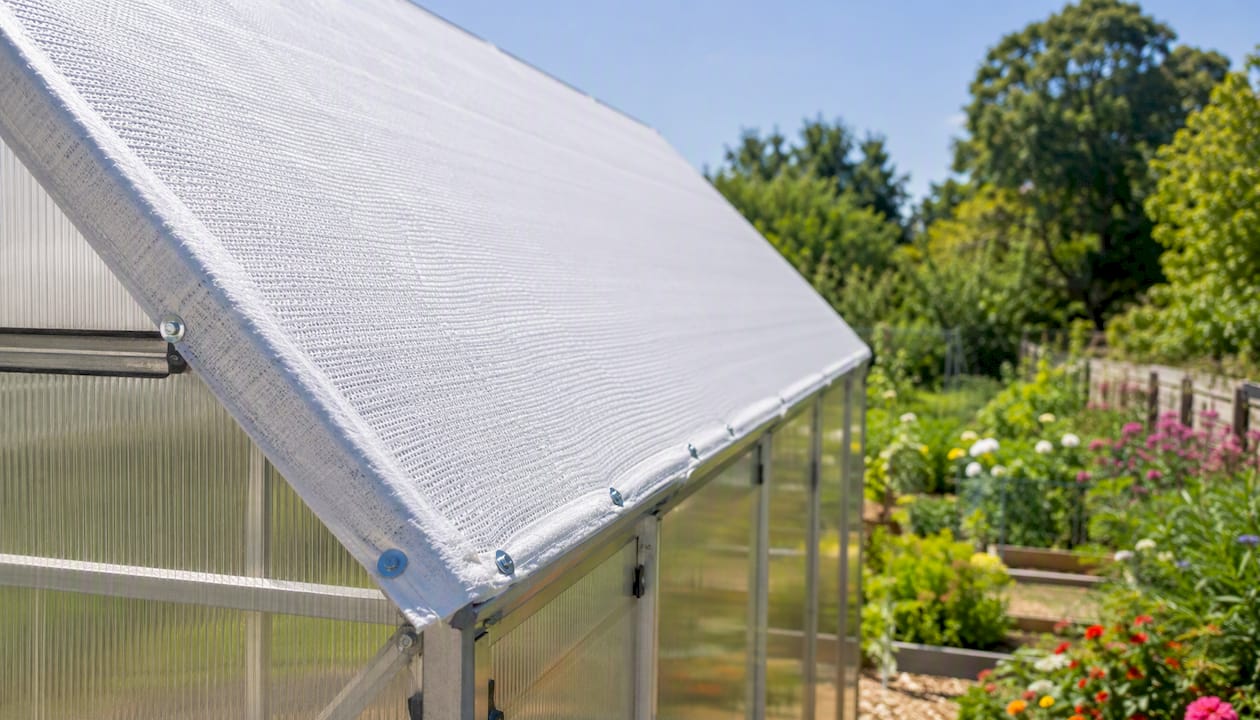
Interior mounting protects the cloth from UV exposure and wind, which extends its usable life. Cooling is slightly less efficient because heat still enters through the glazing before the cloth intercepts it. For most backyard greenhouse owners, interior mounting is the more practical long-term choice.
Common attachment methods
- Spring wire / lock channel: Insert the cloth edge into an aluminum extrusion channel with a spring wire or spline. Clean, secure, and easy to remove seasonally. Requires a compatible frame.
- Grommet and zip tie: Thread zip ties through grommets and around frame members. Fast and inexpensive; replace zip ties annually since UV degrades them.
- Bungee cord and hook: Good for temporary exterior installations. Allows quick removal before storms.
- Rope and ground stakes: For freestanding exterior shade structures over raised beds or low-profile greenhouses. Stake at 45-degree angles away from the structure for tension.
- Clip-on cable system: Stainless steel cable runs along the ridge and eaves; the cloth clips to the cable. Best for permanent exterior installations on metal-frame greenhouses.
Drainage and airflow: Never lay shade cloth flat against glazing or directly on plant foliage. Angle exterior panels so water runs off rather than pooling. Keep at least 6 inches of clearance between the cloth and the plant canopy to maintain airflow and reduce disease risk.
Pro Tip: For exterior cloth in windy locations, run a tensioning rope along the bottom hem and stake it at a 45-degree angle to the ground. This keeps the cloth taut and dramatically reduces the flapping that tears grommets and fatigues seams over time.
How to pick the right shade cloth: a quick buying checklist
Answer five questions before you order and you will narrow the field to one or two options:
- What are you growing? Fruiting vegetables need 30–50%; shade plants need 60–75%.
- What are your peak summer temperatures? Above 95°F, go to the higher end of the range or consider aluminet.
- Interior or exterior mount? Exterior needs grommets and robust hems; interior can use lighter finishes.
- How exposed is your site to wind? High-wind sites need heavy-duty grommets and close fastening spacing.
- What is your budget and timeline? Custom panels cost more and take longer; marketplace panels ship fast.
The Grow It Depot 50% white cloth is a strong off-the-shelf pick for hot-climate growers who want a reflective option without going full aluminet. The Grow1 from Hydrobuilder suits buyers who need standard commercial widths in a ready-made roll. Farm Plastic Supply and ShadeClothStore are the right calls when you need a fabricated panel with factory finishing or a custom dimension.
Pricing varies widely by size and channel. Marketplace panels for a standard 6×12-foot greenhouse typically run $15–$40. Specialty retailer panels with heavy-duty hems and grommets run higher. Custom fabricated panels from ShadeClothStore or Farm Plastic Supply are priced per square foot and depend on material and finish choices; contact vendors directly for quotes on large or custom orders.
DIY shade cloth: what actually works and how to build it
DIY shading makes sense for temporary protection, budget builds, or testing a shade level before committing to a purpose-made panel.
Materials that work:
- Burlap: Cheap, breathable, and biodegradable. Provides roughly 30–50% shade depending on weave density. Degrades in one to two seasons outdoors.
- Lightweight nursery shade netting: Often sold in rolls at garden centers. Knitted construction, cuts cleanly, and provides a predictable shade percentage.
- Builder’s mesh (shade screen): Available at hardware stores. Heavier and more durable than nursery netting; shade percentage varies by product.
- Old bedsheets: Emergency option only. They trap moisture, promote mold, and provide inconsistent shade. Replace as soon as possible.
How to build a simple DIY panel:
- Cut your material to size, adding 4 inches on each side for the hem.
- Fold each edge over twice (a 1-inch double fold) and secure with a staple gun, binder clips, or hand-stitching.
- Mark grommet positions every 12–18 inches along the hem.
- Use a grommet kit (available at fabric or hardware stores) to punch and set brass grommets at each mark.
- Hang using zip ties, bungee hooks, or rope threaded through the grommets.
For knitted cloth, step 2 is optional since the material will not unravel when cut. For woven or burlap, the hem is necessary to prevent rapid fraying.
Safety note: Keep any DIY material off plant foliage and angled for drainage. Burlap and canvas that stay wet against leaves promote fungal disease. If a DIY panel is still in place after two seasons, it is time to replace it with a purpose-made cloth.
How long does shade cloth last, and how do you maintain it?
A quality knitted HDPE shade cloth with UV stabilization typically lasts 5–10 years under normal use. Some vendors claim 10–16 years for heavy-duty commercial grades, though actual lifespan depends on UV intensity, how the cloth is stored off-season, and how well it is fastened (loose cloth that flaps in the wind degrades much faster than taut, well-secured panels).
Maintenance checklist:
- Clean once or twice per season: Hose off dust and debris. For stubborn algae or mineral deposits, use a mild soap solution and a soft brush. Rinse thoroughly and let dry before rolling for storage.
- Inspect for UV brittleness: Pinch the cloth between your fingers. If it cracks or crumbles rather than flexing, UV degradation has reached the point where the cloth will tear under load. Replace it.
- Check seams and grommets: Look for pulled threads at grommet holes and fraying at sewn hems. A grommet that has started to pull through the hem is a warning sign; reinforce with a patch or replace the grommet before the next wind event.
- Patch small tears: For knitted HDPE, cut a patch from a scrap piece and attach with UV-resistant shade cloth repair tape or a few stitches of UV-resistant thread. Woven cloth patches should be sewn and sealed at the edges.
Seasonal storage:
- Remove cloth at the end of the season before the first hard frost if you are in a cold climate.
- Let it dry completely before storing. Folding damp cloth promotes mildew.
- Roll rather than fold to avoid permanent crease lines that weaken the fabric over time.
- Store off the ground in a dry location. A rodent-proof bin or hanging storage prevents pest damage.
Warranty claims vary by vendor. The Grow It Depot 50% white cloth, for example, includes vendor-stated life-expectancy information that buyers should verify directly with the seller before purchase.
Where to buy shade cloth in the U.S.
Buying channels and what to expect:
- Gridwiseliving greenhouse accessories and collections: A practical starting point for greenhouse owners who want shade solutions alongside their structure purchase. Pairing your greenhouse and shade cloth from a single source simplifies sizing and compatibility questions.
- Specialty shade cloth retailers (Grow It Depot, Farm Plastic Supply, ShadeClothStore): Best selection of shade percentages, materials, and finishes. Custom fabrication available. Longer lead times for custom orders but better fit and finish.
- Online marketplaces (Amazon): Fast shipping, competitive pricing, and easy returns on standard sizes. The Agfabric 60% grommeted cover is a representative example of what is available for quick purchases. Shade percentage and material specs are sometimes vague; read product descriptions carefully and check customer reviews for real-world durability feedback.
- Local greenhouse and nursery suppliers: Useful for seeing material samples before committing. Stock is often limited to one or two shade percentages.
Ordering tips:
- Confirm the shade percentage is stated explicitly (not just “light filtering”).
- Check whether the listing specifies knitted or woven construction.
- Ask for UV-life expectancy or warranty information before buying from a specialty retailer.
- Verify the return policy before ordering custom-cut panels; most custom orders are non-returnable.
- For runs over 100 feet or frames with lock-channel edges, go custom rather than piecing together standard rolls.
How shade cloth affects greenhouse humidity and ventilation
Shade cloth does more than block light. By reducing the amount of solar radiation entering the greenhouse, it lowers the rate of evaporation from soil and plant surfaces, which tends to raise relative humidity inside the structure. For crops that prefer moderate humidity, like tomatoes and peppers, this is generally a benefit during peak summer heat. For crops prone to fungal disease, like basil or strawberries, higher humidity requires more active ventilation management.
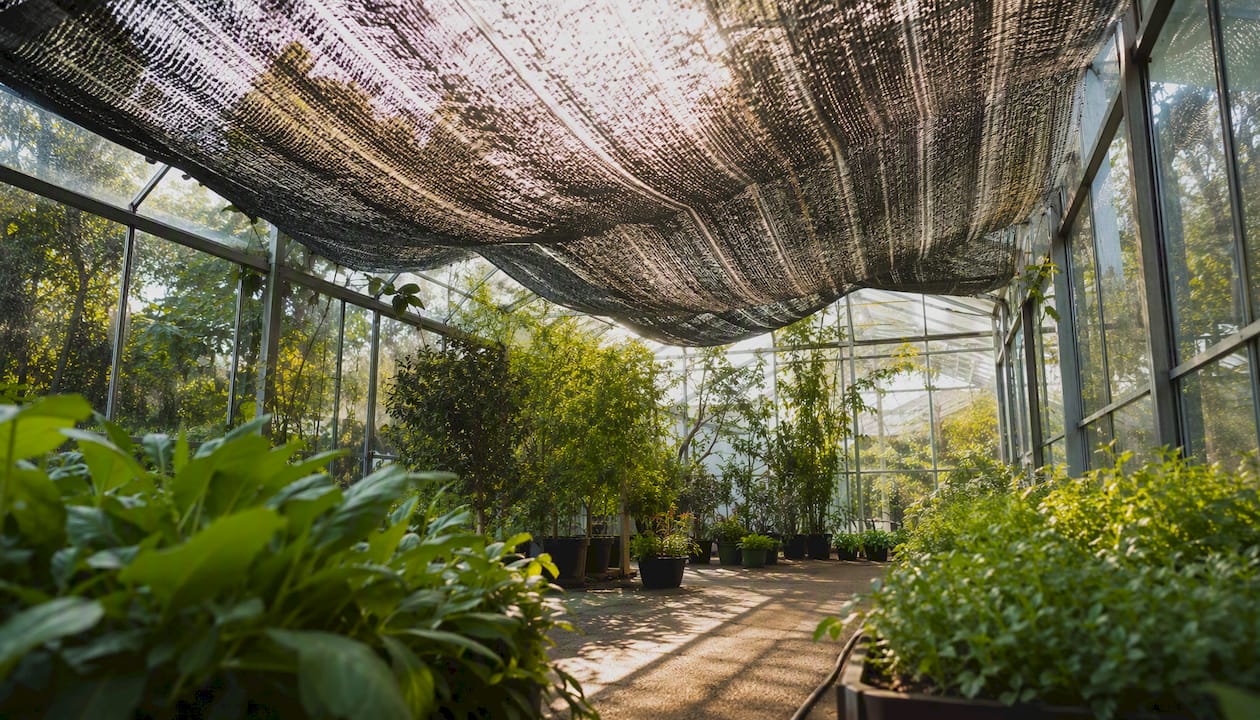
The fabric itself also affects airflow. Knitted HDPE with an open weave allows air to pass through, which moderates the humidity increase and prevents the stagnant-air conditions that promote disease. Dense woven cloth or solid shade panels block airflow more completely, which can create hot, humid pockets near the cloth surface.
Placement matters here too. Interior cloth mounted close to the glazing with no gap traps heat between the cloth and the glass, reducing the cooling benefit and potentially raising humidity in that zone. Leave at least a few inches of clearance between interior cloth and the glazing to allow convective airflow.
For greenhouses with roof vents, shade cloth does not replace ventilation. Run your vents on a thermostat or temperature-activated opener alongside the shade cloth. The combination of reduced solar gain and active air exchange is more effective than either alone.
Environmental impact and sustainability of shade cloth materials
Knitted HDPE and woven polypropylene are petroleum-derived plastics. They are not biodegradable, and most municipal recycling programs do not accept them. At end of life, shade cloth typically goes to landfill unless a specialty agricultural plastic recycler accepts it. Some regions have agricultural film recycling programs through cooperative extension services or farm supply retailers; check with your local extension office.
Aluminet and other reflective fabrics share the same end-of-life limitations. Their longer lifespan relative to untreated cloth does reduce the frequency of replacement, which partially offsets the environmental cost of production.
A few practical steps reduce the overall footprint:
- Buy the highest UV-rated cloth you can afford. A cloth that lasts 10 years instead of 5 cuts the replacement frequency in half.
- Store cloth properly off-season to maximize its usable life.
- Repurpose worn cloth as ground cover, frost protection, or weed barrier before discarding it.
- Burlap and natural-fiber alternatives are biodegradable but degrade quickly outdoors, which means more frequent replacement and potentially a higher cumulative material use than a single long-lived HDPE panel.
There is no perfect option here. The most sustainable choice is usually the one that lasts longest and is maintained well.
Seasonal adjustments and removable shade cloth options
Shade cloth is not a set-it-and-forget-it installation for most climates. In spring and fall, the sun angle is lower and temperatures are cooler, so the same cloth that protects plants in July can suppress growth in September. Growers who treat shade cloth as a seasonal tool rather than a permanent fixture get better results year-round.
Removable systems worth considering:
- Roll-up exterior panels: Shade cloth attached to a top batten with a bottom roller can be raised and lowered like a blind. This is the most flexible option for exterior installations and allows daily or weekly adjustment.
- Clip-on interior panels: Cloth clipped to interior purlins or cable systems can be unclipped and folded back in minutes. Faster to adjust than exterior systems and protected from weather when deployed.
- Seasonal removal: In most U.S. climates, shade cloth is only needed from late May through early September. Removing it for the rest of the year reduces UV exposure and extends lifespan significantly.
A simple rule: if your overnight lows are consistently below 60°F and daytime highs are below 80°F, the shade cloth can probably come down. Put it back up when the forecast shows a sustained stretch above 85°F with full sun.
For growers with backyard greenhouse setups in variable climates, a removable 40–50% panel is more useful than a permanent high-percentage installation. You get full light in spring and fall when plants need it most, and protection during the summer peak.
What Gridwiseliving’s experience with shade planning actually shows
The conventional wisdom says to match your shade percentage to a crop chart and call it done. That is a reasonable starting point, but it misses something most charts do not account for: your specific microclimate. A greenhouse on the south side of a brick wall in Phoenix needs more shade than the same greenhouse in a shaded suburban yard in Atlanta, even if both are growing tomatoes.
Start with 40–50% knitted cloth, install it, and watch your plants for two weeks. Pale, etiolated growth means pull it back or switch to a lower percentage. Scorched tips and midday wilt mean go higher. The cloth is not permanent infrastructure; it is a tool you adjust.
Gridwiseliving’s greenhouse designs, including the 10X32FT heavy-duty aluminum polycarbonate model, are built with solid aluminum frame rails and roof vents that make shade attachment straightforward. A structure with good bones simplifies the shade decision because you are not improvising attachment points. When the frame is designed for accessories, seasonal adjustment becomes a 20-minute job instead of a half-day project.
The growers who get this right are not the ones who found the perfect shade percentage on a chart. They are the ones who stayed curious, kept adjusting, and treated the greenhouse as a system rather than a fixed setup.
Gridwiseliving greenhouses pair naturally with shade solutions
If you are still choosing a greenhouse structure, the shade cloth decision gets easier when the frame is designed to accept it. Gridwiseliving’s greenhouse collection includes structures with aluminum frame rails, roof vents, and solid attachment points that work with standard shade cloth installation methods, including grommet-and-clip systems and lock-channel edges.

The 10X32FT Heavy-Duty Outdoor Aluminum Polycarbonate Greenhouse is a good example: roof vents support active airflow alongside shade cloth, and the aluminum frame provides clean attachment rails for interior or exterior cloth systems. If you are building a year-round food production setup, pairing a well-built structure with the right shade cloth from the start saves retrofitting later. Browse the full greenhouse lineup at Gridwiseliving to find the structure that fits your space and growing goals.
Sources
- How to Use Shade Cloth in the Greenhouse | Gardener’s Path
- How to Choose the Right Shade Cloth for your Greenhouse (and why you need it) – The Everyday Greenhouse
- Shade Cloth | Greenhouse, Garden & Plant Shade Fabric
- Agfabric 60% Greenhouse Shade Cloth Cover with …