

Gravel Pad First: Greenhouse Foundation Options for Home Gardeners
For most home greenhouses, a compacted gravel pad with a pressure-treated timber perimeter is the best all-around foundation: cheap, well-drained, and buildable in a weekend. The main exceptions are heavy glass greenhouses, soft or sloped ground, and frost-prone sites, all of which do better on a poured concrete slab or a masonry dwarf wall.
TL;DR:
- A gravel pad with a timber perimeter generally costs $1 to $3 per square foot and is suitable for greenhouses up to 120 square feet on flat, well-drained ground.
- Heavy glass greenhouses or sites with unstable or sloped ground require a poured concrete slab or a dwarf wall with footings for better permanence and stability.
- Proper site preparation, including good stone gradation, geotextile fabric, and frost line considerations, is critical for foundation longevity and performance in cold climates.
- DIY foundation construction ranges from simple gravel pads to more complex slabs or masonry walls, with costs escalating accordingly and some options requiring professional installation.
- Foundation choice should match the greenhouse size and intended use, with larger or heavier structures favoring concrete or dwarf walls, and small seasonal greenhouses suitable for gravel bases.
Table of Contents
- Which Greenhouse Foundation Options Should You Compare?
- How Do You Build Each Type of Greenhouse Foundation?
- What Site Prep and Anchoring Does a Greenhouse Foundation Need?
- Which Foundation Fits Your Greenhouse Size and Budget?
- What Does It Cost to Build a Greenhouse Foundation Yourself?
- Gridwise Living’s Take on Building the Right Base
- Why Most Foundation Advice Skips the Boring Parts
- Ready to Match a Greenhouse to Your Foundation?
- Sources
- FAQ
Which Greenhouse Foundation Options Should You Compare?
Every greenhouse foundation option trades off cost, drainage, permanence, and how much sweat equity it demands. Here’s the quick version before the deep dive.
Compacted gravel pad (gravel-and-timber base). Best for small to medium kit greenhouses on flat, well-drained soil. This is the workhorse choice across most manufacturer guides, and it’s the option most guides recommend as the default because it balances cost, drainage, and ease of installation better than anything else on this list. Material costs run roughly $1 to $3 per square foot, which puts a small pad in the $100 to $400 range. DIY difficulty: low to moderate, mainly limited by how much digging and compacting you’re willing to do by hand or with a rented plate compactor.
Pressure-treated timber frame with gravel infill. Best for anyone who wants a clean, defined edge around a gravel base without pouring concrete. It’s really a variant of the gravel pad, using rot-resistant lumber as the containment wall instead of plastic edging or buried pavers. Cost adds modestly to a plain gravel pad, and difficulty stays in the same low-to-moderate range.
Concrete pavers or blocks. Best for readers who want a firmer, more finished-looking floor without full concrete work. Pavers sit on a compacted gravel and sand bed, so they inherit most of gravel’s drainage benefits while giving you a walkable, level surface. Cost lands in the middle of the range, and difficulty is moderate. You’re not pouring anything, but leveling dozens of individual pavers takes patience.
Poured concrete slab. Best for heavy glass greenhouses, permanent installations, or any site with unstable, sloped, or consistently soggy ground. Materials run about $3 to $6 per square foot, with installed totals often landing between $500 and $3,000 or more depending on size and whether you add rebar reinforcement. DIY difficulty is high. Most homeowners hire a concrete contractor for anything beyond a small pad, partly because a slab must be poured with the right fall or drain to avoid water pooling inside the greenhouse.
Dwarf wall on footings. Best for premium glass greenhouses where you want a raised, insulated base and a long design life. A dwarf wall is a short masonry perimeter wall, usually laid by a mason, that the greenhouse frame sits on top of. It’s the most expensive option on this list, often running into several thousand dollars once labor is included, but it also delivers the most permanence and the cleanest look.
As a rough sizing rule: small greenhouses under about 60 square feet do fine on gravel alone, medium greenhouses in the 60 to 120 square foot range usually want the gravel-and-timber combination, and anything larger, heavier, or intended as a permanent structure starts to justify a slab or dwarf wall. If you’re still choosing a structure to put on top of any of these bases, it helps to look at different home greenhouse styles before you commit to a foundation, since a heavy aluminum-and-glass frame has very different demands than a lightweight polycarbonate kit.
How Do You Build Each Type of Greenhouse Foundation?
Picking a foundation type is the easy part. Building it correctly is where most backyard projects go sideways, usually because someone skips a step that seems optional but isn’t.
1. Compacted gravel pad. Excavate 4 to 6 inches of topsoil across the footprint, extending a few inches beyond the greenhouse’s actual footprint on each side. Line the excavated area with a heavy-duty woven polypropylene geotextile fabric, the kind sold for driveway stabilization rather than the thin landscape fabric from a garden center rack. That distinction matters more than most first-time builders expect, since standard landscape fabric degrades under the weight of gravel and lets soil migrate up through the stone within a season or two. Fill with angular crushed stone, ideally a 3/4 inch minus gradation, in 2 inch lifts, compacting each lift with a rented plate compactor before adding the next. Contain the edges with buried pavers, landscape timbers, or the timber frame described next.
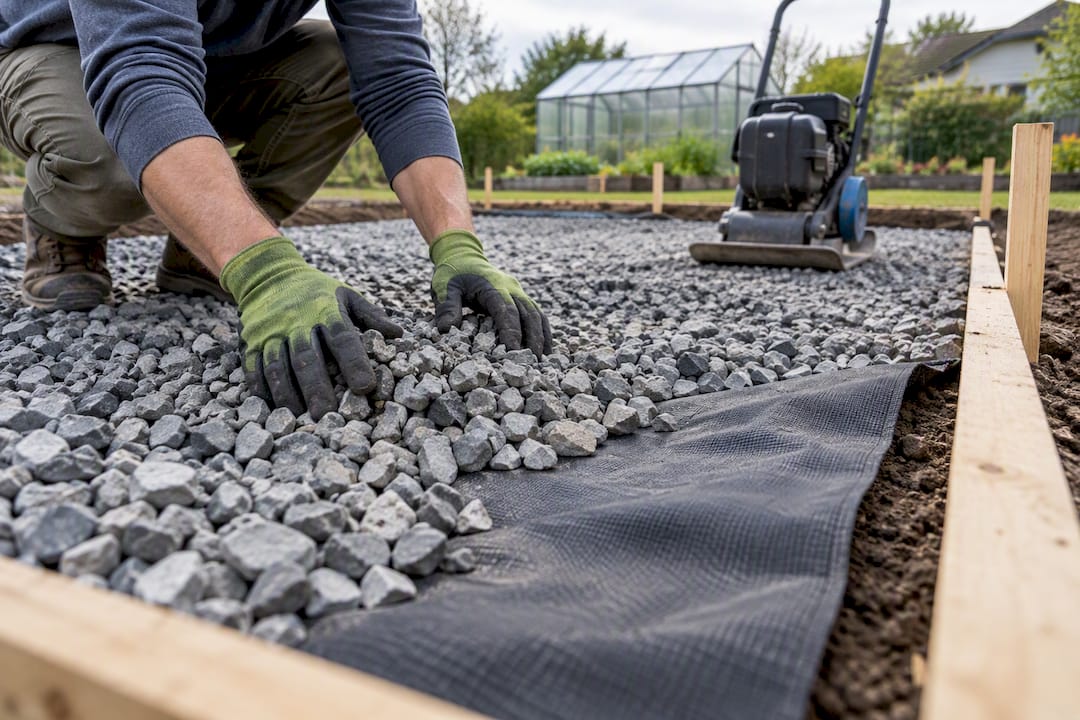
2. Pressure-treated timber frame with gravel infill. Use lumber rated UC4A for ground contact, not the standard UC3B treatment sold for deck rails, since UC4A lumber is designed to resist decay when it sits directly on or in soil. Nominal 2x8 or 2x10 boards, doubled at the corners, give you enough depth to contain 6 to 8 inches of compacted gravel. Anchor the corners with galvanized lag screws and stake the perimeter every 3 to 4 feet with rebar or ground stakes driven flush. Expect the wood to need replacement in 10 to 15 years even with UC4A treatment, faster in consistently wet climates.
3. Concrete pavers or blocks. Bed pavers on 2 inches of compacted sand over a compacted gravel sub base, using a screed board to keep the sand layer even. Check level every few rows, since pavers are forgiving to relevel now but a nightmare to fix once the greenhouse frame is anchored on top. This option makes the most sense when you want a hard, walkable floor for potting benches without the cost or permanence of a full slab.
4. Poured concrete slab. Plan for a slab at least 4 inches thick, with a 1 to 2 percent slope or a central drain so water doesn’t pool against the greenhouse frame. A concrete slab is impermeable, so drainage has to be engineered in rather than left to gravity through the material itself, and footings or piers around the perimeter need to sit below your local frost line to prevent frost heave from cracking the pad. Rebar reinforcement is worth the extra cost in any climate with real freeze-thaw cycles. Most homeowners hire a contractor for anything beyond a small utility pad, and permitting requirements vary enough by municipality that it’s worth a call to your local building department before you schedule a pour.
5. Dwarf wall and piers. A dwarf wall is a low masonry perimeter, typically 18 to 24 inches tall, built on footings that extend below the frost line. It raises the glazing off the ground, adds a layer of thermal mass, and gives a premium glass greenhouse the permanence that a lightweight kit doesn’t need. Piers work the same way but as isolated posts rather than a continuous wall, common in commercial builds where the floor between piers stays open or gets its own gravel or slab treatment.
Common mistakes worth avoiding: using rounded pea gravel instead of angular crushed stone (pea gravel shifts underfoot instead of locking together), skipping the geotextile fabric entirely, under-compacting each gravel lift instead of doing it in stages, and forgetting anchors because “the greenhouse is heavy enough to stay put.” It isn’t, once wind gets under a panel.
Pro Tip: Order your crushed stone before you rent the plate compactor. Delivery scheduling is usually the bottleneck on a weekend gravel pad project, not the labor.
What Site Prep and Anchoring Does a Greenhouse Foundation Need?
A foundation is only as good as the ground underneath it. Start by checking slope across the footprint with a laser level or a long straightedge and a bubble level. Most greenhouse manufacturers want the site level within about a half inch across the full footprint, since panel doors and roof vents can bind if the frame racks even slightly out of square.
Drainage planning depends on the foundation type you picked:
- Gravel pads drain through the stone itself, so grading the surrounding ground away from the greenhouse is usually enough.
- Timber-framed gravel bases benefit from a shallow perimeter drain or gravel-filled trench on the uphill side if the yard has any natural slope toward the structure.
- Poured slabs need either a built-in floor drain or a slight interior fall toward one edge, since concrete won’t let water pass through.
- Paver floors sit on a sand and gravel base that handles minor drainage on its own, similar to a gravel pad.
Frost depth is the detail that changes everything if you skip it. In much of the northern United States, frost lines run anywhere from 12 inches to over 48 inches deep, and any permanent footing, pier, or dwarf wall foundation needs to extend below that line or risk frost heave cracking the structure over a few winters. Gravel pads mostly dodge this problem since they’re not rigid, which is one more reason they’re the lower-maintenance choice in cold climates.
Anchoring has to match the foundation. Ground anchors or rebar stakes work for gravel and timber bases; anchor bolts set into cured concrete are the standard for slabs; and dwarf walls typically anchor the frame with embedded straps or bolts cast into the top course. Whatever you use, plan for real wind load. A guide on anchoring greenhouses against high wind walks through the anchor spacing that keeps panels from lifting in a gust, which matters more on a lightweight gravel base than on concrete.
Which Foundation Fits Your Greenhouse Size and Budget?
Matching foundation to footprint keeps you from overbuilding a hobby greenhouse or underbuilding one that’s going to carry rolling benches and water tanks for a decade.
| Footprint | Recommended foundation | Typical material cost | Best-for note |
|---|---|---|---|
| Small (under 60 sq ft) | Gravel pad, no timber frame required | $100–$400 (at $1–$3 per square foot) | Cold frames, starter kits, seasonal use |
| Medium (60–120 sq ft) | Gravel pad with timber perimeter | moderate-cost estimated materials | Most backyard kit greenhouses |
| Large (over 120 sq ft) or heavy glass | Poured slab or dwarf wall | higher-cost estimated materials; dwarf wall is expensive | Permanent structures, glass panels, rolling benches |
Once you’re planning benches, water barrels, or any heavy equipment inside, a slab often stops being optional. Concentrated loads and the need for easy cleanup tend to rule out gravel or pavers for that kind of setup, since a hard, flat, sanitizable surface handles repeated equipment moves better than loose stone ever will.
If you’re layering in extras like a ground-air heat transfer system or under-slab insulation for year-round growing, budget and complexity both climb fast. Those systems require excavation and ductwork before the slab goes down, which usually pushes the project from a DIY weekend into contractor territory regardless of footprint.
What Does It Cost to Build a Greenhouse Foundation Yourself?
Here’s the difficulty and budget picture in plain terms:
- Gravel pad (small, DIY): $100–$400 in materials, low difficulty, one weekend with a rented plate compactor and a wheelbarrow.
- Timber frame with gravel infill: add $50–$150 for UC4A lumber and hardware on top of gravel costs, low to moderate difficulty, one to two weekends.
- Pavers or blocks: $200–$600 in materials for a medium footprint, moderate difficulty, mostly patience-limited rather than skill-limited.
- Poured slab: costly installed, high difficulty, best left to a concrete contractor unless you’ve poured slabs before; expect permits and an inspection in many jurisdictions.
- Dwarf wall: several thousand dollars including masonry labor, high difficulty, generally a hired job.
If you’re clearing brush, grading a slope, or removing old pavement before any of this starts, a local site prep service like Tri-State Brush and Gravel can save a weekend of hand labor that would otherwise eat into your foundation budget.
Gridwise Living’s Take on Building the Right Base
Some companies work with greenhouses, garden beds, and other hardware for self-reliant backyards, so it is common to see good greenhouse kits get undermined by a bad foundation decision. Site selection and assembly guidance matter as much as the panels themselves. Our site selection guide and step-by-step assembly walkthrough both cover how foundation tolerances affect the final build, since a frame that’s out of square by even a half inch will fight you on every panel and door for the life of the structure.
Why Most Foundation Advice Skips the Boring Parts
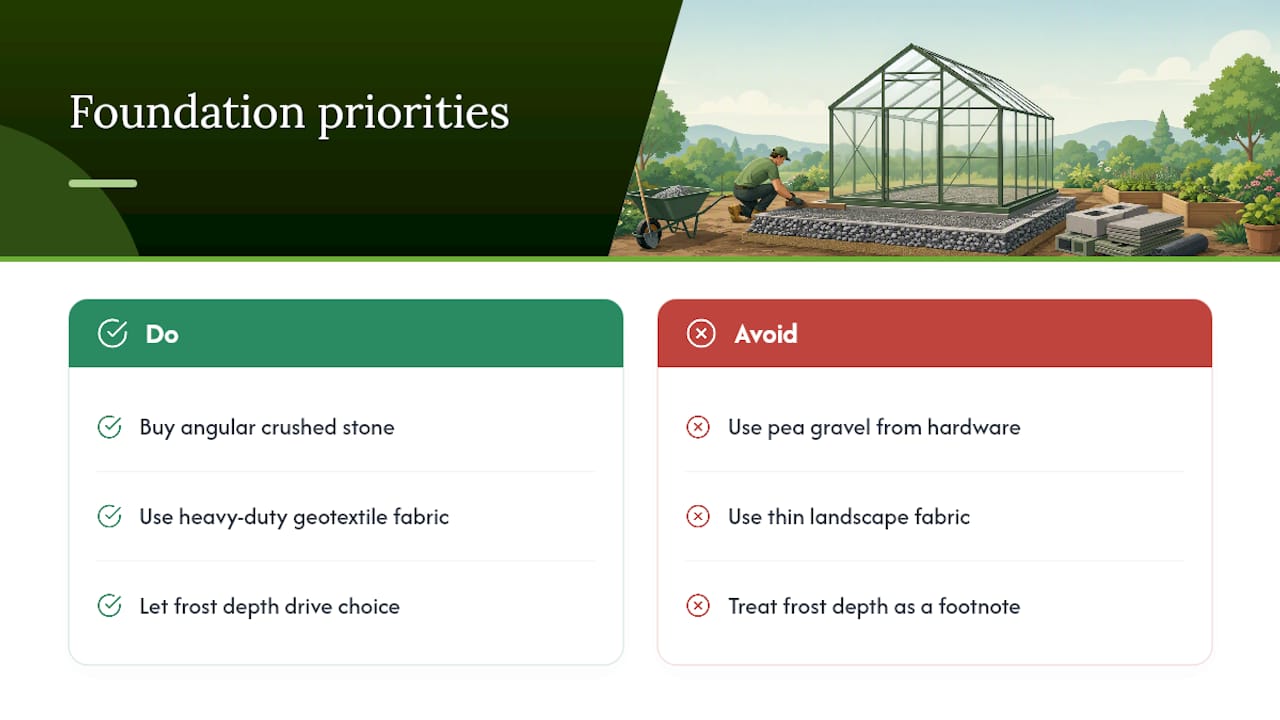
The conventional wisdom on greenhouse foundations spends too much time debating gravel versus concrete and not enough time on the two decisions that actually determine whether your base lasts: stone gradation and fabric quality. Homeowners fixate on the big choice, then grab whatever pea gravel and thin landscape fabric happen to be cheapest at the hardware store, and undo half the benefit of picking gravel in the first place.
What we’d prioritize differently: spend the extra few dollars per bag on angular crushed stone and heavy-duty geotextile before you worry about whether timber or concrete is more “correct.” Those two material choices affect drainage and stability more than the foundation category itself. Frost depth gets treated as a footnote in a lot of guides, but in freeze-thaw climates it’s the difference between a foundation that lasts fifteen years and one that cracks in three. If your ground freezes deep, that reality should drive your foundation choice before budget does.
— Gridwise
Ready to Match a Greenhouse to Your Foundation?
Once you know what your gravel pad, timber frame, or slab can support, the next step is picking a structure sized to fit it. Measure your intended footprint against the size tiers above, then browse the Gridwiseliving greenhouse collection for kits that match your footprint and frame weight. A heavier aluminum and polycarbonate model, like the 10x32ft heavy-duty outdoor greenhouse, performs best on a gravel-and-timber base sized to its full anchor pattern rather than a foundation poured for a smaller kit.
Before you order, check the anchoring and base compatibility notes on the product page, or reach out to Gridwiseliving support with your foundation dimensions. If you’re also planning raised beds nearby, the Timberlane Gardens cedar raised bed kits pair well with a gravel greenhouse pad, since both benefit from the same site leveling work. Get your footprint measured and your ground leveled first. The right foundation only pays off when the greenhouse on top of it actually fits.
Sources
- Greenhouse foundation and base guide (2026)
- Best Flooring for a Greenhouse - Greenhouse foundation ideas
FAQ
What Is the Best Type of Foundation for a Greenhouse?
A compacted gravel pad with a pressure-treated timber perimeter is the best foundation for most home greenhouses, since it drains well, costs roughly $1 to $3 per square foot, and is straightforward for a homeowner to build in a weekend. Heavy glass greenhouses, unstable ground, or permanent installations do better on a poured concrete slab or dwarf wall instead.
What Is the Most Affordable Foundation for a Greenhouse?
A plain compacted gravel pad without a timber frame is the cheapest option, often falling in the $100 to $400 range for a small footprint at $1 to $3 per square foot in materials. Adding a timber perimeter raises the cost slightly but improves edge containment and long-term stability.
What Are Some Good Base Ideas for a Home Greenhouse?
The main options are a gravel pad, a gravel pad with a timber frame, concrete pavers or blocks, a poured concrete slab, and a masonry dwarf wall on footings. Most backyard gardeners land on gravel with a timber perimeter, while anyone browsing greenhouse styles for their yard should match the base to the frame weight before finalizing either choice.
Can I Build a Cinder Block Foundation for My Greenhouse?
Concrete blocks can work as a low perimeter wall or as support piers, similar in function to a dwarf wall, but they need a proper footing below the frost line to avoid shifting. For most kit greenhouses, a gravel pad or timber-framed gravel base is simpler to build correctly and less prone to settling issues than a stacked block wall without engineered footings.