

Save a Season: Home Seed Viability Test in 7 to 14 Days
Yes, you can test seed viability at home, and it takes less effort than most gardeners expect. Start with a quick float test to weed out obvious duds, then confirm with a paper-towel germination test for a real percentage. If fewer than half your seeds sprout, replace the packet instead of gambling a season on it.
TL;DR:
- Fewer than 70% germination indicates the seed lot is unreliable and should be replaced, especially for high-value crops or consistent yields.
- The float test offers a quick, rough viability indication but is less reliable than the paper-towel germination test, which provides precise percentage results over two weeks.
- Seeds stored in cool, dry conditions can last longer; cucumber, lettuce, and spinach seeds often remain viable for 5 to 6 years, while peppers last only 1 to 2 years.
- Dormant seeds like legumes may require scarification or cold stratification before testing, as false negatives can occur in simple germination checks.
- Laboratory tests like tetrazolium screening can confirm seed viability faster but are overkill for home gardening; home tests are estimates, not guarantees.
Table of Contents
- What Is a Seed Viability Test, and Which One Should You Run First?
- Run a Paper-Towel Germination Test: Exact Materials and Steps
- Calculate and Interpret Results: What the Percentages Mean
- How Long Common Garden Seeds Usually Stay Viable
- Dormancy Exceptions: Why Some Viable Seeds Won’t Sprout
- Storing Seeds Correctly Protects Every Test You Run Later
- Why Gridwiseliving Recommends Testing Before You Plant
- Standard Lab Germination Tests Follow Stricter Rules Than a Kitchen Test
- Tetrazolium Testing: A Lab Shortcut That Skips Germination Entirely
- Reading Your Results: What a Seed Lot’s Score Actually Tells You
- No Viability Test Is Perfect: Where Each Method Falls Short
- Test the Seeds You Can’t Easily Replace
- Sources
- FAQ
What Is a Seed Viability Test, and Which One Should You Run First?
A seed viability test simply checks whether seeds are still alive and capable of sprouting before you commit soil, time, and garden space to them. Home gardeners have two practical options, and picking the right one comes down to how much time you have and how many seeds are on the line.
The float test takes about 15 minutes: drop seeds in water, and the ones that sink are generally more likely to be viable, while floaters often are not. It’s fast, but it’s also the least reliable of the two, so treat it as a first pass, not a final verdict. The paper-towel germination test takes 7 to 14 days at a warm room temperature of 70 to 80°F, but it gives you an actual germination percentage you can act on.
- Float test: ~15 minutes, quick screen, best for large seeds like beans or squash.
- Paper-towel test: 7 to 14 days, gives a precise percentage, works for nearly any garden seed.
- Oxygen matters: never seal test bags airtight. Seeds respire, and a sealed bag traps moisture and invites mold.
If you’re short on time and only need a rough sense of a seed lot, float first. If you’re deciding whether to trust seeds for a whole bed, run the paper-towel test.
Run a Paper-Towel Germination Test: Exact Materials and Steps
You need very little to do this right: a few paper towels, a spray bottle, a gallon-size bag or a shallow container with a loose-fitting lid, a marker, and 10 to 50 seeds depending on how big the lot is. Ten seeds gives you a rough read; 50 gives you a number you can trust for planting decisions.
- Dampen a paper towel until it’s moist throughout but not dripping. Squeeze out excess water.
- Lay 10 to 50 seeds across one half of the towel, spaced so they aren’t touching.
- Fold the towel over the seeds and place it in a labeled bag or container, marked with the seed type and today’s date.
- Leave the bag loosely closed, not sealed, so air can circulate.
- Store it somewhere consistently warm, 70 to 80°F, out of direct sun.
- Check every one to two days. Mist the towel if it starts drying out.
- Count and record any sprouted seeds each time you check, and keep counting through day 14.
Pro Tip: Keep the bag on top of the refrigerator or near a water heater. Both spots hold a steady 70 to 80°F without you having to think about it, which matters more than any other single variable in this test.
Once you hit day 14, tally your final sprout count against your starting number. That ratio is your germination percentage, and it tells you exactly what to do next.
Calculate and Interpret Results: What the Percentages Mean
The math is simple: divide the number of sprouted seeds by the total number tested, then multiply by 100.
Extension research sets clear thresholds for what that number means for your garden plans.
| Germination rate | What it means | Action |
|---|---|---|
| above 70% | Excellent seed lot | Plant as normal |
| around 70% | Usable but declining | Sow more thickly to compensate |
| below half | Unreliable for production | Replace the seed lot |
If your test comes back at a germination rate in the moderate range, plant more seeds than the packet recommends to end up with a full stand. That’s a simple multiplier, not guesswork.
One catch worth knowing: germination and vigor aren’t the same thing. A seed lot can technically sprout and still produce weak, spindly seedlings that struggle once transplanted. If your test seeds germinate but look feeble, treat that as a caution sign for high-value crops, even if the raw percentage looks fine.
How Long Common Garden Seeds Usually Stay Viable
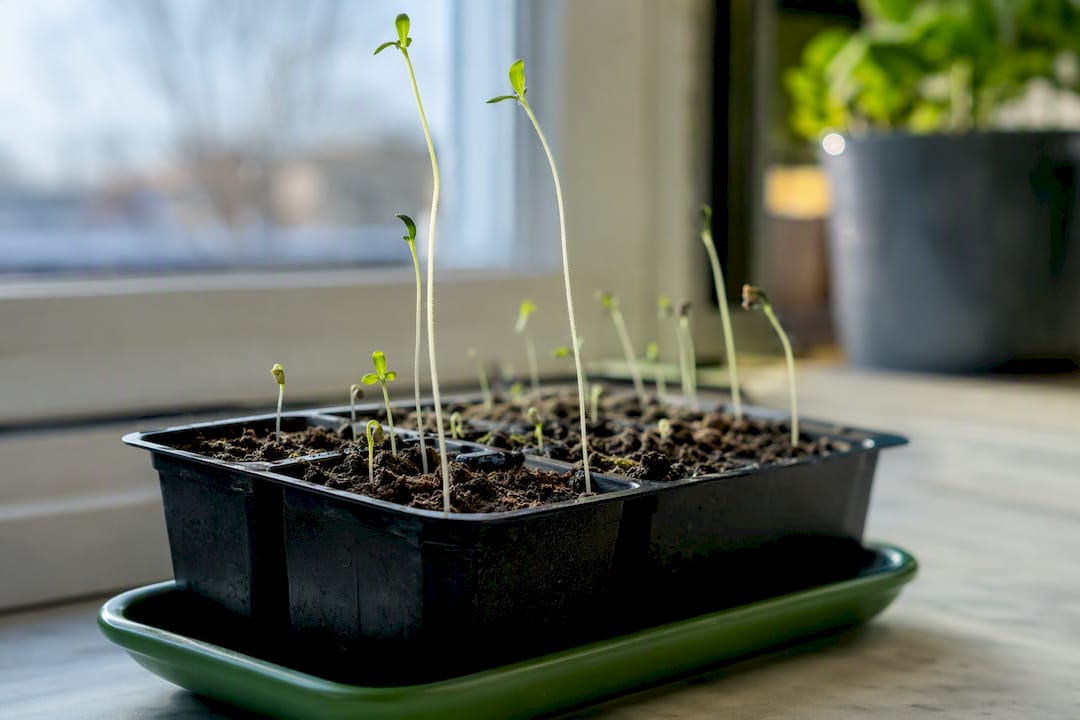
Some seeds are practically bulletproof in storage. Others fade fast no matter what you do. Knowing where a crop falls tells you whether testing is worth the trouble or whether you should just buy fresh.
- Long-lived (5 to 6 years): cucumber, lettuce, and spinach hold up well under decent storage.
- Medium-lived (3 to 4 years): beans, peas, beets, carrots, and tomatoes.
- Short-lived (1 to 2 years): corn, onions, leeks, parsley, parsnips, and peppers lose vigor fastest.
These ranges assume reasonably good storage. Seeds kept cool and dry can outlast these windows; seeds left in a hot garage or a humid shed often fall short of them. That “packed for” date on the seed packet isn’t an expiration date. It’s a packing reference, and storage conditions do far more to determine whether a seed still sprouts than the number printed on the envelope.
Dormancy Exceptions: Why Some Viable Seeds Won’t Sprout
Not every seed that fails a paper-towel test is actually dead. Some seeds are built with built-in dormancy mechanisms that a plain germination test doesn’t account for, and skipping the right pre-treatment can produce a false negative.
- Hard-coated seeds like legumes and many sunflower varieties often need scarification. A light nick with a blade or a rub with fine sandpaper lets water in and reveals true viability.
- Many wildflower and tree seeds need cold stratification. A few weeks in a damp paper towel inside the refrigerator mimics winter and breaks dormancy.
- If a seed still won’t sprout after the right pre-treatment, a soil-based test in a seed tray can sometimes succeed where a paper towel fails, since it more closely mimics natural conditions.
Pro Tip: If you’re not sure whether a species needs pre-treatment, check the seed packet or a reputable seed guide before writing off a batch as dead.
Storing Seeds Correctly Protects Every Test You Run Later
Good storage buys you more time before a test is even necessary. The rule extension offices repeat most often: seeds last longest when temperature in Fahrenheit plus relative humidity in percent add up to less than 100. A humid garage does not, no matter how cool it feels.
- Store seeds in airtight containers with a silica packet or a bit of powdered milk wrapped in cloth as a desiccant.
- A sealed jar in a refrigerator around 40°F works well for most garden seeds; a chest freezer works too, but only if seeds are fully dry first, since moisture plus freezing temperatures can rupture cell walls.
- Label every container with the seed type and the year you stored it, so you’re not guessing later.
- Retest seed lots about one month before planting. That gives you enough lead time to order fresh seed if your stored lot has dropped below a usable rate.
Why Gridwiseliving Recommends Testing Before You Plant
Gridwiseliving built its seed and growing-accessory lineup around one idea: self-reliant gardening only works if what you plant actually grows. A viability test costs a few paper towels and ten days. A failed bed costs you an entire season. Our seed storage guide walks through container choices and humidity control in more detail, and our growing accessories collection covers the trays, desiccants, and containers that make both storage and testing easier to manage at home.
Standard Lab Germination Tests Follow Stricter Rules Than a Kitchen Test
Seed labs and certification programs don’t eyeball a damp paper towel the way home gardeners do. Standard laboratory protocols, the kind used by state seed-testing labs and seed companies to certify germination rates on commercial packets, run under tightly controlled temperature and light conditions specific to each species. Some crops germinate best in constant light, others in complete darkness, and many need an alternating temperature cycle rather than one steady number.
Labs use calibrated germination chambers that hold humidity and temperature within a narrow range for the entire test period, rather than relying on a windowsill or the top of a refrigerator. They also run larger sample sizes, often several hundred seeds per lot split into replicate groups of 100, to produce a statistically reliable percentage rather than a rough estimate. That’s the standard behind the germination rate printed on most commercial seed packets.
For a home gardener, this level of rigor is overkill. A ten-to-fifty-seed paper-towel test at a warm, steady room temperature gets you close enough to make a planting decision. But it’s worth knowing the lab standard exists, because it explains why your own quick test at home might land a few percentage points off from what the packet claims. Slight temperature swings, an inconsistent light source, or a smaller sample size can all nudge your number in either direction. That’s not a flaw in your method. It’s just the difference between a controlled lab environment and a kitchen counter.
Tetrazolium Testing: A Lab Shortcut That Skips Germination Entirely
The tetrazolium test, often called a TZ test, is a biochemical shortcut labs use to check viability without waiting for seeds to sprout at all. Seeds are soaked, then split or cut, then treated with a tetrazolium chloride solution. Living tissue that’s still respiring turns a visible red or pink color as the chemical reacts with enzymes in active cells; dead tissue stays pale.
The appeal is speed. Where a paper-towel test takes 7 to 14 days, TZ results are typically ready in 24 to 48 hours, which matters when a commercial grower or a seed bank needs an answer fast on a large lot. It also requires trained interpretation. Reading the staining pattern correctly takes practice, since partial staining or discoloration in the wrong tissue region can be misread as either viable or dead when it’s actually ambiguous.
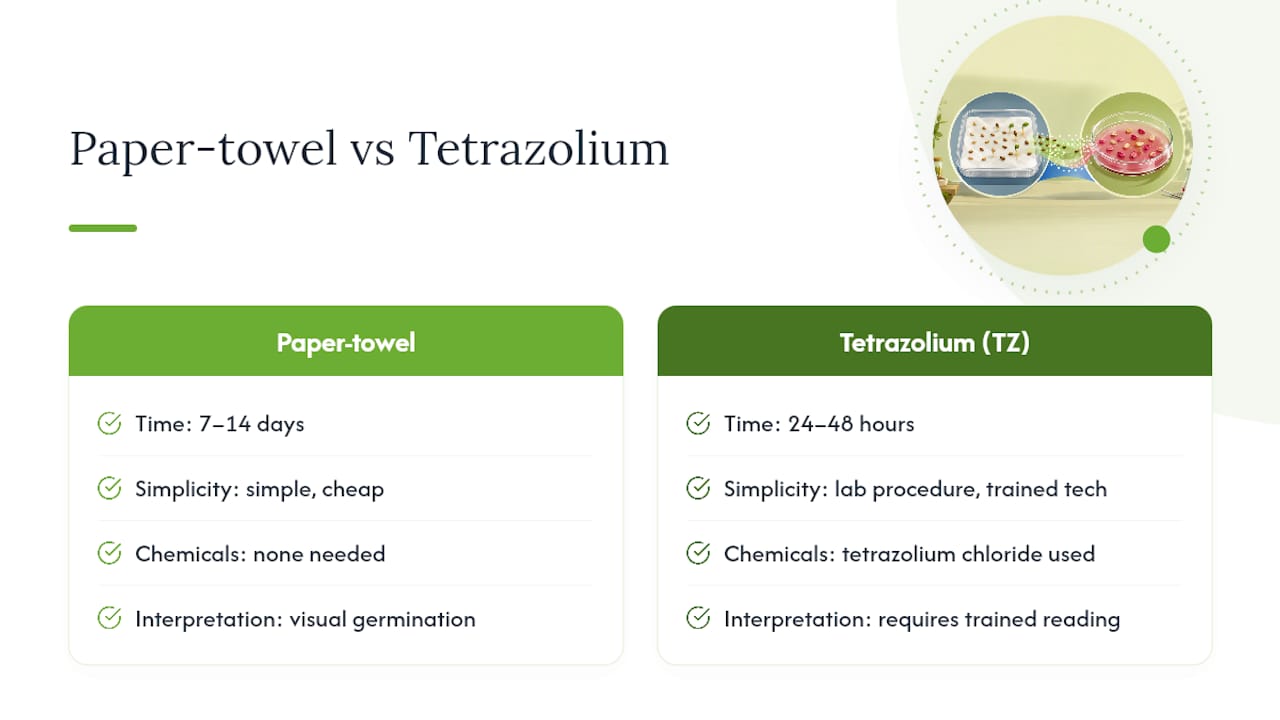
TZ testing also involves handling chemical reagents safely, which is one more reason it stays mostly in the lab rather than the home garden. For the seed quantities most backyard growers work with, and the timeline most home planting schedules allow, a paper-towel test remains simpler, cheaper, and plenty accurate. TZ testing earns its place when you’re evaluating hundreds of seeds at once, need results in two days instead of two weeks, or you’re working with rare or wetland species where every seed counts and destructive slicing for a chemical assay is worth the tradeoff.
Reading Your Results: What a Seed Lot’s Score Actually Tells You
A single germination number doesn’t tell the whole story of a seed lot’s quality. Context matters as much as the percentage itself.
But layer a few more questions on top of that raw number before you decide. How old is the seed, and how was it stored?
Look at how the seedlings themselves emerged, not just how many did. That’s a vigor problem, and it matters most for crops where you’re depending on strong, even stands, like a row of carrots you’ll thin later or a market bed of lettuce.
Finally, weigh the cost of being wrong in either direction. For a $3 packet of lettuce seed, overseeding to compensate for a mediocre germination rate costs you almost nothing. For a rare heirloom tomato variety or seed you saved yourself from last year’s best plants, a borderline result might be worth a second test, or worth starting extra seedlings indoors as insurance rather than betting the whole batch on one outdoor sowing.
No Viability Test Is Perfect: Where Each Method Falls Short
Every method covered here trades some accuracy for convenience, or some convenience for accuracy. None of them is flawless, and knowing the weak points helps you avoid overtrusting a single result.
The float test is the least reliable of the bunch. Seed density varies by species and even by individual seed, so a seed that sinks isn’t guaranteed to be alive, and one that floats isn’t guaranteed to be dead. Treat it strictly as a first screen, never as your final answer.
The paper-towel test is far more trustworthy but still sensitive to conditions you control imperfectly at home. A room that swings between 65°F overnight and 78°F during the day won’t give you the same result as a steady 75°F. Small sample sizes amplify this problem.
Lab-grade tests like TZ solve the temperature-consistency problem but introduce their own limitations. TZ measures whether tissue is metabolically alive, not whether the whole embryo will successfully sprout, grow roots, and push through soil. A seed can show live staining and still fail to establish in real garden conditions due to a damaged embryo or a physical defect the stain doesn’t catch.
The honest takeaway: no test replaces actually planting a seed and watching it grow. Every method here is a prediction, not a guarantee, and the more seeds you test, the more that prediction narrows toward the truth.
Test the Seeds You Can’t Easily Replace
Prioritize testing rare, saved, or expensive seed first. Common annual vegetable seed is cheap to replace; a saved heirloom variety isn’t. Run your test about a month before planting, so a bad result still leaves you time to order more.
— Gridwise
Sources
- How to Store Seeds and Test Germination Rates | Yard and Garden (Iowa State Extension)
- Seed viability testing guide for common wetland plant species (Robinson et al., 2024)
- Checking for seed viability | Tilth Alliance
If you’re setting up a dedicated space for seed starting and want more consistent warmth than a windowsill offers, browse greenhouses built for reliable germination conditions.
FAQ
How do you test for seed viability?
Run a quick float test to screen out obvious duds, then confirm with a paper-towel germination test over 7 to 14 days at 70 to 80°F, counting sprouts against your total seed count.
What are the four methods of testing seed viability?
The most common approaches are the float test, the paper-towel germination test, soil-tray testing for dormant or hard-coated seeds, and lab-based tetrazolium (TZ) testing for fast biochemical results.
How long can a seed remain viable?
It depends on the species and storage: cucumber, lettuce, and spinach often last 5 to 6 years, beans, peas, and tomatoes typically last 3 to 4 years, and corn, onions, and peppers usually last only 1 to 2 years, with good cool, dry storage extending all of these ranges.