

How to Choose Between Container and Tiny Home Styles
A container tiny home is a modular, durable living structure built from repurposed ISO shipping containers, offering design flexibility and cost advantages over traditional construction. When you need to choose between container tiny home styles and conventional tiny houses, the decision comes down to three factors: budget, site conditions, and how much customization you want. Container homes use recycled steel frames that already meet structural load standards, which cuts build time and material costs significantly. This guide walks you through design options, real cost ranges, and the practical tradeoffs so you can make a confident choice.
How to choose between container tiny home configurations
The most common container sizes for residential conversion are 20-foot and 40-foot standard units, plus the high-cube variant that stands 9’6" tall instead of the standard 8’6". That extra foot matters more than it sounds. After you add spray foam insulation and interior framing, a standard container loses 6–8 inches of headroom. A high-cube unit keeps the finished ceiling at a livable height without forcing you to crouch near the walls.
Single vs. multi-container layouts
A single 20-foot container gives you roughly 160 square feet of usable floor space. That works for one person with a lofted sleeping area and a compact kitchen. A 40-foot unit doubles that to about 320 square feet, which comfortably fits a couple. Multi-container builds, where you place units side by side or stack them, open up full family-sized floor plans. Joining multiple containers requires structural engineering to reinforce cut edges and welding, adding $5,000–$15,000 to your budget but enabling layouts that feel like a conventional home.
Stacked configurations work well on narrow lots where horizontal space is limited. Side-by-side arrangements are easier to insulate and connect utilities across. Both require a structural engineer to sign off on any wall cuts, since the corrugated side panels carry load differently than the corner posts.
- 20-foot single: Best for solo living or a weekend retreat
- 40-foot single: Fits a couple with a defined bedroom and living area
- Two 20-foot side by side: Creates a 320-square-foot open plan with wider rooms
- Stacked 40-foot units: Delivers two-story living on a compact footprint
- L-shaped or U-shaped multi-unit: Maximizes outdoor courtyard space
Pro Tip: Always spec a high-cube container for any residential build. The standard unit’s finished ceiling will feel oppressively low once insulation and drywall go in, and you cannot fix that after the fact.
What does a container tiny home actually cost?
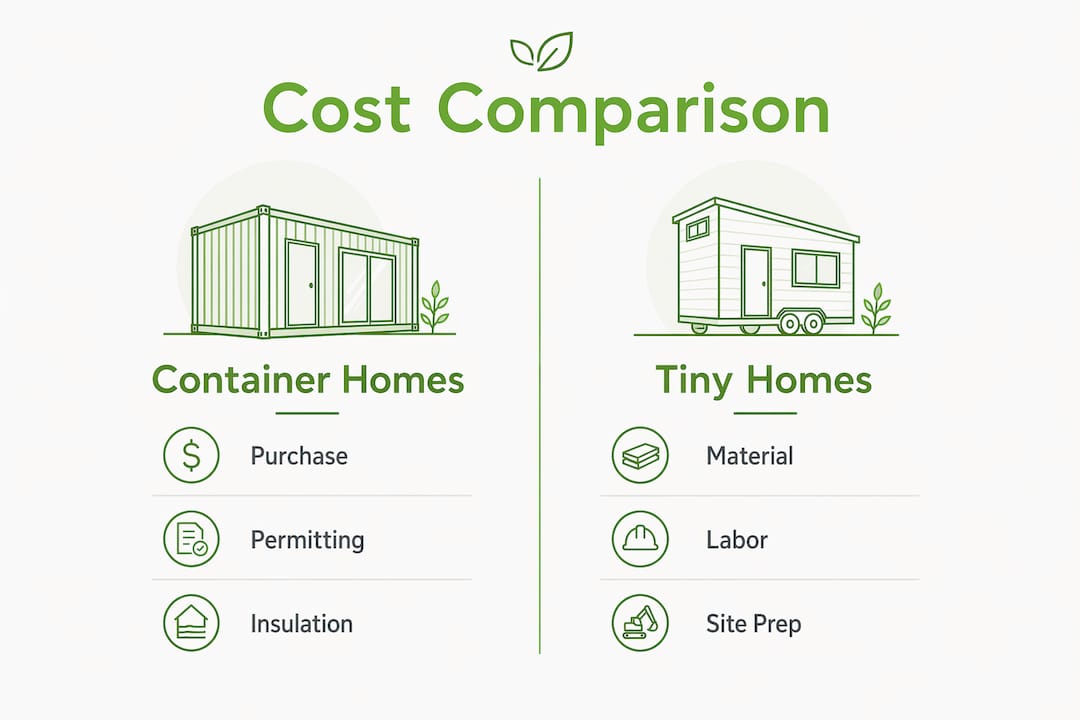
Cost is where container homes vs. tiny homes built on wood frames diverge most sharply. DIY container tiny homes cost between $13,400 and $30,200, while turnkey finished builds run $60,000 to $150,000 depending on size and finish level. That range is wide because the container itself is only the starting point.
Container purchase price
Your first major decision is container condition. One-trip containers cost $4,000–$6,500 and arrive in near-new condition with minimal rust and intact floor boards. Wind-and-watertight units run $1,500–$2,500 but often need floor replacement, rust treatment, and repainting before you can build. The cheaper container frequently costs more in the end once you factor in repair labor.
Key cost categories
| Cost Category | Typical Range | Notes |
|---|---|---|
| Container purchase (one-trip) | $4,000–$6,500 | Near-new condition, minimal prep |
| Container purchase (wind-and-watertight) | $1,500–$2,500 | Requires significant repair work |
| Spray foam insulation | $3,000–$6,000 | 2–3 inches required for moisture control |
| Mini-split HVAC (9,000–12,000 BTU) | $1,500–$3,500 | Sized for under 400 square feet |
| Permitting and zoning | Under $500–$5,000 | Varies by rural vs. urban jurisdiction |
| Multi-container welding and reinforcement | $5,000–$15,000 | Required for any wall cuts or stacking |
Zoning and permitting costs vary from under $500 in rural areas to $2,000–$5,000 in urban jurisdictions with stricter codes. That spread can shift your total budget by more than the container itself costs. Research your local codes before you buy anything.
Pro Tip: Call your county planning department before purchasing a container. Some jurisdictions classify container homes as accessory dwelling units, which carry different permit fees and setback rules than primary residences.
What are the real advantages and challenges of container homes?
Container homes carry genuine structural advantages that wood-frame tiny houses cannot match. Steel shipping containers are engineered to stack eight units high when fully loaded at sea. That structural integrity translates directly into a home that handles high winds, heavy snow loads, and seismic activity better than most stick-built alternatives.
Benefits worth knowing
- Durability: Corten steel resists corrosion and physical impact far better than wood framing
- Modularity: You can add a second container later without rebuilding the whole structure
- Speed: A single-container shell is ready for interior work within days of delivery
- Sustainability: Converting shipping containers reduces construction waste by 40% compared to traditional building methods
- Footprint: The compact floor plan forces intentional design, which cuts long-term utility costs
That 40% waste reduction is not a minor footnote. It reflects the fact that you are repurposing an existing manufactured structure rather than cutting new lumber, pouring new concrete, and generating offcuts at every stage.
Challenges you need to plan for
Steel conducts heat and cold aggressively. Without proper insulation, a container home becomes an oven in summer and a freezer in winter. Spray foam insulation at 2–3 inches is the standard solution because it seals the steel surface completely and prevents condensation from forming inside the wall cavity. Rigid foam board alone leaves gaps at seams where moisture collects and mold follows.
Zoning remains the most unpredictable challenge. Many municipalities have no code category for container homes, which means your project lands in a gray area that requires variance applications and sometimes a structural engineer’s letter. Starting that process early, before you commit to a site, prevents the most common and expensive delays.
How do you plan and build a container tiny home step by step?
The build process follows a clear sequence. Skipping steps or reordering them creates expensive rework.
- Choose your container. Select a one-trip unit in your target size. Inspect corner posts and floor boards in person or request a condition report with photos. Surface rust on corrugated walls is cosmetic. Corner post damage or soft floor boards are structural problems that disqualify the unit.
- Prepare your site and foundation. Concrete piers at the four corner posts are the most common foundation for a single container. A full concrete slab costs more but simplifies plumbing rough-in. Gravel pads work for temporary or off-grid placements where local codes allow.
- Plan and cut openings. Mark all door and window locations before any cutting starts. Every cut in a corrugated wall requires a steel header welded above the opening to redistribute load. IRC standards require at least one egress window per sleeping area with minimum dimensions and sill height. Plan those openings first, then design the interior around them.
- Insulate before framing. Apply closed-cell spray foam directly to the interior steel surface before any wood framing goes up. This creates the vapor barrier and thermal break in one step. Framing over bare steel traps condensation between the wood and metal.
- Run electrical, plumbing, and HVAC. Electrical conduit runs inside the framed walls after insulation. Plumbing is simplest when concentrated on one end wall. Install a mini-split heat pump sized at 9,000–12,000 BTU for a unit under 400 square feet. That size handles both heating and cooling without overworking the compressor.
- Finish interior and exterior. Shiplap, plywood panels, and tile all work well inside containers. Exterior coatings should include a rust-inhibiting primer before any topcoat. Light-colored exterior paint reduces solar heat gain significantly in warm climates.
- Arrange delivery and placement. Container delivery requires a flatbed truck and a crane or tilt-bed trailer depending on site access. Measure your driveway width and any overhead obstacles before scheduling delivery. The container needs to land within a few inches of its final position because repositioning on-site is difficult without equipment.
Pro Tip: For off-grid builds, rough in your solar conduit during the electrical phase even if you are not installing panels immediately. Adding it later means cutting through finished walls.
| Foundation Type | Best For | Cost Range |
|---|---|---|
| Concrete piers | Single containers, most sites | $1,500–$4,000 |
| Full concrete slab | Multi-container, plumbing-heavy builds | $4,000–$10,000 |
| Gravel pad | Temporary or rural off-grid placement | $500–$1,500 |
| Steel frame on grade | Sloped or uneven terrain | $2,000–$6,000 |
You can pair a container home with solar energy systems from the start, which makes off-grid placement genuinely practical rather than aspirational.
Key Takeaways
Choosing the right container tiny home style requires matching container size, condition, and site requirements to your budget before committing to any design.
| Point | Details |
|---|---|
| High-cube containers are the standard | The extra headroom accommodates insulation and framing without sacrificing livable ceiling height. |
| DIY vs. turnkey gap is significant | DIY builds run $13,400–$30,200; turnkey finished homes cost $60,000–$150,000. |
| Permitting is the biggest wildcard | Zoning costs range from under $500 to $5,000 depending on your jurisdiction. |
| Spray foam insulation is non-negotiable | 2–3 inches of closed-cell foam prevents condensation and maintains energy efficiency in steel containers. |
| Container condition determines true cost | One-trip units cost more upfront but avoid the repair expenses that make cheap containers expensive. |
What I’ve learned from watching container builds go right and wrong
Most people who regret their container home made the same mistake: they bought the container before they understood their local zoning rules. I’ve seen projects stall for six months because the owner purchased a 40-foot unit, had it delivered, and then discovered the county required a variance for any structure over 200 square feet on their parcel. The container sat on the lot, depreciating and rusting, while the paperwork worked its way through the system.
The builds that go smoothly share one habit. The owner treats the permitting research as the first construction task, not an afterthought. They call the planning department, describe the project, and ask specifically whether container homes require a variance, a special use permit, or just a standard building permit. That one phone call shapes every decision that follows.
The other lesson I keep seeing confirmed is that the insulation decision is the most consequential technical choice in the whole build. Owners who cut costs by using rigid foam board instead of spray foam consistently report condensation problems within the first winter. Fixing it after the walls are finished means tearing out the interior. Spray foam costs more upfront and pays for itself in the first year of heating bills, let alone in avoided remediation.
Container tiny homes reward people who plan methodically and punish people who improvise. The structure itself is forgiving. Steel does not rot, warp, or get eaten by termites. But the systems inside it, insulation, electrical, plumbing, and HVAC, require the same precision as any other residential build. Embrace that reality early and the process becomes straightforward.
— Gridwise
Gridwiseliving’s container tiny home collection
Gridwiseliving offers a range of expandable tiny homes built for buyers who want a turnkey solution without the complexity of a full DIY build. These units ship ready for placement and include the core systems that take most self-builders months to source and install.

The 20-foot luxury expandable model includes two bedrooms, a living room, and a bathroom in a folding container format that deploys on-site without heavy crane equipment. For buyers who want to browse the full range of sizes and configurations, the complete tiny homes collection covers options from compact single units to multi-room expandable layouts. Each product listing includes specifications, dimensions, and feature details to help you match the right unit to your site and budget.
FAQ
What is the difference between a container home and a tiny house?
A container home is built from repurposed steel shipping containers, while a traditional tiny house typically uses wood-frame construction on a trailer or foundation. Container homes offer greater structural durability and modularity but require more intensive insulation work.
How much does a container tiny home cost to build?
DIY container tiny homes cost between $13,400 and $30,200, while turnkey finished builds range from $60,000 to $150,000 depending on size, finish level, and site conditions.
Do container homes need special permits?
Most jurisdictions require a building permit, and some require a zoning variance or special use permit for container homes. Permitting costs range from under $500 in rural areas to $2,000–$5,000 in urban jurisdictions with stricter codes.
What size container is best for a tiny home?
A 40-foot high-cube container is the most practical choice for full-time living, providing roughly 320 square feet with enough ceiling height after insulation and framing to feel comfortable.
Can you live off-grid in a container tiny home?
Container homes are well-suited to off-grid living because their steel structure integrates easily with solar panels, rainwater collection, and composting systems. A 9,000–12,000 BTU mini-split heat pump handles climate control efficiently in units under 400 square feet.