

Budget Home Food Production Setup: Start This Weekend
Start with three small raised beds, a 55–100 gallon rain barrel, and a backyard compost bin. That combination gets you to a first harvest in 30–60 days and puts a real dent in your grocery bill without requiring a major investment. Intensive urban garden techniques can yield significantly more food per square foot than conventional field farming, which means even a modest backyard plot produces more than most families expect.
Your immediate action checklist:
- Pick a spot with 6–8 hours of direct sun
- Build or buy two to three raised beds (pallets work fine to start)
- Install one 55–100 gal rain barrel on a downspout
- Start a compost bin with kitchen scraps and yard waste
- Plant fast crops: lettuce, radish, basil, and pea shoot microgreens
- Contact your county extension office for free local guidance
University of Maryland Extension and the USDA both offer resources specifically for beginning growers. Gridwiseliving products like the Homie 28 hydroponic system and the 10x32ft polycarbonate greenhouse are practical upgrade paths once your outdoor beds are running.
Table of Contents
- How do you set up a budget home food production system in 30–60 days?
- What does a realistic budget home food production setup actually cost?
- Where should you spend and where should you save?
- What U.S. programs and resources help you grow food on a budget?
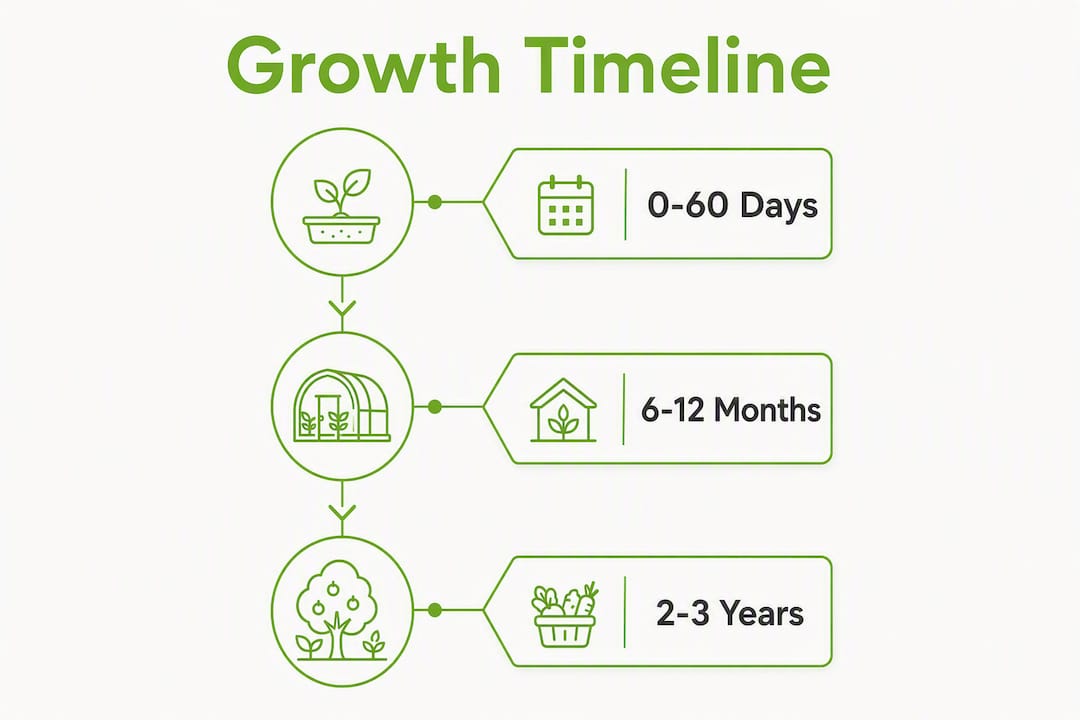
- How long does it take to see real results from a home food setup?
- What DIY builds and Gridwise products give you the most for your money?
- Key Takeaways
- The case for starting small and staying practical
- Gridwiseliving products built for exactly this kind of start
- Useful sources and further reading
How do you set up a budget home food production system in 30–60 days?
A working budget home food production setup comes down to four decisions made in the right order: where, what structure, how to water, and what to plant.
Weekend 1: Site, beds, and water
- Walk your yard at noon and mark every spot that gets 6–8 hours of unobstructed sun. South-facing spots near a wall or fence often create a warmer microclimate that extends your season by two to three weeks.
- Build or source a few raised beds. Free pallets from hardware stores, salvaged lumber, or inexpensive cedar kits all work. A 4’x8’ bed costs a modest amount in materials. Fill with a 50/50 mix of topsoil and finished compost.
- Install a rain barrel on your nearest downspout. Connect a soaker hose loop to the spigot. Keep your main drip line short and limit the number of emitters to maintain even pressure.
Weekend 2: Planting, mulch, and pest barriers
- Plant quick-yield crops first: lettuce and radish germinate in 5–7 days and reach harvest in 30–45 days. Add basil, spinach, and green onions for variety.
- Mulch 2–3 inches deep with straw or wood chips to hold moisture and suppress weeds.
- Install simple pest barriers: row cover fabric over hoops keeps cabbage moths off brassicas; a ring of crushed eggshells or copper tape deters slugs.
Pro Tip: Plant a new short row of lettuce or radish every two weeks. That succession schedule keeps harvests coming continuously rather than delivering one big glut.
For late-season starts, a cold frame built from an old window and four boards of scrap lumber extends your growing window by 4–6 weeks on either end of the season. Pair it with companion planting: basil near tomatoes repels aphids, and marigolds along bed edges deter nematodes.
What does a realistic budget home food production setup actually cost?
Three budget profiles cover most homeowners, from a true zero-spend start to a durable long-term system.
| Item | Minimal ($20–$100) | Modest ($150–$300) | Durable ($300+) |
|---|---|---|---|
| Raised beds / containers | Free pallets or salvaged lumber | Cedar kit or galvanized metal beds | Timberlane cedar raised bed kit |
| Soil and compost | Bagged topsoil + DIY compost | Bulk delivery + compost bin | Bulk + worm bin + amendments |
| Water collection | 55 gal barrel ($30–$50) | 100 gal barrel + soaker hose | Dual-barrel system + drip kit |
| Basic tools | Borrowed or secondhand | New trowel, hoe, watering can | Full tool set + soil thermometer |
| Season extension | Scrap-lumber cold frame | Row cover + hoop kit | Polycarbonate greenhouse |
| Optional Gridwise upgrade | Pea Shoots microgreens seeds | Homie 28 hydroponic system | 10x32ft aluminum greenhouse |
Where DIY saves the most:
- Raised beds from pallets or salvaged 2x6 lumber cost a fraction of retail kits
- Compost bins built from wooden pallets are free and divert roughly 30% of household organic waste into free soil amendment
- Rain barrels pay back their $30–$50 cost quickly: rainwater harvesting can cut irrigation-related water bills by up to 50%
When buying is worth it:
- A polycarbonate greenhouse panel system outlasts cheap PVC kits by years. Budget greenhouse frames using thin PVC or low-grade materials frequently fail in the first season; galvanized steel framing is the better long-term buy.
- Quality brass drip fittings cost slightly more upfront but reduce leaks and maintenance across multiple seasons.
Pro Tip: Check Facebook Marketplace, Craigslist free sections, and Habitat for Humanity ReStores for pallets, lumber, and barrels before spending anything. Many homesteaders build their first full setup for under $50 this way.
Where should you spend and where should you save?
Not every dollar in a home food setup returns equally. Ranked by return on modest spend:
- Sun and soil access first. No structure compensates for a shady spot or dead soil. Spend time, not money, getting this right.
- Water second. A rain barrel and soaker hose loop is the single highest-ROI purchase in the first season. Layering rainwater collection with composting compounds savings: water costs drop while soil fertility builds for free.
- Compost third. A $0 pallet bin producing finished compost cuts fertilizer costs and improves yields more reliably than any single purchased amendment. Container gardening setups benefit especially from regular compost top-dressing.
- Seeds and varieties fourth. Heirloom and open-pollinated seeds cost the same as hybrids but let you save seed year after year. High-yield, low-input crops like kale, Swiss chard, and pole beans return far more calories per square foot than ornamental or specialty varieties.
- Durable shelter last, but don’t skip it. Once your outdoor beds are producing, a small greenhouse or cold frame is where a modest investment pays off over years, not months.
Save on: building materials (salvage first), seed starting trays (repurpose yogurt containers), and soil amendments (compost your own). Invest in: greenhouse framing quality, irrigation fittings, and a basic solar panel kit if you plan to run a pump or grow light off-grid.
What U.S. programs and resources help you grow food on a budget?
Federal and local support for beginning growers is more accessible than most homeowners realize.
- County extension offices — provide free or low-cost soil testing, planting calendars, and sometimes free seeds. Find yours at the USDA’s extension locator at nifa.usda.gov.
Composting and rainwater harvesting together create a compounding cost advantage: compost diverts about 30% of household organic waste into free fertilizer, while a rain barrel can reduce your irrigation water bill by up to 50%. Those two systems alone often pay for a full season’s seed budget.
How long does it take to see real results from a home food setup?
Year 1 milestones:
- Days 5–7: First seedlings emerge (lettuce, radish, pea shoots)
- Days 30–45: First salad harvest from fast crops
- Months 2–4: Tomatoes, beans, and squash producing; first compost batch ready
- Months 6–12: Meaningful reduction in produce purchases; system rhythms established
Year 2–3: Perennials like asparagus and fruit bushes begin producing. Seed-saving reduces annual costs. Soil quality improves noticeably.
Year 3–5: Reaching substantial self-sufficiency typically takes 3–5 years of consistent work, but meaningful food contribution starts in the first season.
Weekly maintenance (roughly 2–4 hours):
- Water deeply 2–3 times per week (rain barrel first)
- Harvest ripe produce and succession-plant open gaps
- Check for pests; remove by hand or apply row cover
- Add kitchen scraps and yard waste to compost; turn weekly
[Timeline graphic: 0–60 days / 6–12 months / 3 years milestones — request from designer]
What DIY builds and Gridwise products give you the most for your money?
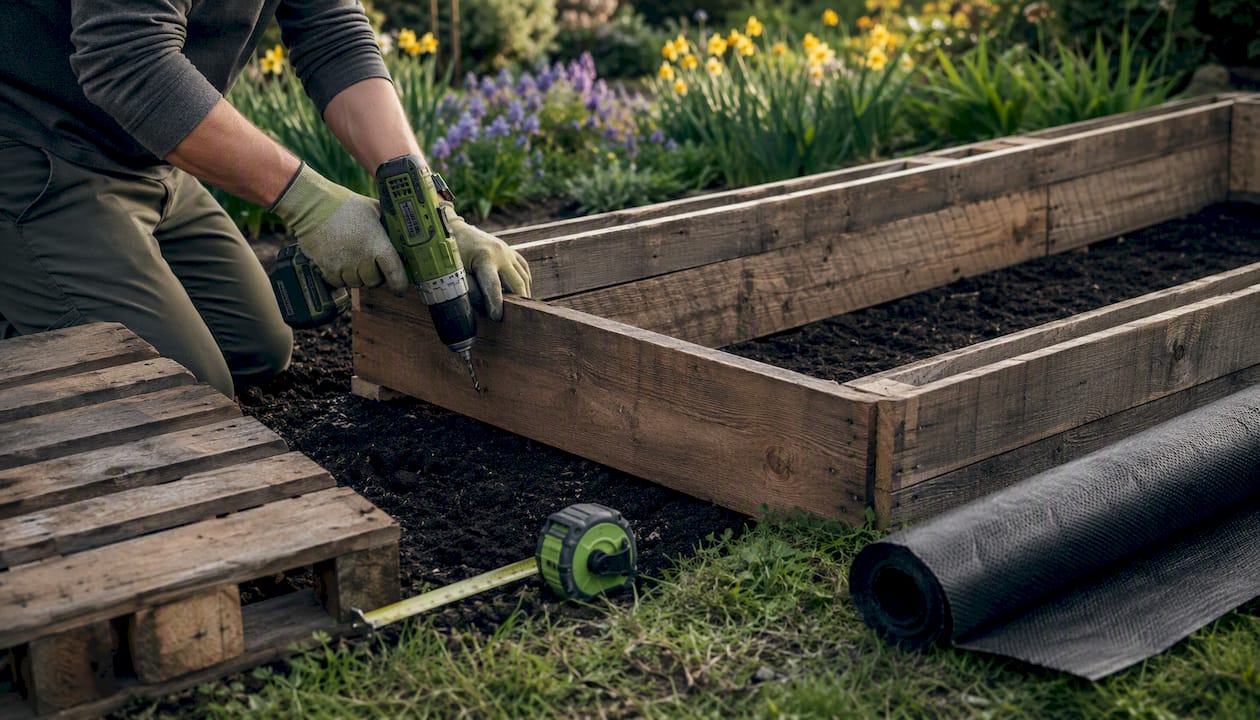
DIY project 1: Pallet raised beds ($20–$100)
Use heat-treated (HT-stamped) pallets only. Build a 4’x8’ frame, line with landscape fabric, and fill with a 50/50 topsoil/compost mix. Total cost with bagged soil: $40–$80.
DIY project 2: $150 aquaponics starter
A basic flood-and-drain system uses a grow bed, a fish tank, a small pump, and air stones. University of Maryland Extension recommends DIY assembly to avoid the high startup cost of turnkey commercial units. Key pitfall: avoid limestone or marble chips as grow media. They raise pH to around 8.5, causing nutrient lockout and fish stress. Use lava rock or washed river gravel instead. Budget roughly a modest amount for a complete DIY build versus much higher cost for a commercial equivalent. Allow a a cycling period of several weeks to establish nitrifying bacteria before heavy planting or stocking.
DIY project 3: One-day hoop house
Bend 10-foot sections of 1/2-inch PVC or EMT conduit over raised beds, secure with rebar stakes, and drape 6-mil poly film over the top. Cost: a modest amount per bed. Extends the growing season at each end
Gridwise product options
Gridwiseliving 10x32ft Heavy-Duty Aluminum Polycarbonate Greenhouse: Roof vents and swing doors make year-round management practical. The aluminum frame and 4mm polycarbonate panels outlast PVC hoop houses by years. Best for families ready to invest in a permanent season-extension structure.
Chef’s Organic Set Hydroponic Bundle: A turnkey nutrient system for indoor herb and greens production. Fits a kitchen counter or spare room. Produces harvests faster than soil beds and works year-round regardless of outdoor conditions.
Homie 28 Home Hydroponic Growing System: Compact, beginner-friendly, and designed for 28 plants at once. Good fit for apartments or homes with limited outdoor space.
Pea Shoots Field Microgreens Seeds: Fast-growing, nutrient-dense, and harvestable in 10–14 days. The lowest-barrier entry point for indoor food production.
100-Watt Portable Briefcase Solar Panel Kit: Powers a small aquaponics pump or grow light off-grid. Portable enough to reposition seasonally.
Pro Tip: Prefer galvanized steel framing for any permanent greenhouse structure. Thin PVC degrades in UV within one to two seasons; galvanized frames hold for a decade or more.
Key Takeaways
A budget home food production setup built on raised beds, rainwater collection, and composting can deliver a first harvest within 60 days and meaningful food savings within one full season.
| Point | Details |
|---|---|
| Start this weekend | Three raised beds, a rain barrel, and a compost bin are all you need to begin. |
| Compost and water savings | Composting diverts about 30% of household organic waste; rain barrels can reduce irrigation water bills by up to 50%. |
| Realistic timeline | First salad greens arrive within several weeks; substantial self-sufficiency takes several years. |
| DIY vs. buy | Build beds and barrels from salvaged materials; invest in galvanized greenhouse framing and quality irrigation fittings. |
| Gridwiseliving upgrades | The 10x32ft polycarbonate greenhouse, Homie 28 hydroponic system, and 100-Watt solar kit scale a starter setup into year-round production. |
The case for starting small and staying practical
The most common mistake new growers make is planning for the system they want in year five and buying for it in year one. A more expensive greenhouse sitting empty while you figure out basic soil management is not a food security investment. It is an expensive lesson in sequencing.
Start with the cheapest version of each component that actually works: a free pallet bed, a $35 rain barrel, kitchen scraps. Get one full season of real growing under your belt. You will learn more about your specific microclimate, your soil, and your family’s actual consumption patterns in those first 60 days than any amount of planning can teach you. Then, when you upgrade to a polycarbonate greenhouse or a hydroponic bundle, you are buying for a system you already understand.
Food security is not a product you purchase. It is a skill set you build, season by season. The gear helps. The practice is what makes it real.
Gridwiseliving products built for exactly this kind of start
Growing your own food at home is one of the highest-return investments a family can make in long-term resilience, and Gridwiseliving’s product line is built around that premise: durable, practical gear that earns its cost over years, not months.

For families just getting started, the Pea Shoots Microgreens Seeds deliver a first indoor harvest in under two weeks with zero outdoor space required. The Chef’s Organic Hydroponic Bundle takes that a step further with a complete nutrient system for year-round countertop production. For homeowners ready to invest in permanent season extension, the Gridwiseliving greenhouse collection includes the 10x32ft aluminum polycarbonate greenhouse with roof vents and swing doors, built to last through years of serious growing. Browse the full range and find the setup that fits where you are right now.
Useful sources and further reading
- How to Build a Low-Cost, Small-Scale Aquaponic System | University of Maryland Extension — Step-by-step DIY aquaponics guidance from a land-grant university, including media selection, cycling, and cost comparisons.
- How To Make a Cheap Drip Irrigation System That Works | Mother Earth News — Field-tested drip irrigation setup for small vegetable gardens, including pressure and layout guidance.
- Self-Sufficient Homestead Plan for Food | Mother Earth News — Year-round food planning framework for families growing and sourcing their own produce.
- USDA Beginning Farmer and Rancher Programs | USDA — Federal program page covering microloans, grants, and support resources for new growers.
- Find Your Local Extension Office | USDA NIFA — Directory for locating your county extension office for free soil testing, planting calendars, and workshops.
This article provides general educational information about home food production. Consult your local extension office, a qualified agronomist, or USDA program staff to confirm eligibility requirements and current program details before making financial decisions.