

Anchor Systems for Outdoor Buildings: Safety & Compliance
Anchor systems create the continuous load path that keeps outdoor buildings from lifting, sliding, or racking apart under wind and dynamic loads, and they protect anyone working on a roof or platform above ground. That single job, moving force safely from the structure into the earth or a footing, is the whole point of an anchor. Miss it and even a well-built shed or pergola can fail in the first real storm.
Every anchor system has four working parts you need to think about before you buy hardware: the anchorage (the structural point being attached to), the anchor device (the physical hardware), the connector (straps, cables, or carabiners linking device to user or structure), and the substrate or foundation receiving the load. Weakness in any one piece breaks the whole chain.
- Anchorage: the structural element (rafter, post, footing) that must itself be strong enough
- Anchor device: bolts, augers, ballast blocks, or D-rings rated for a specific load
- Connector: the strap, cable, or lanyard bridging device and structure or worker
- Substrate: soil, concrete, wood framing, or steel that ultimately absorbs the load
Pro Tip: Before buying anchor hardware, confirm the rated capacity matches your application. If the job involves fall arrest or high wind exposure, loop in a Qualified Person or licensed engineer rather than guessing.
Key Takeaways
Anchor systems function as engineered load paths, not simple tie-downs, and their strength rating only matters when the placement geometry, substrate, and connection details are all correct.
| Point | Details |
|---|---|
| Load path beats hardware | An anchor is only as strong as the framing and connections feeding force into it. |
| Know your compliance path | Choose the 5,000 lb prescriptive OSHA rule or a Qualified Person’s engineered 2x safety-factor design. |
| Match anchor type to substrate | Concrete gets embedded anchors, soil gets helical augers, steel gets beam clamps. |
| Inspect on a schedule, not by accident | Check fasteners, connections, and substrate condition after storms or major loads. |
| Gridwiseliving builds for anchoring | Our greenhouses and tiny homes are engineered with load paths that make proper anchoring straightforward. |
Table of Contents
- What Is the Role of Anchor Systems in Outdoor Buildings?
- What Types of Anchor Systems Work for Outdoor Structures?
- What Forces Do Outdoor Anchor Systems Actually Resist?
- What Do OSHA and ANSI Require for Anchor Strength?
- How Much Clearance Does a Fall Arrest Anchor Need?
- How Do You Choose Anchors by Substrate and Building Type?
- How Often Should Anchor Systems Be Inspected and Tested?
- What Installation Mistakes Cause Anchor Failures?
- What Do Engineers Say About Anchor Design Mistakes?
- Fall Arrest vs. Fall Restraint: Training Workers to Use Anchors Correctly
- How Much Do Anchor Systems Cost to Install?
- Get Anchoring Right the First Time With Gridwise Living
- Sources
What Is the Role of Anchor Systems in Outdoor Buildings?
Contractors and safety engineers use a specific vocabulary that homeowners often blur together, and that confusion causes real installation mistakes. Getting these three terms straight matters before you touch a drill.
An anchorage is the structure or component the anchor attaches to, a roof truss, a concrete slab, a steel beam. The anchor is the physical device fastened into or onto that anchorage, a bolt, auger, or D-ring plate. The connector is what bridges the anchor to whatever needs securing, whether that’s a lanyard on a worker’s harness or a tie-down strap on a shed wall.
The distinction matters more with fall protection. Fall arrest systems stop a worker already falling and must handle sudden, high shock loads. Fall restraint systems physically prevent a worker from reaching a fall hazard in the first place, so loads stay low and controlled. Positioning systems let a worker lean back and work hands free, holding steady loads rather than dynamic ones.
A shed tie-down anchor and a roof-work tie-off anchor look similar on a spec sheet, but they’re solving completely different problems: one resists steady wind uplift, the other has to catch a sudden falling body without breaking.
What Types of Anchor Systems Work for Outdoor Structures?
Anchor hardware splits broadly into penetrating and non-penetrating families, and picking between them usually comes down to substrate and permanence.
- Penetrating anchors: bolts or expansion anchors driven into concrete or wood, offering the highest strength for permanent installs
- Helical or auger ground anchors: screwed into soil, popular for greenhouses, shade sails, and seasonal structures
- Concrete-embedded anchors: cast directly into a poured footing during construction, the strongest option for new builds
- Ballasted or counterweight systems: non-penetrating, using weight instead of fasteners, common on rooftops or rental properties where drilling isn’t allowed
- Strap and tie-down kits: webbing or cable systems connecting a building frame to ground anchors, widely used on metal and resin sheds
- Beam clamps and SRL cradle anchors: clamp onto existing steel members for rooftop maintenance work without permanent modification
Roof anchors alone come in several configurations, including ridge anchors, truss anchors, and post anchors, and the right choice depends on the work being done and how much lateral movement the worker or structure needs, according to FallTech’s anchor guide. Permanent buildings like tiny homes generally call for concrete-embedded or bolted anchors, while seasonal or portable structures lean on helical anchors or ballast.
Pro Tip: Match anchor type to how often the structure moves or gets relocated. A helical anchor you can back out of the ground in an afternoon is the wrong choice for a permanent addition, and a poured concrete footing is overkill for a shade sail you take down every winter.
What Forces Do Outdoor Anchor Systems Actually Resist?
Three force types drive nearly every anchor decision: uplift, lateral racking, and dynamic arrest.
Uplift happens when wind moving over and around a roof creates suction that tries to lift the structure off its base, the same principle that generates lift on an airplane wing. Lateral racking is sideways force, from wind pushing against a wall or from seismic movement, that tries to shear a structure diagonally. Dynamic arrest is different in kind: it’s the sudden shock load generated when a falling worker’s harness snaps taut, and it can spike far higher than any static load the same connection sees during normal use.
- Uplift example: a pergola roof pulling against its posts in gusting wind
- Lateral racking example: a tall storage shed wall flexing under sustained side wind
- Dynamic arrest example: a worker’s fall generating a sudden shock load on a roof anchor
Geometry decides how dangerous these forces become. An overhead anchor point keeps free-fall distance short and limits pendulum, or swing-fall, motion. A side-mounted anchor lets a worker swing in an arc during a fall, and that lateral swing is what causes injuries against walls, equipment, or roof edges rather than the fall itself.
What Do OSHA and ANSI Require for Anchor Strength?
Federal rules give installers two compliant paths, not one, and understanding both helps you judge whether a contractor’s anchor setup actually meets code.
Under OSHA’s prescriptive standard, personal fall arrest anchorages must support at least 5,000 pounds per attached worker. The alternative path skips that fixed number entirely: a Qualified Person can design and use the anchorage under a safety factor of at least two, meaning it holds at least twice the maximum expected load. Positioning device anchorages carry a separate, lower threshold, at least 3,000 pounds or twice the potential impact load, whichever is greater, according to WCSafety’s breakdown of fall protection anchor requirements.
- A minimum strength per worker under the prescriptive OSHA path
- 2x safety factor minimum under the engineered/Qualified Person path
- A minimum strength requirement for positioning device anchorages
- Fall-arrest anchors must be independent of any anchorage used to support or suspend platforms
An anchor rated for platform support cannot double as a fall arrest anchor. OSHA treats these as separate systems precisely because a platform failure and a fall event can happen simultaneously.
The ANSI Z359 family of standards fills in the consensus detail OSHA’s rules leave open, covering everything from connector design to inspection protocols. Local building codes add another layer entirely, particularly for wind design on permanent outdoor structures, so checking both before installation saves headaches later.
How Much Clearance Does a Fall Arrest Anchor Need?
Strength ratings only solve half the problem. Placement geometry determines whether a correctly rated anchor actually keeps a worker safe.
- Pick your compliance path first: 5,000 lb per worker under the prescriptive rule, or an engineered design carrying at least a 2x safety factor, sized by a Qualified Person.
- Mount overhead whenever possible: an anchor above the dorsal D-ring shortens free-fall distance and reduces swing-fall arc.
- Keep systems independent: never rely on a platform-support anchor to also serve as the fall-arrest anchor.
- Calculate total fall clearance: add free fall distance (ideally 6 feet or less), deceleration distance, and a safety margin before deciding where a worker can safely tie off.
Engineered fall arrest systems are also designed against a hard ceiling: arresting force on a falling body generally cannot exceed 1,800 pounds-force, a limit that shapes how shock-absorbing lanyards and engineered anchors get sized. Anchor height isn’t a minor detail here. Every foot lower an anchor sits above a worker’s feet eats directly into available clearance below.
How Do You Choose Anchors by Substrate and Building Type?
Substrate dictates anchor family more than any other single factor, and mismatching the two is one of the most common installation errors.
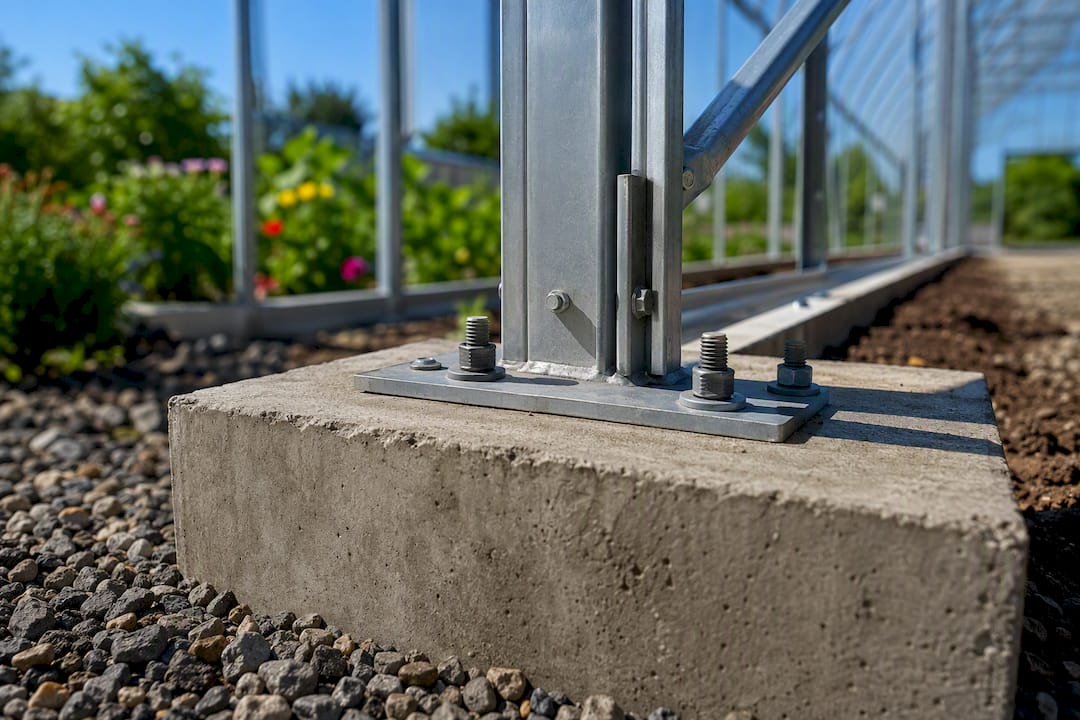
- Concrete and masonry: wedge or embedded anchors driven or cast into cured concrete, ideal for permanent slabs and footings
- Wood framing: through-bolts into solid framing members, or engineered post bases rather than surface screws alone
- Soil: helical or auger anchors sized to soil class, common for greenhouses and shade sails on unpaved ground
- Steel: beam clamps or bolted connections, frequently used for rooftop maintenance anchors on metal buildings
Application changes the calculation further. Light framed sheds and greenhouses generally need an uninterrupted uplift path running from roof to footing, since wind suction on a large roof surface is often the dominant failure mode rather than sliding. BillyOh’s guidance on anchoring metal sheds notes that solutions range from concrete footings and expansion bolts to ground-screw augers and ballast, depending on soil and how permanent the installation needs to be. Shade sails and tensile fabric structures need correctly angled augers or engineered footings, since off-axis loading on fabric tension can pull an improperly angled anchor right out of the ground. Tiny homes generally need fully engineered tie-down and foundation systems, closer to what a manufactured home requires than a garden shed.
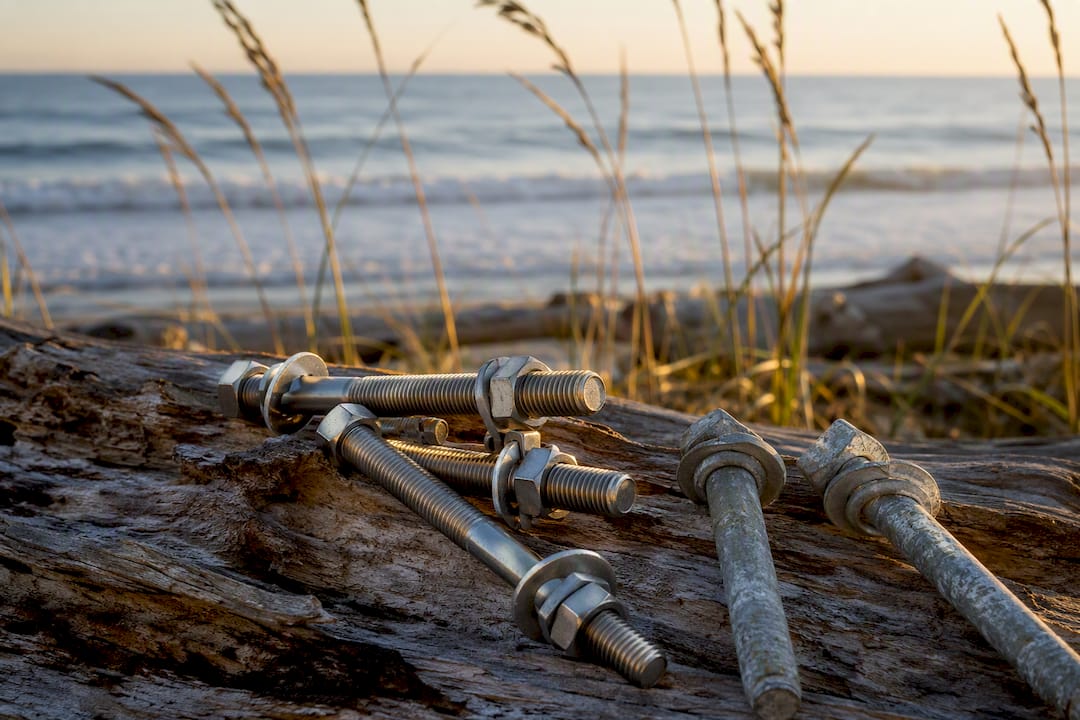
Corrosion resistance deserves its own line item if you’re within roughly five miles of a coastline. Standard galvanized hardware can fail prematurely from salt-air exposure, and T316 stainless steel fasteners hold up substantially longer in that environment.
Pro Tip: If you’re anchoring a large structure like a heavy-duty greenhouse, don’t anchor the frame alone. Confirm the footing itself is sized for the uplift load the roof surface generates, not just the load the frame connection can handle.
How Often Should Anchor Systems Be Inspected and Tested?
Anchors degrade quietly. Corrosion, loosening, and hairline substrate cracking rarely announce themselves until load reveals the weakness, so a routine inspection schedule matters more than a one-time installation check.
- Check fasteners for visible corrosion, backing-out, or stripped threads.
- Look for movement or play at every connection point.
- Inspect the substrate itself for cracking, spalling, or softening around embedded anchors.
- Verify torque on bolted connections against manufacturer specification.
- Re-test load capacity after major storms, structural modifications, or any visible impact.
- A Qualified Person, licensed PE, or manufacturer-authorized tester should handle certification and load testing.
- Keep a simple log recording installation date, test results, certified load values, and the next scheduled inspection.
- Store that log with the structure’s paperwork or fall-protection program documentation, not in a drawer nobody checks.
What Installation Mistakes Cause Anchor Failures?
Most anchor failures trace back to a handful of repeat mistakes, not exotic engineering problems.
- Using correctly rated hardware in the wrong geometry, so the rating never gets tested the way it was designed for
- Tying a fall-arrest lanyard to an anchor that’s also supporting a platform, violating the independence requirement outright
- Underestimating uplift or racking vectors on wide roof surfaces, especially on greenhouses and pergolas
- Skipping corrosion-resistant hardware in coastal zones, then wondering why fasteners fail years early
- Loose or corroded fasteners, insufficient embedment depth, and shifting under a test load are the clearest red flags during inspection.
Pro Tip: Trace the load path with your finger, literally, from roof or post down through every connection to the anchor itself. If any link in that chain is weaker than the anchor rating, the anchor’s strength number is meaningless. Multipoint redundancy beats a single strong anchor whenever loads can act from more than one direction.
What Do Engineers Say About Anchor Design Mistakes?
Homeowners routinely treat anchors as simple tie-downs rather than what they actually are: one link in an engineered continuous load path running from roof through framing into the ground, according to PNNL’s Building America Solution Center. That mental shortcut causes real failures, because an anchor device is only as strong as the connection details feeding force into it.
Practitioners who design rigging and rescue anchor systems for a living emphasize geometry and force distribution over raw rated capacity, treating anchors as engineered control systems rather than fixed points. A correctly rated anchor mounted in the wrong spot can still allow dangerous swing or shock loading.
Misaligned anchor geometry, not undersized hardware, is behind a large share of real-world anchor failures.
Certain conditions should trigger a call to a licensed PE rather than a DIY install: any roof work involving fall arrest, coastal high-wind sites, structures facing multi-directional loads, or any anchor that must remain independent of platform-support hardware.
Fall Arrest vs. Fall Restraint: Training Workers to Use Anchors Correctly
A perfectly rated anchor system still fails if the person clipping into it doesn’t understand what kind of protection they’re actually using. That gap between hardware and habit causes more incidents than bad equipment does.
Fall restraint keeps a worker physically tethered so they can never reach an unprotected edge in the first place. It’s the safer category by design, since it prevents a fall entirely rather than managing one after it starts. Fall arrest assumes a fall will happen and focuses on stopping it safely, which means the anchor, connector, and harness all need to handle a sudden shock load rather than steady tension.
Workers need clear, repeatable protocols, not general safety talk:
- Inspect the anchor and connector visually before every use, not just at scheduled intervals.
- Confirm the anchor is rated for the specific system in use, fall arrest anchors and positioning anchors are not interchangeable.
- Understand the difference between restraint length (calculated to prevent reaching an edge) and arrest system clearance (calculated to stop a fall safely).
- Never anchor to unrated points, guardrails, HVAC units, or vent stacks are common but unacceptable substitutes.
- Report any sign of wear, corrosion, or looseness immediately rather than completing “one more job” first.
Manufacturers like 3M DBI-SALA and FallTech both publish training materials alongside their hardware, and pairing product documentation with hands-on training closes the gap between having a compliant anchor and actually using it safely. A five-minute orientation on the difference between restraint and arrest, done once per crew member, prevents the most common on-site misuse: clipping a fall-arrest lanyard to a point that was only ever rated for restraint.
How Much Do Anchor Systems Cost to Install?
Anchor pricing spans a wide range, and the substrate, not the hardware itself, usually drives the final number.
Simple strap and tie-down kits for a small shed run cheapest, often well under $200 for a complete kit, since they require no excavation or concrete work. Helical or auger ground anchors sit in the middle range once you add installation labor, particularly if a powered driver is needed for dense or rocky soil. Concrete-embedded anchors and engineered footings cost the most upfront because they require excavation, forming, and cure time, but they also deliver the highest strength and the longest service life for permanent structures.
Several factors swing the total cost beyond the anchor hardware itself:
- Engineering fees: a stamped design from a licensed PE adds cost but is often required for high-wind or coastal sites
- Substrate prep: excavation, concrete forming, or soil testing before a helical anchor install
- Hardware grade: T316 stainless costs more than standard galvanized but avoids premature coastal corrosion
- Access and labor: rooftop anchor installations typically cost more than ground-level work due to access equipment and safety requirements
Hurricane-rated structures illustrate the ceiling on this range well. Meeting high-wind code for a pergola or similar structure requires an engineered continuous load path and PE-stamped drawings, and that engineering cost gets built into the total project rather than the anchors alone. Budgeting for anchors without budgeting for the substrate work around them is the single most common cost surprise homeowners run into.
Publisher perspective: Gridwise’s practical view on safe anchors
Our stance is simple: an anchor is only as good as the load path behind it, and code compliance isn’t optional paperwork, it’s what keeps a structure standing and a worker safe. We design greenhouses and tiny homes with that continuous load path in mind from the footing up, not as an afterthought bolted on later.
Get Anchoring Right the First Time With Gridwise Living
Sourcing the right anchor hardware is only half the job. The structure it’s attached to needs a load path built for that hardware from the ground up, and that’s where a lot of DIY shed and greenhouse builds run into trouble later.

Gridwiseliving designs its heavy-duty greenhouses and tiny homes with framing and footing details that make proper anchoring straightforward instead of an afterthought, so you’re not retrofitting a load path onto a structure that was never designed for one. If you’re working on a smaller project, our furniture anchor safety strap kit shows the same engineered-connection thinking applied at a much smaller scale. Browse our greenhouse lineup, check the foundation specs listed on each product page, and reach out for guidance if your site conditions, coastal exposure, high wind zone, uneven soil, call for anchoring beyond the standard kit.
Sources
- OSHA
- Porches, carports, and deck attachments — BASC (PNNL)
- Anchors and anchor systems in rope rescue — Rigging Lab Academy
- Fall protection anchor requirements — WCSafety